Questions? Call Toll Free at 1-800-737-2112
Copyright © 2009 MAT Engine Technologies, LLC
13
Drive Safety Control Levers
G
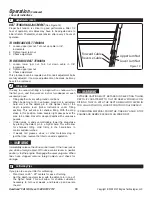
FORWARD LEVER
(See Figure 9)
Engages wheels and tines into forward. Pushing down the
drive safety control lever (
FORWARD
) toward the handlebar
engages the wheels and tines. Releasing the lever stops the
wheels and tines and brings the tiller to a complete stop.
Operation
(Continued)
• Save all instructions
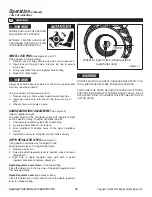
CAUTION
DO NOT OPERATE bOTH ˝FORWARD˝ AND ˝REVERSE˝ DRIVE
SAFETY CONTROL LEVERS AT THE SAME TIME.
THIS INFORMATION IS PROVIDED HERE ONLY TO INTRO
-
DUCE THE CONTROLS. DO NOT START THE ENGINE AT THIS
TIME. STARTING AND OPERATING INSTRUCTIONS ARE GIVEN
ON PAGE 11. PLEASE READ THIS SECTION AND ALL OPERAT
-
ING AND SAFETY INSTRUCTIONS BEFORE STARTING YOUR
TILLER.
• AS A SAFETY PRECAUTION, THE DRIVE SAFETY
CONTROL LEVERS WILL NOT LOCk IN THE FORWARD
OR REVERSE POSITION.
WARNING
DO NOT FIX THE FORWARD OR REVERSE DRIVE LEVERS IN
DRIVE POSITION bY ANY OTHER MEANS THAN MANUALLY
USING YOUR RIGHT HAND. DO NOT TIE OR OTHERWISE SE
-
CURE THE LEVERS IN DRIVE POSITION.
• TO STOP THE WHEELS AND TINES AT ANY TIME RELEASE
THE DRIVE SAFETY CONTROL LEVERS OR RELEASE THE
REVERSE HANDLE.
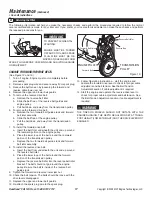
REVERSE LEVER
(See Figure 10)
Engages wheels and tines into reverse.
Pulling the drive safety control lever (
REVERSE
) toward the
handlebar reverses tiller.
Releasing the lever stops the wheels and tines.
Forward Lever
Engaged
Figure 9
Reverse Lever
Engaged
Reverse Lever
Figure 10


