background image

2

Thank you

Thanks for purchasing this product. The product will help you exercise your muscles in

the correct way and to improve your fitness – and all this in a familiar environment.

Implied Warranty

The importer of this machine assures that this device was manufactured from high quality

materials.

Prerequisite for the implied warranty is the proper setup in accordance with the operating

instructions. Improper use and /or incorrect transportation can render the warranty void.

The implied warranty is for 1 years, beginning with the date of purchase. If the device you

acquired is defective, please contact our Customer Service (Inset page) within the

guarantee period of 12 months as of purchase date. The warranty applies to the following

parts (as far as included in the scope of delivery): Frame, cable, electronic devices, foam,

wheels. The guarantee does not cover:

1.Damage effected by outer force

2. Intervention by unauthorized parties

3. Incorrect handling of the product

4. Non-compliance of the operating instructions

Wear parts and expendable items are also not covered(such as running belt) .

The device is only intended for private use. The warranty does not apply to professional

usage.

Spare parts can be ordered from Customer Services (Inset page) as needed.

Please make sure you have the following information on hand when ordering spare parts.

1. Operating instructions

2. Model number (located on the cover sheet of these instructions)

3. Description of attachments

4. Attachment number

5. Proof of purchase with purchase date

Please do not send the device to our firm without being requested to do so by our Service

team. The costs of unsolicited shipments will be borne by the sender.

Содержание Bodymax T200ti

Страница 1: ...A ...

Страница 2: ...arts as far as included in the scope of delivery Frame cable electronic devices foam wheels The guarantee does not cover 1 Damage effected by outer force 2 Intervention by unauthorized parties 3 Incorrect handling of the product 4 Non compliance of the operating instructions Wear parts and expendable items are also not covered such as running belt The device is only intended for private use The wa...

Страница 3: ... exercising too intensively with the device At the first signs of dizziness lay down on the ground until you feel better 5 Ensure there are no children nearby when you are exercising on the device In addition the device should be stowed in a place that children or house pets cannot reach 6 Ensure that only one person at a time uses the fitness device 7 After the sports device has been set up accor...

Страница 4: ...can cause peak voltages over voltage or interference voltage To limit the danger of damage to the treadmill it should be equipped with an over voltage protective device not included Keep power cord away from the carrying roller Do not leave the power cord below the striding belt Do not use the treadmill with a damaged or worn out power cord Unplug before cleaning or engaging in maintenance work Ma...

Страница 5: ...jury when using tools and carrying out technical activities Please proceed with care when assembling the device Make sure you have a hazard free working environment and do not for example leave tools lying around Deposit the packaging material in such a way that it does not pose a danger Foil plastic bags are a potential risk of suffocation for children Take your time when viewing the drawings and...

Страница 6: ... be doing Read and understand all instructions thoroughly before assembling the treadmill UNPACK AND VERIFY THE CONTENTS OF THE BOX Lift up and remove the box that surrounds the Treadmill Check the following items are present If any of the parts are missing contact with the dealer Silicon bottler Manual Safety key Hardware pack Upright post Console Hardware bag Display Lateral cover left right ...

Страница 7: ...in Part Motor cover Console Display Handle bar left Handle bar right Running belt Running board Side rail Lateral cover left right Front roller Rear roller Incline motor Motor Motor belt Rear cover Cylinder ...

Страница 8: ...LD 1400 920 1720mm RUNNING BOARD 1450 510mm SPEED 1 0 20Km h WE RESERVES THE RIGHT TO AMEND THE PRODUCT WITHOUT PRIOR NOTICE Motor cover Running belt Touch button Handle pluse PU handle bar console Upright post Lateral cover Platform frame Base frame Rear cover Side rail ...

Страница 9: ...f the supply cord is damaged it must be replaced by the manufacturer its service agent or similarly qualified persons in order to avoid a hazard This appliance is not intended for use by persons including children with reduced physical sensory or mental capabi If the supply cord is damaged it must be replaced by the manufacturer its service Children should be supervised to ensure that they do not ...

Страница 10: ...t on the main frame with 4pcs M8 40 Allen socket full thread screws and 4 pcs M8 15 Allen C K S full thread screw Step 2 Connect the console signal wire with the upright post signal wire put the console on the upright post using 4pcs screw M8 15 to fix the monitor on the upright post left and right Please be caution do not clamp the signal wire ASSEMBLY INSTRUCTIONS ...

Страница 11: ...splay signal wire then fix it with 4pcs M8 15 Allen socket full thread screw Step 4 Insert the lateral cover along the upright post then use 6PCS ST4 16 Philips C K S self tapping screw to lock it Tighten up all the screws for the whole treadmill Finished ...

Страница 12: ...r furniture Allow a safety area of 2m X 1m behind the treadmill so that you can easily get on and off the treadmill without getting trapped during an emergency Occasionally after extended use you will find a fine black dust below your treadmill This is normal wear and DOES NOT mean there is anything wrong with your treadmill This dust can be easily removed with a vacuum cleaner If you wish to prev...

Страница 13: ...ly to minimize injury For your safety never use the treadmill without securing the safety key clipped to your clothing Pull on the safety key clip to make turn it will not come off your clothing GETTING ON AND OFF THE TREADMILL Handle with care when getting on or off the treadmill Try to use the handlebars while getting on or off While you are preparing to use the treadmill do not stand on the run...

Страница 14: ...o push top of the running deck forward 2 Press one foot on the middle section of the cylinder to dis engage the locking mechanism 3 Allow deck to begin slowly dropping before releasing hands MOVING THE TREADMILL The treadmill can be moved around in house safely in its fold up position by using the transport wheels Firmly hold onto handle bars with both hands pull the treadmill towards you then por...

Страница 15: ...ation and management of user 3 How to use your treadmill Data window Speed adjustment Inclination adjustment 4 How to play media Play music Play movie Watch the online TV Surf the Internet Streetscape 5 High level mode Aerobic exercise Climbing mode Time Countdown User defined 6 Software upgrade and recover Remote automatic upgrade function Software support offline upgrade 7 Problem shooting Error...

Страница 16: ...nterface Speed Speed Speed Speed control control control control Click on the speed of addition and subtraction Incline Incline Incline Incline control control control control Click on the inclination of addition and subtraction Music Music Music Music Enter into adjust music mode Online Online Online Online music music music music Click in and listen to online music Previous Previous Previous Pre...

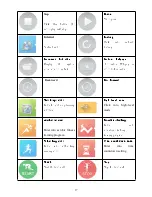
Страница 17: ...mode mode mode mode Enter the real map training selection High level High level High level High level mode mode mode mode Click into high level mode Aerobic Aerobic Aerobic Aerobic exercise exercise exercise exercise Enter into aerobic fitness training program M M M Mountain climbing ountain climbing ountain climbing ountain climbing Enter into mountain climbing training program Self setting Self ...

Страница 18: ...t let the child or pet get close After running please shut off the power supply in time Energy saving is a virtue Add lubricating oil onto the running deck at least once a month that can extend the lifespan of the treadmill Press button instruction FAN press once turn on or turn off the fan QUICK INCLINE quick setting the inclination of the treadmill INCLINE set the inclination of the treadmill pr...

Страница 19: ...h as a list or Webpage will slide according to the direction of finger movement Zoom with two finger in some programs support with two fingers Double click click the screen twice When you viewing the picture double click on the picture to enlarge view double click again can reduce If you want to open the application please click the icon on the screen If you want to switch to the other main screen...

Страница 20: ...enter into setting In the set center you can set up new user account connect WIFI adjust the brightness Language choice The product support Chinese English language vision Setting method Click the Chinese English setting button to choose the appropriate language ...

Страница 21: ...d to a wireless network the treadmill can be normal operation but you can not watch online TV movies and listen to music street view maps and other functions that needed network connection Click on back you can return to the Android interface The diagram of setting up a wireless network You can also adjust the screen brightness through sliding brightness control The picture of brightness adjustmen...

Страница 22: ...te of birth height weight sex and other personal information health archives Treadmill supports up to 3 users but do not support the delete established user The treadmill also support cloud account login to enjoy personal movement data The chart of established user s update maintenance The picture of established user update and maintenance ...

Страница 23: ...xercised also display the current running speed and inclination Speed adjustment Click SPEED button to adjust speed Press once the speed plus 0 1KM H Press once the speed minus 0 1KM H Inclination adjustment Click INCLINE button to adjust inclination Press once the inclination plus 1 Press once the inclination minus 0 1 ...

Страница 24: ...d the specified audio and video file you want to play If you want to watch the movie online or surf the Internet please make sure you are in a wireless network environment and treadmill has connected to your wireless network Play music Enter the music interface control button launch music control interface click local video file icon can load the local audio Click the volume icon can adjust the vo...

Страница 25: ...sion control interface You will find that we provide fantastic TV channel resources You select the channel you prefer then you can watch online synchronous television channels Click the volume icon you can adjust the volume Click on the up and down button to switch channels The picture of playing TV ...

Страница 26: ...e set some popular website in the bookmarks make you check these website quickly and easily You can also input the website you usually go through and save to self setting files Streetscape mode In this mode we take you tour the world famous sights and classical city map while running ...

Страница 27: ...mode countdown mode In the custom mode you can freely adjust the speed and incline in the process of exercising In the aerobic exercise mode and climbing mode we have set many detailed training plan for users scientifically to meet the different needs of people Users can choose according to their own situation ...

Страница 28: ...down starts When the treadmill reach the setting time distance or calorie consumption the treadmill will stop automatically User defined mode can add the exercise time speed incline according to the users need You can select a data to adjust the value click the Every time you click once plus 1 click once minus 1 save the data ...

Страница 29: ...ll the notice are in Chinese you just need to click next and set up to complete the upgrade B Software support offline upgrade you can go to our site to download the offline upgrade file copy to u disk Then connect your U disk to treadmill wait for about 20s the system will pop up automatically upgrade prompt box then after you point installation the system will automatically upgrade 7 Online help...

Страница 30: ...sk for the after sale service Key defected Key is damaged Change key Key can not work Change key board and wire Change pcb board Change computer E1 A Connect wire loose or defected Well connect the wire or Change the wire Problem Possible cause Corrective action Treadmill does not work a no connect to power supply Plug into socket b safety switch not insert Insert safety switch in monitor c cut of...

Страница 31: ... sensor defected Change the speed sensor C The connect wire between the speed sensor and the controller did not connect well Well connect the wire D controller defected Change the controller E5 Controller defected Change the controller Motor defected Change the motor E7 Computer can not test the safety key signal Check the safety key and well put No pulse Handle pulse wire did not connect well or ...

Страница 32: ...ow you can measure your heart rate effectively Determine your personal exercise frequency range to achieve optimal training success Take into account both your age and your level of fitness The table on page 16 will give you a reference point for determining the optimal exercise pulse Make sure you breathe regularly and calmly when exercising Take care to drink enough while exercising This ensures...

Страница 33: ... and cooling down Please pay attention to the following points NECK EXERCISES Tilt your head to the right and feel the tension in your neck Slowly drop your head down to your chest in a semi circle and then turn your head to the left You will feel a comfortable tension in your neck again You can repeat this exercise alternately several times 1 EXERCISES FOR THE SHOULDER AREA Lift the left and righ...

Страница 34: ...Maintain this position for 30 seconds if possible and repeat this exercise 2 times for each leg 4 INSIDE UPPER THIGH Sit on the floor and place your feet in such a way that your knees are facing outwards Pull your feet as close as possible to your groin Now press your knees carefully downwards Maintain this position for 30 40 seconds if possible 5 TOUCH TOES Bend your trunk slowly forwards and try...

Страница 35: ...foot on your right upper thigh Now try to reach your right foot with your right arm Maintain this position for 30 40 seconds if possible 7 EXERCISES FOR THE CALVES ACHILLES TENDON Place both hands on the wall and support your full body weight Then move your left leg backwards and alternate it with your right leg This stretches the back of the leg Maintain this position for 30 40 seconds if possibl...

Страница 36: ......

Страница 37: ...er Φ8 15 17 Lock washer Φ5 1 18 Flat washer Φ10 5 19 Hex self locking nut M8 9 20 Hex self locking nut M10 3 21 Hex full thread screw M8 40 1 22 Hex full thread screw M8 45 1 23 Allen socket full thread screwM8 15 4 24 Allen socket full thread screwM8 35 2 25 Allen socket full thread screwM8 40 4 26 Allen socket full thread screwM8 75 3 27 Allen C K S half thread screw M10 35 20 1 28 Allen C K S h...

Страница 38: ...s pan head self tapping screw ST3 10 12 43 Philips counter sunk self tapping screw ST3 10 2 44 Philips pan head self tapping screw ST3 25 4 45 Philips pan head self tapping screw ST4 15 25 46 Washer Φ22 6 Φ12 8 T2 0 2 47 Powder metallurgy set 2 48 Console 1 49 Safety key 1 50 Front roller 1 51 rear roller 1 52 Cylinder 2 53 PU handle bar right 1 54 PU handle bar left 1 55 Magnetic ring 2 56 Spring...

Страница 39: ...over right 1 78 Rear cover 1 79 Accessory for rear cover left 1 80 Accessory for rear cover right 1 81 Side rail 2 82 Lateral cover right 1 83 Lateral cover left 1 84 Slider 2 85 Side rail guider 6 86 Round tube plugΦ35 T1 2 1 87 Round tube plugΦ32 55 1 88 Motor belt 1 89 Square cushion 4 90 Column cushion 6 91 Taper cushion 2 92 Wheel 6 93 Wire protector 1 94 Cable guider 2 95 Filter 1 96 Inducta...

Страница 40: ...using lower 1 48 3 PCB of console 1 48 3 1 Plastic central parts of console 1 48 3 2 Net cover left 1 1 48 3 3 Net cover roght 2 1 48 3 4 IPAD pallet 1 48 3 5 Display PCB board 1 48 3 6 MP3 socket 1 48 3 7 Fan 1 48 3 8 Screen overlay 1 48 3 9 Touch button soft key 1 48 3 10 Safety key iron 1 48 3 11 Safety key thimble 1 48 3 12 Switch 1 48 3 13 Safety key yellow overlay 1 48 3 14 Touch button PCB ...

Страница 41: ...e sure to turn both bolts the same number of turns so the rear roller will stay square relative to the frame 3 Repeat STEP 1 and STEP 2 until the slipping is eliminated 4 Be careful not to tighten the running belt tension too much as you can create Excessive pressure on the front and rear roller bearings An excessively tightened running belt may damage the roller bearings that would result in bear...

Страница 42: ...steps if it is necessary If the above procedure is unsuccessful in resolving the off centre you may need to increase the belt tension LUBRICATION The treadmill is factory lubricated However it is recommended to check the lubrication of the treadmill regularly to ensure an optimal operation of the treadmill It is usually not necessary to lubricate the treadmill in the first year or the first 500 ho...

Страница 43: ... long product life Warning The treadmill must be turned off to avoid electrical shocks The power cord must be pulled out of the socket before starting the cleaning or maintenance After each training Wipe the console and other surfaces with a clean soft and damp cloth to remove sweat residues Caution Do not use any abrasives or solvents To avoid damage to the computer keep any liquids away Do not e...

Страница 44: ... training could be harmful to your health Carefully read through the following general fitness tips and the exercise instructions If you have pain shortness of breath feel unwell or have other physical complaints break off the exercise immediately Consult a doctor immediately if you have prolonged pain This fitness device is not suitable for professional or medical use nor may it be used for thera...

Страница 45: ...fective motor electronic component or defective part and is the sole remedy of the warranty Labor for repair or replacement of defective parts is not covered by this warranty The warranty does not cover normal wear and tear improper assembly or maintenance or installation of parts or accessories not originally intended or compatible with the treadmill sold The warranty does not apply to damage or ...

Отзывы: