


8706012
3.9 Gallon Backpack Sprayer
V4.0
6
For technical questions call 1-800-665-8685
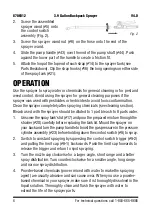
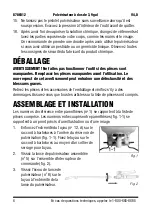
2. Screw the assembled
sprayer wand (#5) onto
the control switch
assembly (Fig. 2).
3. Screw the sprayer wand nut (#6) on the hose onto the end of the
sprayer wand.
4. Slide the pump handle (#43) over the end of the pump shaft (#44). Push
against the lower part of the handle to create a friction fit.
5. Attach the loop at the top end of each strap (#14) to the sprayer tank (see
Parts Breakdown). Clip the strap hooks (#16) the long openings on either side
of the spray tank (#21).
OPERATION
Use the sprayer to spray water or chemicals for general cleaning or for pest and
weed control. Avoid using the sprayer for general cleaning purposes if the
sprayer was used with pesticides or herbicides to avoid toxic contamination.
Clean the sprayer completely after spraying chemicals (see cleaning section).
Bleach used with the sprayer should be diluted to 1 part bleach to 9 parts water.
1. Unscrew the spray tank’s lid (#17) and pour the prepared mixture through the
strainer (#20) carefully before replacing the tank lid. Mount the sprayer on
your back and turn the pump handle to boost the gas pressure in the pressure
cylinder assembly (#23) before holding down the control switch (#9) to spray.
2. Switch to constant spraying by squeezing the control switch trigger (#9-2)
and pulling the limit cap (#9-1) backwards. Push the limit cap forwards to
release the trigger and return to spot spraying.
3. Turn the nozzle cap clockwise for a larger angle, short range and a better
spray distribution. Turn counterclockwise for a smaller angle, long range
and narrow spray distribution.
4. Powder-based chemicals (power mixed with water to make the spraying
agent) are usually abrasive and can cause wear. When you use a powder-
based chemical in your sprayer, make sure it is thoroughly dissolved in the
liquid solution. Thoroughly clean and flush the sprayer with water to
extend the life of the sprayer parts.
Fig. 2


