Power Fist 8549024 Скачать руководство пользователя страница 5

Visit www.princessauto.com for more information 

5

8549024 

V 4.0

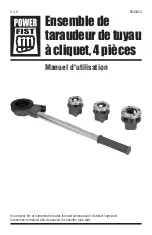
4 pc Ratcheting Pipe Threader Set

ASSEMBLE

1.  Determine the size of the pipe to be threaded.

2.  Pick the appropriate die to be used. Die sizes are stamped on the outside of each die.

3.  Insert the die into the Ratchet Holder. It is a force fitting, and once the die is in the 

Ratchet Holder, it may require light tapping with a wooden mallet to remove the die.

4.  Have an oil can available to be used during the threading operation.

5.  The pipe to be threaded must be properly secured during the threading operation.

6.  To reverse the threading direction, pull out the reversing knob, turn it 180 degrees 

until the arrow points in the opposite direction and drop it back into place.

OPERATION

CAUTION: Make sure the pipe end and threads of the die are sufficiently oiled at all times. 

Otherwise, die life will be shortened and the threads will be rough.
Now that the proper die is installed, you are ready to attach the 

Ratchet Holder to the pipe, and begin cutting threads.

1.  Place the rear of the die over the end of the pipe to 

be threaded. Verify that the inside diameter of the die 

matches the outside diameter of the pipe.

2.  Make sure that the pipe to be threaded is properly held 

in place.

3.  While applying pressure to the end of the pipe, begin 

rotating the Handle around the pipe to engage the die to 

the pipe end. Continue this operation until the desired 

thread length is achieved.

4.  To disengage the Ratchet Holder after threading is complete, follow steps discussed in 

step 6 of Assemble to reverse the direction, and then rotate the Connecting Rod until 

the die is disengaged from the pipe end.

5.  When sliding the pipe out of the Ratchet Holder, be careful not to damage newly 

cut threads.

MAINTENANCE

1.  Clean the Pipe Threading tool after each use. Clean dies after each use. Check for 

broken teeth or pipe material between teeth.

2.  When not in use, store all parts in the case, and store the case in a dry location.

Pipe

Die

Содержание 8549024

Страница 1: ...Owner s Manual V 4 0 8549024 Please read and understand all instructions before use Retain this manual for future reference 4 pc Ratcheting Pipe Threader Set ...

Страница 2: ......

Страница 3: ...ions relative to a particular application DO NOT use the machine until you have first contacted the distributor to determine if it can or should be performed on the product INTENDED USE The RATCHETING PIPE THREADER SET is designed for threading pipes and has three different threading dies ranging in size from 1 2 to 1 SAFETY GENERAL SAFETY RULES When using tool basic safety precautions should alwa...

Страница 4: ...fety goggles Wear a full face shield if you are producing metal filings or wood chips Wear an ANSI approved dust mask or respirator when working around metal wood and chemical dusts and mists 9 Do not overreach Keep proper footing and balance at all times Do not reach over or across running machines 10 Maintain tools with care Keep tools sharp and clean for better and safer performance Follow inst...

Страница 5: ...s will be rough Now that the proper die is installed you are ready to attach the Ratchet Holder to the pipe and begin cutting threads 1 Place the rear of the die over the end of the pipe to be threaded Verify that the inside diameter of the die matches the outside diameter of the pipe 2 Make sure that the pipe to be threaded is properly held in place 3 While applying pressure to the end of the pip...

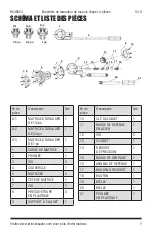
Страница 6: ... RETAINING RING 1 17 SPRING BOLT 1 18 KNOB 1 19 CONNECTING ROD 1 20 CONNECTING ROD 1 21 PLASTIC HANDLE 1 DIAGRAM AND PARTS LIST D 1 D 2 D 3 1 2 3 4 5 6 7 8 9 10 11 8 12 19 20 21 18 17 16 15 13 14 1 2 3 4 1 Part No Description Qty D 1 DIES THREADER 1 2 1 D 2 DIES THREADER 3 4 1 D 3 DIES THREADER 1 1 1 DIES FRAME 1 2 WORK HANDLE 1 3 SCREW 4 4 COVER 1 5 DIES 4 6 DIES HEAD 1 7 SCREW 3 8 PLASTIC GLAND ...

Страница 7: ...4 Manuel d utilisation Vous devez lire et comprendre toutes les instructions avant d utiliser l appareil Conservez ce manuel afin de pouvoir le consulter plus tard Ensemble de taraudeur de tuyau à cliquet 4 pièces ...

Страница 8: ......

Страница 9: ...elle pour laquelle il a été conçu Si vous avez des questions concernant une application particulière n utilisez PAS l appareil avant d avoir communiqué premièrement avec le distributeur afin de déterminer si vous pouvez ou devriez l utiliser sur le produit UTILISATION PRÉVUE L ENSEMBLE DE TARAUDEURS POUR TUYAUX À CLIQUET a été conçu pour fileter les tuyaux et présente trois matrices de filetage di...

Страница 10: ...le Gardez toujours les outils dans un endroit verrouillé et hors de la portée des enfants 5 Ne forcez pas l outil Il fonctionnera mieux et sera plus sécuritaire à la vitesse pour laquelle il a été conçu N utilisez pas d accessoires inappropriés pour tenter d accroître la capacité de l outil 6 Utilisez le bon outil pour effectuer le travail N utilisez pas un petit outil ou un petit accessoire pour ...

Страница 11: ...er la tâche prévue Vérifiez l alignement et le coincement des pièces mobiles les composants ou dispositifs de fixation brisés et toute autre situation pouvant perturber le bon fonctionnement Toute pièce endommagée doit être réparée correctement ou remplacée par un technicien qualifié 13 Protégez vous contre les chocs électriques Évitez que le corps entre en contact avec des surfaces mises à la ter...

Страница 12: ... prêt à fixer le support à cliquet au tuyau et à entreprendre de couper les filets 1 Placez l arrière de la matrice sur l extrémité du tuyau à fileter Vérifiez si le diamètre intérieur de la matrice correspond au diamètre extérieur du tuyau 2 Assurez vous que le tuyau à fileter est bien retenu en place 3 Tout en appliquant une pression sur l extrémité du tuyau commencez à tourner la poignée autour...

Страница 13: ...RICE À TARAUDER DE 1 po 1 1 CADRE DE MATRICE 1 2 POIGNÉE 1 3 VIS 4 4 COUVERCLE 1 5 MATRICES 4 6 TÊTE DE MATRICE 1 7 VIS 3 8 PRESSE ÉTOUPE EN PLASTIQUE 2 9 SUPPORT À CLIQUET 1 Visitez www princessauto com pour plus d informations 7 No de pièce Description Qté 10 CLÉ À CLIQUET 1 11 BAGUE DE RETENUE EN ACIER 1 12 VIS 3 13 CLIQUET 1 14 RESSORT DE PRESSION 1 15 BAGUE DE SERRAGE 1 16 ANNEAU DE RETENUE 1...

Страница 14: ......

Страница 15: ......

Страница 16: ......

Отзывы: