Charge Your Monitor
Connect our original USB charging cable with any USB port, the red USB indicator
light keeps bright. Then connect the USB cable with the monitor, the red light turns
off, which indicates that the monitor is charging.About 30 minutes later, the light turns
red again and keeps bright when fully charged.The total using time upon a fully charged
monitor is about 25 minutes.* Be sure to power off the monitor when charging, or it
would be damaged.(
Figure 4
)
Specifications
1. Video Resolution: 1280*720/ 30FPS
2.Photo Pixels: 1600*1200
3.Camera light-sensitive chips: 1/4 inch HD Color CMOS
4.Lens Specifications: 4P visible angle 68 degree
5.Video format: PAL NTSC
6.Image area: 3888um * 2430um
7.Video output: 1.0Vp-p / 75Ω
8.Signal to noise ratio: 38db
9.5.8G Receiving sensitivity: -94dbm
10.Camera module working voltage: DC3.0-4.2V
11.Camera module power consumption: 440MA ± 10% (DC3.7V)
12.Monitor working voltage: DC3.3-5 v
13.Monitor power consumption: 620 ma, + / - 10% (DC3.7 V)
14.Working temperature: - 5
℃
to 55
℃
RH95 % of Max
15.Storage temperature: -40
℃
-85
℃
RH95% Max
16.Transmission power: 20 mw
Additional Instruction before Flying
1.The camera lens is front(head).Players should keep away from the head of the drone.
2.After frequency pairing,press the Start/Landing button and check the rotating blades.
The left front/right rear blades(blades A) rotates towards clockwise direction while
the right front/left left rear blades(blades B)rotates towards counterclockwise direction.
3.Slowly push the left throttle stick up, the drone flies upwards, then push the left stick
slowly down to end, the drone flies downwards and landing.
4. Adjust relative transmitter Trim button to adjust the rudder if the drone tilts to one
side when flying.
Calibration Instruction
Please follow the below steps to calibrate the drone if the drone wouldn't hover after
taking off, and can not be adjusted by trim button and cause difficult operation.
1.Turn off the drone switch and then turn off the transmitter switch.
2.Turn on the transmitter switch, then power on the drone switch and put it on the
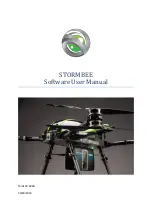
horizontal ground, after successful frequency piaring, press the fip button (Figure 9),
you will hear "beep,beep,beep" sound from the transmitter. Push the left stick and
right stick to left rear positon about 45 degrees at the same time( Figure 10),the
percentage displayed on the transmitter LCD screen turns to 0.0%(Figure 11).
CHA
OFF
ON
09
10
Flying Operation
Pairyourdronewiththetransmitter
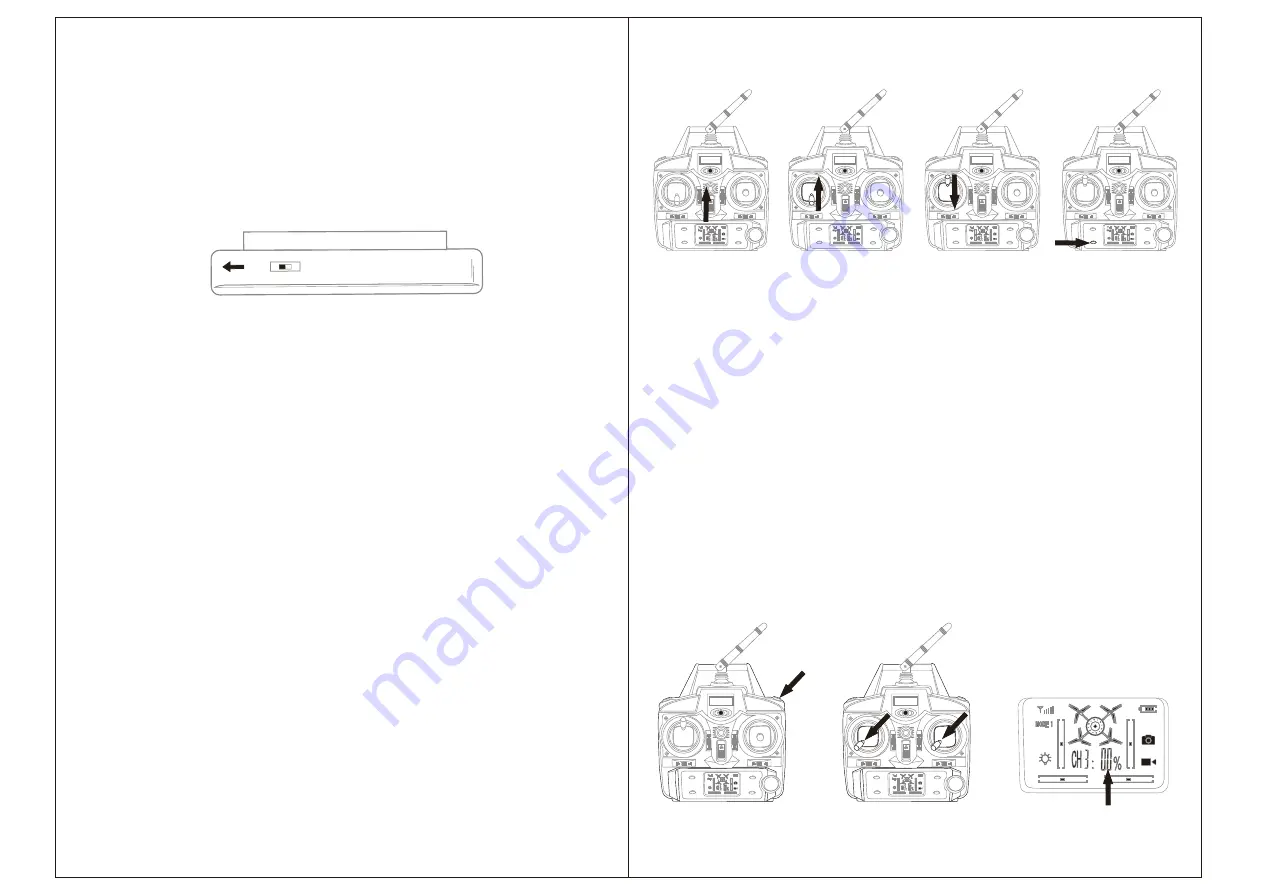
1.Turn on the transmitter(Figure 5
),
then turn on the Drone,the side lights of the drone
flash slowly, move the left throttle forward and backword(Figure 6
/
7
),
the sides lights
of the drone stop flashing and stay bright, at this moment, the drone is successfully
connected to the transmitter.
2.Put the drone on the flat ground, press the swithover button on the controller(Figure 8),
the blades begin rotate and you can operate your drone with the transmitter.
Important Notice: Please make sure the gyro of the receiving board is placed on the
horizontal position after powering on the drone, so that the drone can be controlled.
Figure 4
Figure 5 Figure 6 Figure 7 Figure 8
Figure 9 Figure 10 Figure 11


