Part 5
Assembling and Disassembling(LM-2310)
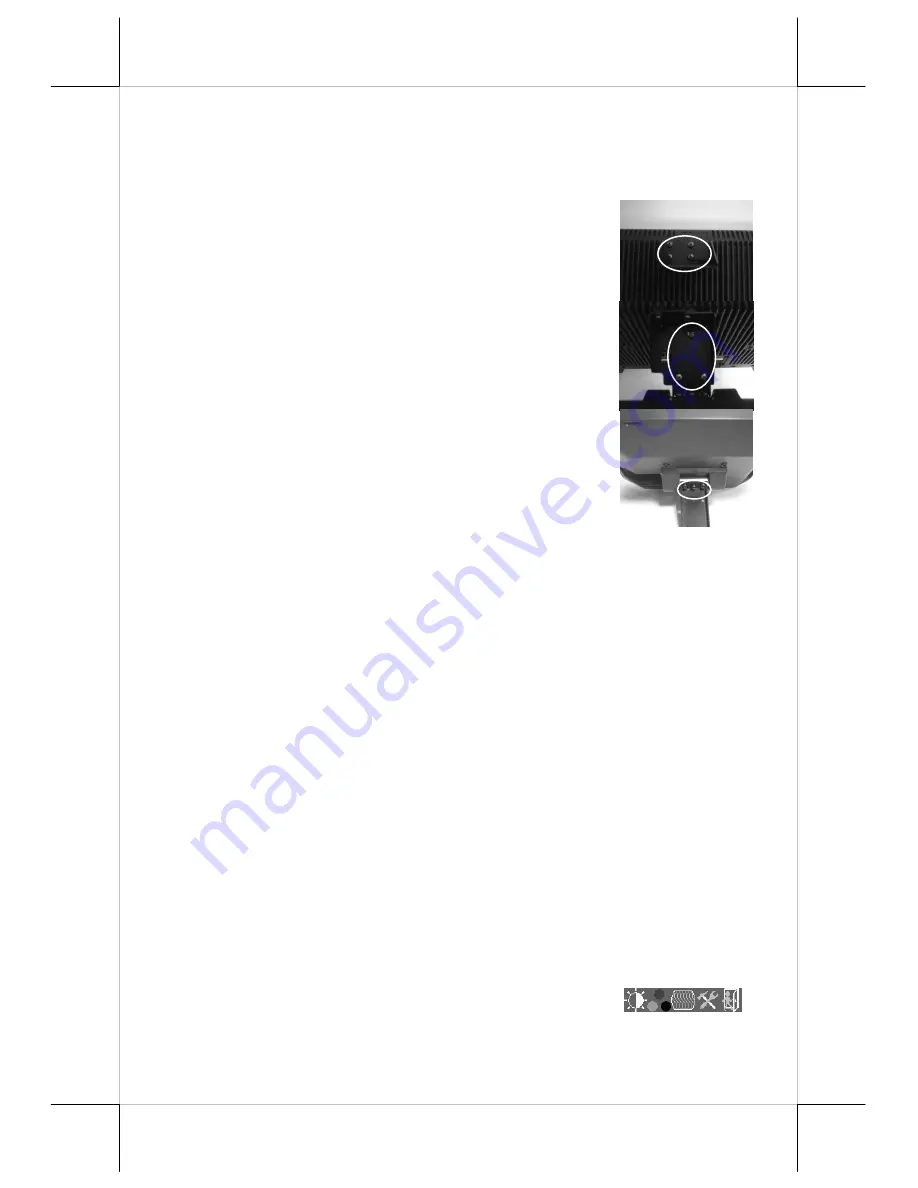
After releasing the back cover of stand, please unfasten these 4 screws to
remove the main structure of base stand shown in the rightmost picture.
Next, unfasten these 3 screws which fix the hinge as
shown in the right picture.
Now, there are 3 screws holes which fit in with VESA
standard 75mm
After that, please use flat drill to release 3 screws shown
in the right picture.
OSD
The monitor can be turned OFF only when there is video signal; turned ON
only when there is video signal and after the “Turn Off Panel” message
vanishes. The default status is set to ON when power is supplied unless
manually turned OFF. Since this button controls only the display power but not
the display controller, please try to disconnect the power cable or the VGA
cable once unfortunately the screen display goes into a power-off mode.
OSD functions
Press “OSD” button with a normal display on the screen to activate the OSD
functions (On Screen Display adjustment). The OSD window will pop up on
the screen. On top part of this window is a Posiflex logo with the OSD
firmware version indicated to its lower right part. Below this area are a row of
icons for main OSD menu. Below the main menu are a group of icons for
submenu that corresponds to one icon selected in the main menu. An analysis
of the video signal on resolution and refresh rate will be displayed at the
bottom. Applicable icons in the main menu and its subsequent menus are
illustrated below.
“
MAIN MENU
”: There are a total of 5 icons in this menu:
One of the 5 icons will be displayed in inverted color to indicate its
relationship with the submenu below. Pressing “NXT” button will shift the


