Portwell WEBS-1010 Скачать руководство пользователя страница 4

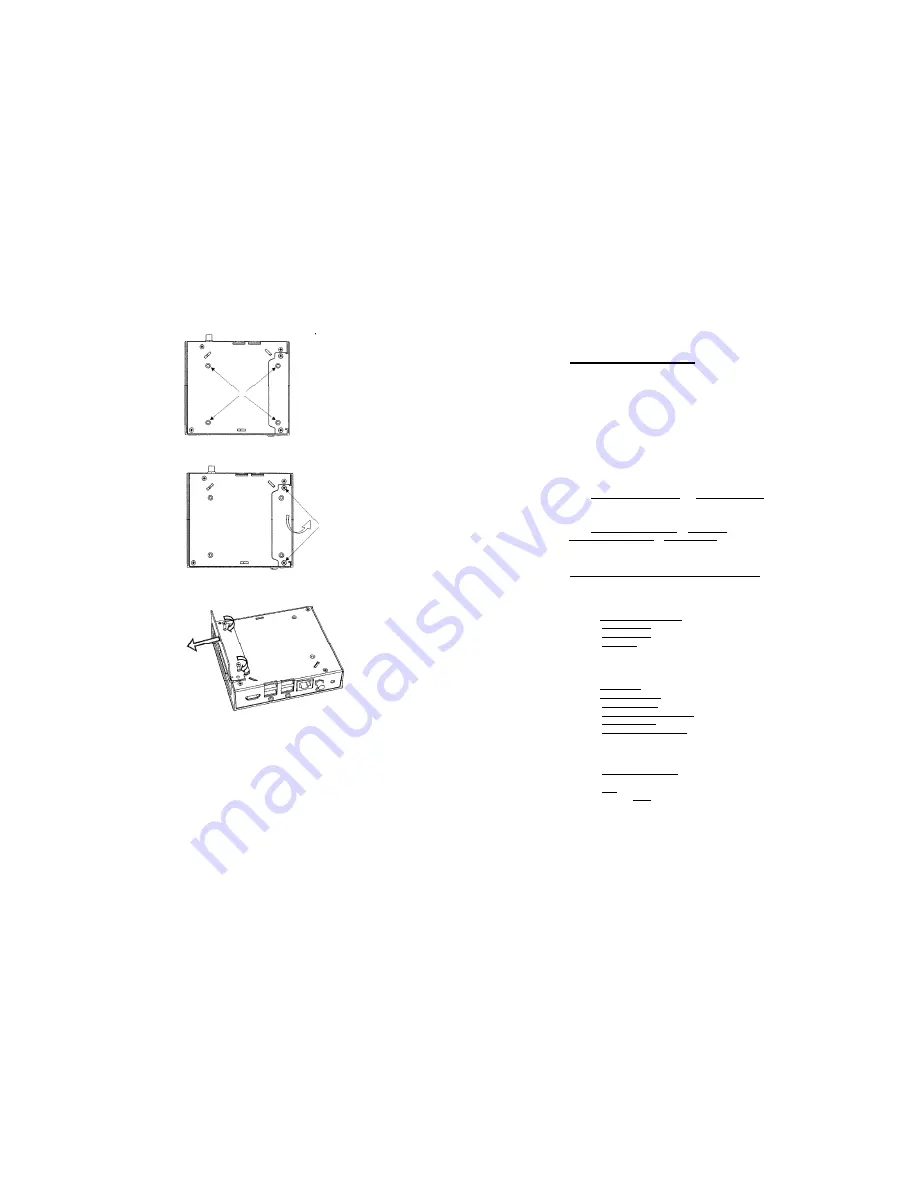
2.     Open the two screws on the HDD cover indicated below and remove it.


3.     Flip the cover (see below) and reattach the two screws to use it as a handle to pull out the HDD.


BIOS Setup Utility


Entering BIOS Setup Utility


Turn off the Unit


Turn on while holding down the F2 key.


Screen Layout


Menu is on the top.


The left pane shows configuration items. When an item is highlighted, the right pane displays help for


this item.


Navigation keys are detailed on the bottom.


Restoring BIOS Defaults


Select 

Exit -> Load Setup Defaults 

and 

Exit Saving Changes


Booting over LAN (PXE)


Select 

Chipset Control Sub-Menu 

-> 

Gigabit LAN -> 

Enable Select 

Chipset Control Sub-Menu 

-> 

LAN PXE BOOT 

-> Enable Save 

settings and reboot


BIOS Setup Utility Sections 

Main


Setting date and time


Large Disk Access Mode 

[DOS | Other] - select DOS for Windows XP and Linux


• 

Primary Master- 

hard disk identification. Usually automatically detects an installed hard disk 

• 

Memory Cache - 

should be enabled 

• 

BIOS Date 

- indicates when BIOS was generated, useful if you consider BIOS update 

Advanced


• 

Installed O/S - 

select WinXP for Windows and Linux 

9

 Keyboard 

Features - 

standard keyboard settings


• 

Summary Screen - 

displays system configuration on boot 

• 

Boot-time Diagnostic Screen - 

displays the diagnostics screen during boot 

• 

QuickBoot mode - 

perform fewer tests during boot for a quicker boot 

• 

Extended Memory Testing - 

choose whether to test all RAM during boot 

Intel 

• 

CPU Control Sub-Menu - 

various CPU settings. The defaults provide the best performance 

and optimal power saving. 

• 

Chipset Control Sub-Menu


o     

Audio - 

enable or disable 

Содержание WEBS-1010

Страница 1: ... power supply 3 AC cord with North American or localized standard plug 4 HDMI to DVI adapter 5 4 Rubber feet 6 WiFi antenna in some models To use WEBS 1010 you will need A display with DVI or HDMI input DVI or HDMI cable USB keyboard and mouse Hardware specifications CPU Intel Atom Z510 Z530 Chipset Intel US15W RAM 1GBDDR2 533 Storage 160GB Hard Disk Display DVI up to 1920x1200 Audio Stereo line o...

Страница 2: ... Ethernet using a standard RJ45 connector Use a standard Ethernet cable to connect The connector has built in LED s that are lit when a connection is detected WLAN A WLAN antenna is supplied in models with integrated WiFi and should be screwed into a standard SMA connector Power button WEBS 1010 has a tactile power push button It is used for turning on off the unit and for standby resume when supp...

Страница 3: ...BS 1010 apart this will void its warranty The following operations can be conducted by the user Affixing rubber feet You should stick the rubber feet to the bottom of the WEBS 1010 to protect the supporting surface Recommended rubber feet placement is shown below Installing Hard Disk 1 Open the two screws on the HDD cover indicated below and remove it 3 Replace the HDD cover and tighten the two sc...

Страница 4: ...ings and reboot BIOS Setup Utility Sections Main Setting date and time Large Disk Access Mode DOS Other select DOS for Windows XP and Linux Primary Master hard disk identification Usually automatically detects an installed hard disk Memory Cache should be enabled BIOS Date indicates when BIOS was generated useful if you consider BIOS update Advanced Installed O S select WinXP for Windows and Linux...

Страница 5: ... by the amount chosen Security This section allows the setting of Supervisor password for protecting setup utility User password for protecting system boot If you wish to clear a password set a new blank password Boot Select a boot sequence between the built in HDD USB thumb drive USB key USB CDROM USB HDD and USB Floppy FDC Booting over LAN PXE is enabled separately see above Booting from SD is n...

Отзывы: