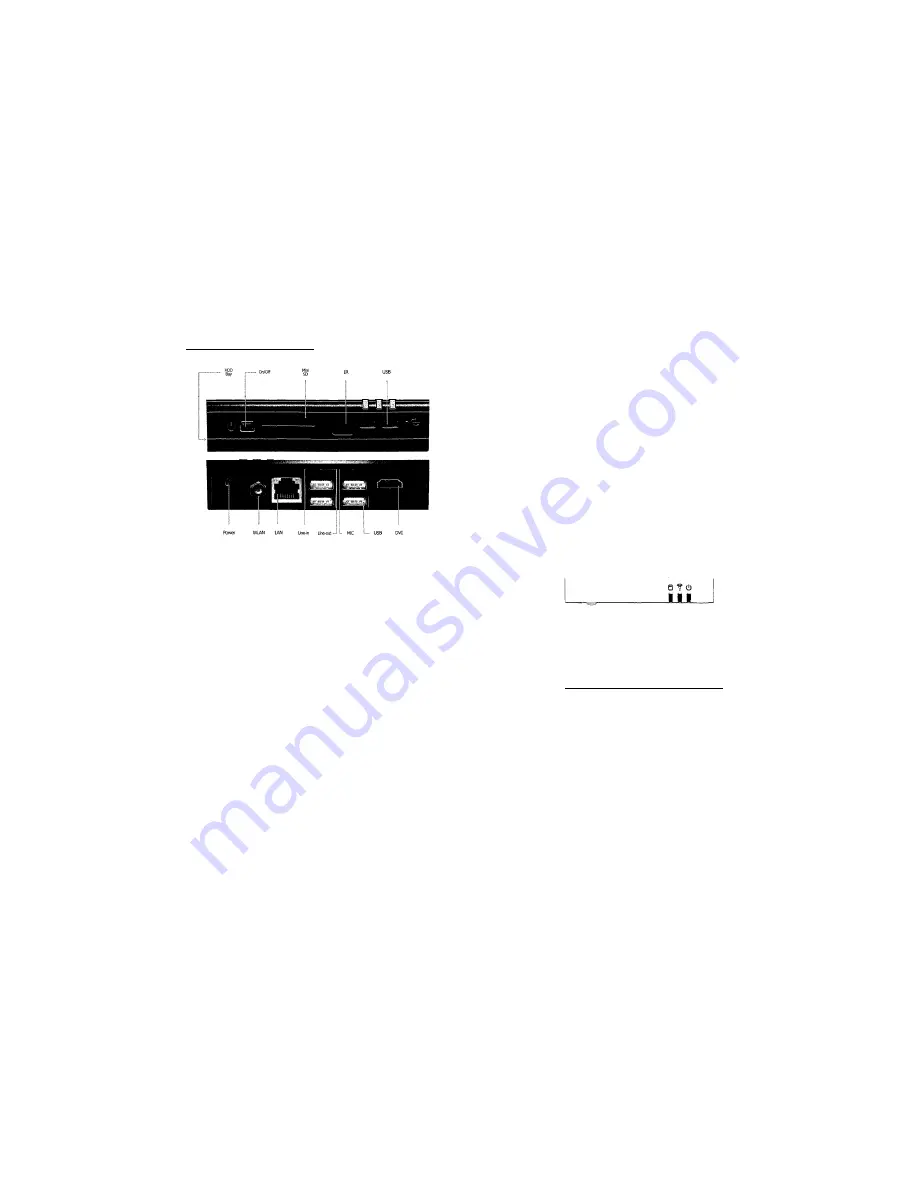
USB
There are 6 USB ports - 4 USB A ports on the back and 2 mini-USB on the front. All ports
support High-speed USB 2.0 - 480 Mbps.
Ports on the back are upside down - note when connecting USB plugs.
Note: Front left port supports USB 2 only and not USB 1 - good for connecting a camera or
a thumb drive, not for a keyboard or a mouse.
IR Receiver
The IR receiver is compatible with any standard IR remote control (38KHz). A driver and utility are
required to take advantage of IR functionality.
DVI
Display interface is DVI-D over HDMI connector.
To connect WEBS-1010 to a DVI display
Use the provided HDMI to DVI adapter. Use a DVI cable to connect the adapter to the display.
To connect WEBS-1010 to a flat-screen TV
Use an HDMI cable between the HDMI connector and HDMI input of the TV.
Note: Audio should be connected separately.
miniSD
The MiniSD socket supports MiniSD cards, including SDIO. SDHC is not supported.
Audio
There are 3 standard 3.5mm jacks on the back.
From left to right:
• Stereo line-in
• Stereo line-out
• Microphone
LAN
WEBS-1010 has 10/100/1000 BaseT Ethernet using a standard RJ45 connector. Use a standard Ethernet
cable to connect.
The connector has built-in LED's that are lit when a connection is detected.
WLAN
A WLAN antenna is supplied in models with integrated WiFi and should be screwed into a standard SMA
connector.
Power button
WEBS-1010 has a tactile power push-button. It is used for turning on/off the unit and for standby/resume
when supported by the operating system.
A push of at least 5 seconds will always turn off the WEBS-1010.
LED's
WEBS-1010 has 3 indicator LED's.
From left to right -
• HDD
activity
•
WLAN enabled / activity
• Power
Quick start guide
Connecting WEBS-1010
•
Turn off the display and connect it to the WEBS-1010 HDMI connector (use the HDMI to
DVI adapter if needed).
•
Gently insert the DC plug into the WEBS-1010 DC in jack. Connect the power supply to the AC
cord and plug the cord into AC outlet.
•
Connect the USB keyboard and mouse to USB connectors.
•
Plug the speakers into the line-out jack.
•
Plug the Ethernet cable into the Ethernet connector.
•
In WEBS-1010 models with WiFi: Mount the WiFi Antenna on the SMA connector by
turning it clockwise repeatedly until the antenna holds firm.
• Press the power button. The power LED should light up as the WEBS-1010 boots.
WEBS-1010 features


