28
29
Your riving knife may be out of alignment if your work
piece is hitting the riving knife after the cut or causing
some binding during the cut. When this condition
occurs you will need to make an adjustment to the
riving knife alignment. The following procedures in this
section will assist you with making adjustments to the
riving knife alignment.
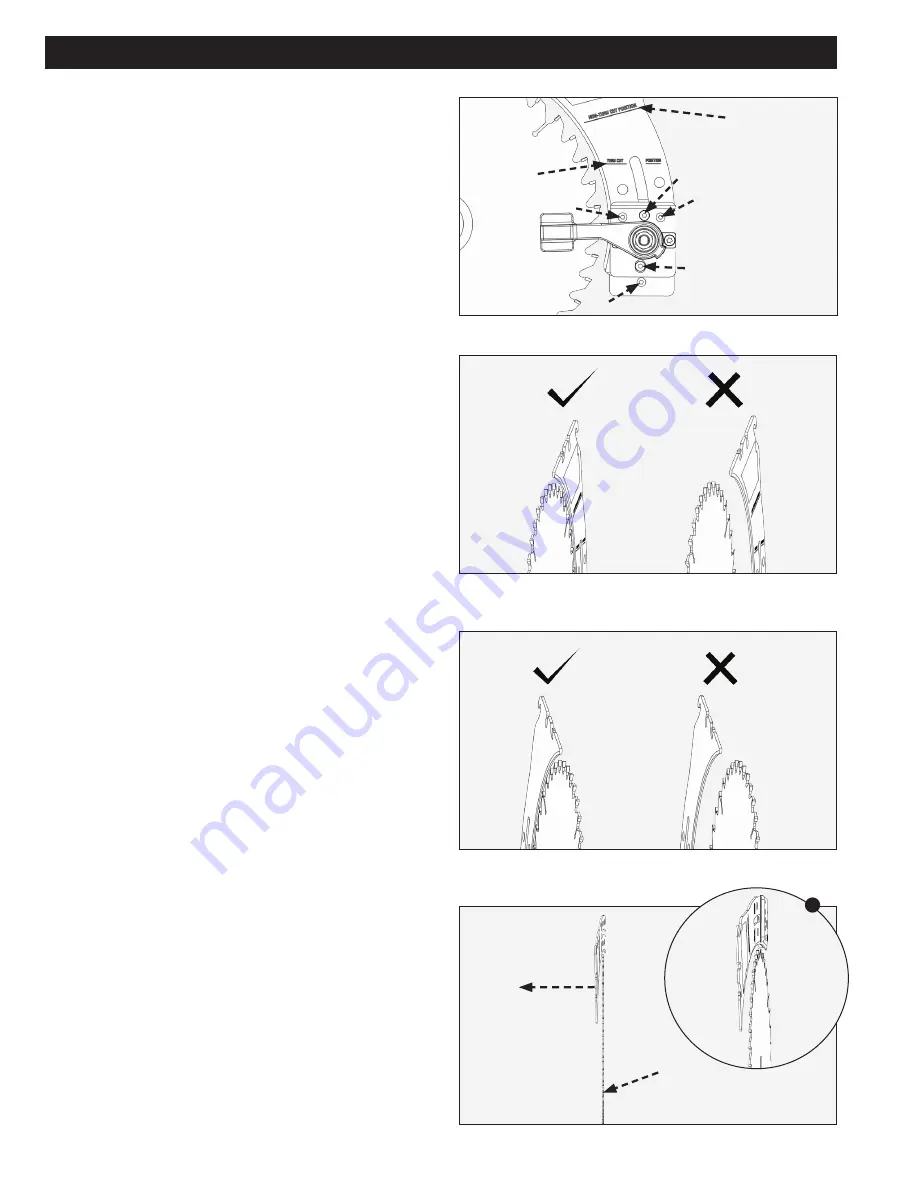
Locating point for THRU CUT POSITION as shown in
Fig. 37 (Customer should adjust the riving knife in this
position when making “THRU” cuts.)
NOTE:
You must locate the riving knife in this position
prior to making any alignment adjustments to the riving
knife alignment of the blade.
If a parallel adjustment is required, use Fig. 37 and Fig.
38 to make the following adjustments:
1. Loosen the 2 hex socket head screws (AA)
2. Tighten or loosen the adjustment screw (BB1) to
adjust the datum line if the riving knife to be aligned
to the blade.
3. Adjust set screw (BB2) and (BB3), to assist with
alignment of the riving knife to be parallel to the
blade.
4. Tighten hex socket head screws (AA).
If the riving knife has vertical misalignment, adjust as
follows using Fig. 37 and Fig. 39:
1. Loosen the 2 hex socket head screws (AA)
2. Make adjustments to (BB2) and (BB3), to align
riving knife to the blade. No adjustment is needed
for (BB1).
3. Tighten screws (AA).
If the riving knife has horizontal misalignment, adjust as
follows using Fig. 37 and Fig. 40:
1. Loosen the 2 hex socket head screws (AA).
2. Adjust screw (BB2) to align the riving knife to the
blade, if still out of alignment then adjust (BB3) until
proper alignment is acheived. Do not adjust (BB1).
3. Tighten screws (AA).
RIVING KNIFE ALIGNMENT
FIG. 37
AA
CORRECT
POSITION
CORRECT
POSITION
PARALLEL
SHIFT
DEFLECTIVE
RIVING KNIFE
AA
BB1
BB2
BB3
NON-THRU CUT
POSITION
THRU-CUT
POSITION
FIG. 38
FIG. 39
FIG. 40
BLADE
DIRECTION OF
MISALIGNMENT
MISALIGNMENT
OF RIVING KNIFE
a
Содержание PCX362010
Страница 31: ...31 NOTES ...


