7
Setting up and assembly
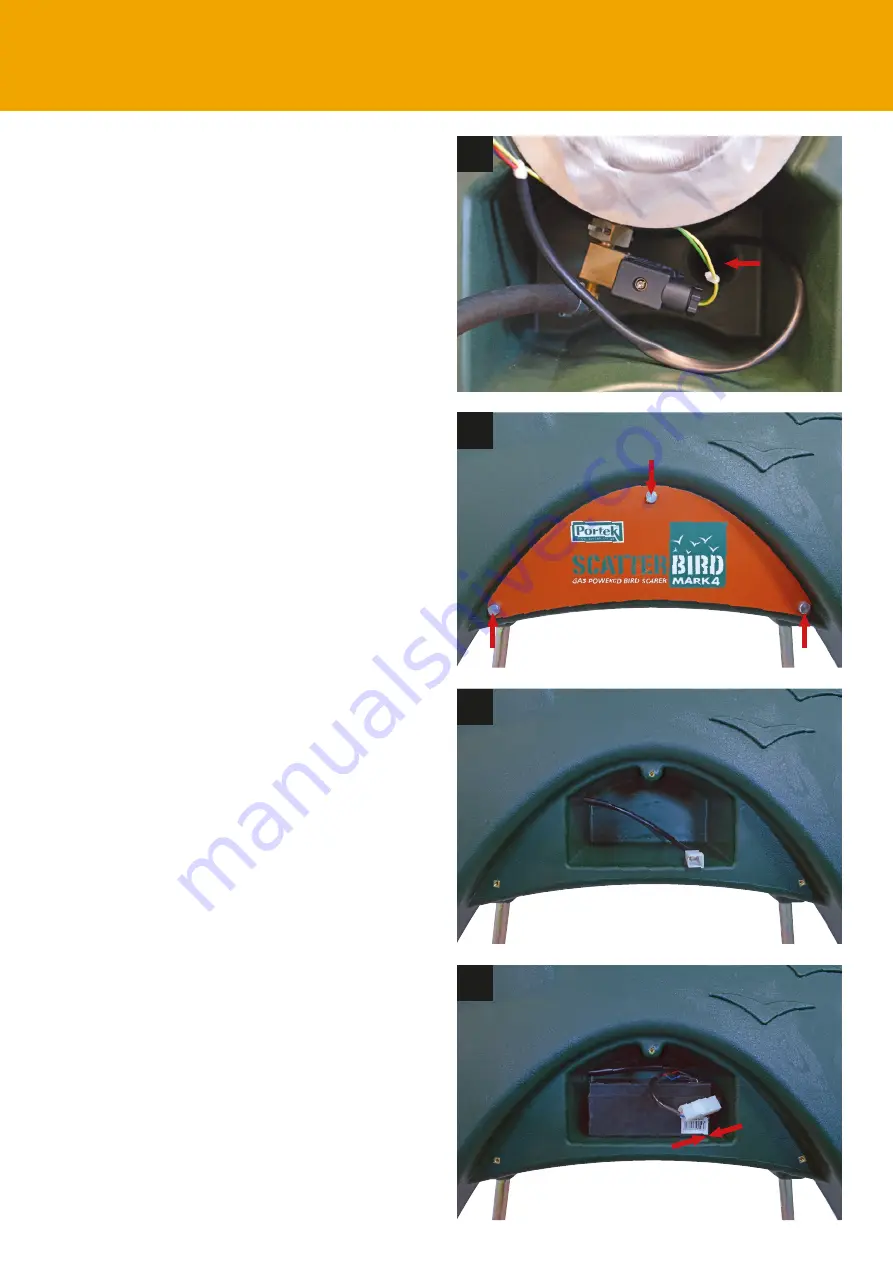
Feed the connector block on the wiring harness
through the moulded in hole at the back right of
the moulding (Photo 3).
4
5
3
6
Undo the side panel of the machine. This can be
done by undoing the 3 screws on the side of the
Scatterbird MK4 unit (Photo 4).
Attach the short battery lead connector block to
the wiring harness connector block, which you
have fed through into this side cavity (Photo 5).
Make sure that you have the pip on the connector
blocks matched together. These ensure that the
polarity of the wires is correct when they are
connected to the battery (Photo 6). The spade
connectors on this short lead can now be attached
to the rechargeable battery. Make sure that the
red wire is connected to the red, positive terminal
and the blue wire is attached to the black,
negative terminal. The battery can then be placed
in the housing and the side panel replaced.


