Содержание BOXTER -

Страница 1: ...TechnicalManual 8e TechnicalInformation Contents Group9 Electrics WKD483 521 www WorkshopManuals co uk Purchased from www WorkshopManuals co uk ...

Страница 2: ...ansmission 3 Transmission automatictransmission 4 Runninggear 5 Body 6 Bodyequipment exterior 7 Bodyequipment interior 8 9 Air conditioning Electrics 9 Circuitdiagrams part 1 up to and includingthe 99 model 5 9 Circuitdiagrams part 2 as of the 00 model 6 1 Thetwo folders with Group0 are to be regarded as one folder i e file the TechnicalInformation notices onlyin front of the repair descriptionsin...

Страница 3: ...a Instructionson repairs As can be seenfrom the breakdown the publishedTechnicalInformationis in the front part of each folder numbered according to the Groups TheTable of Contentsassignedto each Groupwill be periodicallyupdated Followingthe TechnicalInformation separated by a title page the instructionson repairs assigned according to the Groupsor brokendown into RepairGroups are includedin the f...

Страница 4: ... 25 26 27 28 Group 2 Fuel exhaust engine electronics Fuelsupply control Exhaust system turbocharging Fuelsystem electronic injection Fuelsystem K Jetronic Exhaust system Starter powersupply cruisecontrol Ignition system 3 30 34 35 39 Group 3 Transmission manual transmission Clutch control Manualtransmission Actuation housing Manualtransmission Gears shafts intogearsh Finaldrive differential differ...

Страница 5: ...ent Interior equipment Passengerprotection 7 70 72 74 Body equipment interior Linings insulation Seatframes Seatupholsteries covers Group 7 8 80 85 87 88 Group 8 Air conditioning Heating Ventilation Air conditioning Auxiliaryair conditioningsystem 9 90 91 92 94 96 Group 9 Electrics Instruments alarm system Radio telephone on boardcomputer navigation Windshieldwiper and washersystem Lights lamps sw...

Страница 6: ... pressure switch for the air conditioning system Removing and installing fluid tank Removing and installing the compressor Removing and installing the expansion valve Installing and removing the heating air conditioning unit Removing and installing the condenser Removing and installing the magnetic coupling Removing and installing drive motors of the heater air conditioning unit Removing and insta...

Страница 7: ... 5 M5 M8 23 17 Compressor M8 23 17 Refrigerantline M 10 26 36 19 27 Oilfiller screw M6 6 4 5 Fluidtank M8 14 10 5 Flangeconnectionsof refrigerant lines Note Wheninstallingthe refrigerantlines the screwconnectionsandthe a rings must be wetted with refrigerantoil The refrigerant oil must be disposed of as special category waste 8 1 8 Technical data for the air conditioning system Printed in Germany ...

Страница 8: ...atexchanger airtight withbutyladhesive 2 Replace coverif damaged I 287 96 4 Clampshutbothheaterhosesin frontofthe heatexchanger usinga commercially available hoseclamp Loosen heaterhosesatthe heat exchanger andpulloff 3 The heatexchangeris connectedto the en gine cooling system and coolantflows through it whenthe engineis running After re movingor installingthe heatexchanger I vent the coolingsyst...

Страница 9: ...crewfasteningscrews 4 ea and pull corr trol module out of the dashboard 2 Engageelectricalplug connections do not jam cables 3 Pulloffelectrical plugconnection UnclipBow dencablesandpulloutupwards or detach cables LabelBowden cablesbeforeremoval U I j M 289 96 85 10 19 Removing and installing mechanical heating and fresh air control Printed in Germany 1996 986851 85 1 www WorkshopManuals co uk Pur...

Страница 10: ...landloosensteering column panel Comply withsafetyregulations whenhandling airbagunits seeRepair Group 169 3 Loosencentral screw clamp at the steering columnswitchfrom belowand pullforward a little Removetop cover and disconnectelectri cal plug connections Removesteering column switch 108 96 5 Remove steering column cover 4screws 107 96 109 96 85 3 85 15 19 Removing and installing heating and fresh...

Страница 11: ...sidenozzle anddisconnect elec tricalplugconnection Unclip coverofsun sensoranddefrosterpanelandremove 8 Loosen passenger compartment monitorand disconnect electrical plugconnection A1 co c 9 Removebottom right air guide Removepas sengerairbagunit Complywith safetyregulationswhenhandling airbag units see RepairGroup69 l co 10 Removefront cover of centre console Loosenfuse carrier and loosendiagnosi...

Страница 12: ...lectrical plugconnections or cable f C 113 96 Installation 1 Ensurecorrect seating of air distributor housingand air guides Engageelectrical plug connectionsand route electricalcables care fully do notjam 16 Clamp shutboth heater hosesin front of the heatexchangerwith a commerciallyavailable hose clamp Loosenheatinghoses at the heatexchangerand plug the connections 2 Comply withsafetyregulations w...

Страница 13: ...e firewall tightening torque 15 Nm 11 ftlb the batterycable is tightenedwith a new hexagonnutM8 Tighteningtorque 15 Nm 11 ftlb 5 The heatexchangeris connectedto the en gine cooling system and coolantflows through it whenthe engineis running After re movingor installingthe heatingandfresh air control ventthe cooling system seeRepair Group19 85 15 19 Removing and installing heating and fresh air con...

Страница 14: ...g temperature valve 1 Turntemperaturecontrol to left handstop cold Temperaturevalve closed no passage to the heatexchanger c A B 0 h I 00 534 96 536 96 A Bowden cable temperaturevalve B Bowden cable footwelVdefrostvalve C Bowden cable centralvalve 2 Engage bowden cableintheadjusting lever 85 7 85 11 06 Installing and adjusting bowden cables of the heating fresh air control Printed in Germany 5 199...

Страница 15: ... IU y 537 96 538 96 Adjusting footwelljdefrost valve 1 Turnrotaryknobfor airdistribution to the sym bolfor thefootwell Defroster outletclosed nopassage to thewindscreen Adjustingcentral valve 1 Turn rotary knobfor air distributionto the sym bol for the footwell Air outletto the centre and side vents closed SeeFigure534 2 96 2 Engagebowdencablein the adjustinglever 53412 96 85 11 06 Installing and ...

Страница 16: ...point 539 96 Note Perform a functiontestafterinstalling the bow dencables Testlimitpositionoftherotary knobsfor airdistribution andadjusting leversof thevalves 85 11 06 Installing and adjusting bowden cables of the heating fresh air control Printed in Germany 5 1996 986857 85 9 www WorkshopManuals co uk Purchased from www WorkshopManuals co uk ...

Страница 17: ...h air unitwhen removed 531 96 Note Whenthe housinglid is removed the blower motor is simultaneously detachedfrom its guide Holdthe blowermotor and carefully remove it in downwarddirection J c b j hr I 530 96 a 2 Pulloffelectrical plugconnection onthe bal lastresistorandundobothfastening screws onthehousing lid Theballastresistorandhousing lidare a spare part 532 96 85 11 85 30 19 Removing and inst...

Страница 18: ...ightenfastening screws carefully plastichousing 3 Engage electrical plugconnections andper forma function test 8 12 85 30 19 Removing and installing heater fresh air blower motor 986857 Printed in Germany 5 1996 www WorkshopManuals co uk Purchased from www WorkshopManuals co uk ...

Страница 19: ...nbe removed inthisposition recirculation Installation 1 Theremoval or installation positionofthe drivemotorandfresh air recirculation valve cannot bechanged 2 Remove footwellbulkhead andrightairguide Disconnect electrical plugconnection ofthe drivemotorandundofastening screw 2 Tighten fastening screwcarefully plastichousing 3 Engage electrical plugconnection androute wirecarefully I 4 Perform a fu...

Страница 20: ... bulb Removal 1 Pulloff rotaryblowerswitch 2 Pulloutbulb Thebulbcanbepulledoutby pushing a connecting hoseofa vacuum line ontoit seediagramofhoseconnections Re pairGroup24 2 Check functionofthebulb 535 96 85 15 85 10 19 Removing and installing bulb for rotary blower switch Printed in Germany 5 1996 986857 www WorkshopManuals co uk Purchased from www WorkshopManuals co uk ...

Страница 21: ...n your eyes consulta physician immediately Wearrubber glovesto protect your hands 2 Whencarrying out repairs on the air condition ing system the system mustbe emptied by suctionandthe refrigerantmustbe purified Chlorine free refrigerants mustalso not be allowedto escapeinto the atmosphereand must be disposed of correctly Dueto their chemicalcomposition differentre frigerants must not be mixedwith ...

Страница 22: ...7 Assembly work on the air conditioning system Service unit SECU 134 1797 87 87 03 17 Assembly work on the air conditioning system 986871 Printed in Germany 1996 87 2 www WorkshopManuals co uk Purchased from www WorkshopManuals co uk ...

Страница 23: ...and repair instruc tions mustbe observedwhencarrying out all work on the serviceunit 8 Low pressure flange 9 High pressureflange 10 Refrigerant inlet shut offvalve 11 Refrigerant outlet shut offvalve 12 Refrigerant oil inlet shut offvalve 13 Refrigerant oil ventvalve 14 Moisture indicator 15 Oil tank vacuumflange 16 Hourmeter 17 Pilot lightSUCTION END 18 Pressure switch SUCTION CLEANING 19 Main sw...

Страница 24: ...oroughcleanli ness musttherefore be ensuredduringall work Systemcomponentsmustneverbe cleanedon the insidewith hot steam Use onlynitrogenfor cleaningpurposes 5 Rinse withrefrigerant 6 Empty thesystembysuctionagain 7 Evacuate 8 Fill Whenreplacinga component all openingsmust be closed off with suitableplugs Note Payattentionto sealingringswhen disconnect ing or connectingthe hose connections A I 1 9...

Страница 25: ...uctionremoval start end 3 SUCTIONjEND 4 ON OFF 1 ON OFF 2 SUCTION CLEANING Pressuretoo high fillingcylinderfull Drain off refrigerantfrom the filling cylinderinto a refrigerantbottle approx 50 87 5 87 03 17 Assembly work on the air conditioning system Printed in Germany 1996 986871 www WorkshopManuals co uk Purchased from www WorkshopManuals co uk ...

Страница 26: ...ND 4 ON OFF 1 ON OFF 2 SUCTION CLEANING Pressuretoo high fillingcylinderfull One revolutionOPEN After approx 15 minutesCLOSED 87 03 17 Assembly work on the air conditioning system 986871 Printed in Germany 1996 87 6 www WorkshopManuals co uk Purchased from www WorkshopManuals co uk ...

Страница 27: ... m B HFA 134a A A 8 3 1 f 2 B open A close 1 ON OFF Instructions 1 opento 2 OFF then 1 CLOSED and 3 OPEN 87 7 87 03 17 Assembly work on the air conditioning system Printed in Germany 1996 986871 www WorkshopManuals co uk Purchased from www WorkshopManuals co uk ...

Страница 28: ...ng B B A close B open 1 ON OFF 2 VACUUMPUMP Evaluation time at least 15 minutes 87 03 17 Assembly work on the air conditioning system 986871 Printed in Germany 1996 87 8 www WorkshopManuals co uk Purchased from www WorkshopManuals co uk ...

Страница 29: ...p with new refrigerant oil A A A close B open 1 ON OFF 87 9 87 03 17 Assembly work on the air conditioning system Printed in Germany 1996 986871 www WorkshopManuals co uk Purchased from www WorkshopManuals co uk ...

Страница 30: ...Pressure8 10 bar If pressureis less than 8 bar After usingthe SECU perform internalsuctionremoval seePage87 5 first close the handvalveson both suctionlines 87 03 17 Assembly work on the air conditioning system 986871 Printed in Germany 1996 87 10 www WorkshopManuals co uk Purchased from www WorkshopManuals co uk ...

Страница 31: ...1 Removethe refrigerantby suction usingthe serviceunit 2 Determinethe refrigerantoil quantityafter the refrigerant hasbeen removedby suction 3 Fillup with new refrigerantoil 4 Evacuate 5 Fillwiththe stipulated amount ofrefrigerant 6 Checkthe system for leaks 87 11 87 03 17 Assembly work on the air conditioning system Printed in Germany 16 1997 986871 www WorkshopManuals co uk Purchased from www Wo...

Страница 32: ...vehicles the amount of oil removed by suction is approx 15 40 cm3 Oil removedby suction must be returnedto the system Refrigerantoil removedfrom a previouslyrun air conditioning system mayno longer be used special category waste After the refrigerant hasbeenremovedby suctionand a componenthasbeen replaced the oil quantitymust be determinedandtopped up bythe quantityremainingin the removed componen...

Страница 33: ...srecirculating airbutton Settemperaturecontrol to maximumcooling Switchfresh airblowerto stage 4 Start engine Operateair conditionwhileidling Set enginespeedto 2000 rpm start of time measurement Ifthe prescribednominalvaluesare not reached the cooling system mustbe checkedfor leaks and re paired 10 u 0 oS Q ro Q Co E Q c Q Q u 8 6 4 2 15 20 25 30 35 40 Ambient temperature in C Centreventtemperatur...

Страница 34: ... cold circuit as a function of ambienttemperature 1 8 1 7 1 6 1 5 1 4 1 3 0 I J II II I 1 1 1 _ J 15 20 25 30 35 40 Ambienttemperaturein DC Lowpressure incold circuitasa functionof ambient temperature 87 Nominal values for pressures and temperatures 9868713 Printed in Germany 1996 8 7 14 www WorkshopManuals co uk Purchased from www WorkshopManuals co uk ...

Страница 35: ...eswitch 2 96 4 Undoand unscrewthe pressureswitch Installation 1 Replace the O ring on the pressure switch and wet it with refrigerant oil Tightening torque 3 Nm 2 2 ftlb 2 Refrigerant oil removed froma previously run air conditioning systemmaynolongerbeused special category waste 87 15 87 83 19 Removing and installing pressure switch for the air conditioning system Printed in Germany 1996 986871 w...

Страница 36: ... clamp on the fluidtank Undo both hexagon head bolts on the fluid tank and removethe fluid tank upwards Immediately close lineswith plugs so that theyare air tight 3 96 Installation 1 Do not removethe plug until shortlybefore in stallation Replacethe a ring on the branch pieceand on the refrigerantline and wetthe newO ringswith refrigerantoil 2 Tighten bothhexagon head boltsonfluidtank with6 Nm 4 ...

Страница 37: ...ley and remove the belt 5 Detachthe battery positiveconnector at the B connectionon the engine Undothe B connection 2 screws M6 on the engineand put it aside 26 96 8 Undothe refrigerantlines at the compressor Immediatelyclose the connectionsand lines with plugs so that they are air tight 6 Removethe fluid of the power steering in the supplytank until belowthe connection Removethe servo tank bayone...

Страница 38: ...essors are under pressureand are fil led with the required amountof oil for the refri gerantcircuit The remainingoil quantityin the in dividualcomponents musttherefore be taken into account 5 Tightening torque for refrigerantline screwsM8 x 32 23 Nm 17 ftlb Usefasteningscrewsfrom the new compressor ReplaceO ringsand wet with refrigerantoil 1 First openthe cap on the high pressureside and relieveth...

Страница 39: ...ize approx 5 seconds 3 Setthefanto max output 4 Switchon the air conditioning system AC switch and allow it to run uninterruptedfor at least 2 minutesat 1500 rpm 5 After 2 minutes uninterrupted compressor operationtime the oil distribution in the air conditioningsystem is completed andthe compressorcan be run up to the max engine speed 87 21 87 34 19 Removing and installing the compressor Printed ...

Страница 40: ... Closeconnectionsand lines immedi atelywith plugs so that theyare air tight 4 Undothe expansionvalveand removeit Im mediatelyclose the linesto the evaporator with plugs so that theyare air tight P_ l 1 81 96 Installation 1 Donotremoveplugsuntilshortlybeforeinstal lation Replace O rings andwetthe newrings withrefrigerant oil 2 Refrigerantoil removed by suctionfrom a pre viouslyrun air conditioning ...

Страница 41: ...nes with plugs immediatelyso that theyare air tight 4 Remove thesteering wheelandloosen the steering columnpanel Observe the safety regulations for handling airbagunits seeRe pairGroup69 5 Undothe central screw clamp on the steer ing columnswitchfrom belowand pull it for wards slightly Removethe cover at the top and disconnectthe electricalplug connec tions Removethe steeringcolumnswitch 108 96 7 ...

Страница 42: ...ction 10 11 Removethe air guide at the bottom right Removethe passenger sairbag unit Ob servethe safetyregulationsfor handlingair bag units see RepairGroup69 II 12 Remove the frontcoverofthecentercon sole Undothefuseholderanddiagnosis pluginthe leftfootwell 112 96 15 Remove the leftairguide Onlyloosen thede frostchannel Undoandremove thecenter airdistributor casing 13 Undothe control panel at the ...

Страница 43: ...nections Installation 1 Ensurethat the air distributor casing and air guidesare correctlypositioned Engagethe electricalplug connectionsand carefullylay the electricalcables do not pinch 19 Undothe heater air conditioning uniton the lid firewall 3 nuts Pulloff the water drain age hosefrom the heater air conditioning unit 20 Undotheholderoftheheater air condition ing unitfromthepassenger s sideatth...

Страница 44: ...he firewall tightening torque 15 Nm tightenthe battery cablewith a new M8 hexagonnut Tighteningtorque 15 Nm 11 ftlb 55t 0 5 115 5 Replacethe a ringsfor the refrigerantlines at the expansionvalveand wet the newO rings with refrigerantoil Note Ifthe heatingjair conditioning unitis replaced the refrigerantoil in the evaporatormustbe topped up Determinethe quantityof the refrige rantoil andtop up agai...

Страница 45: ... 4 0 to 5 Nm 3 0 t 0 4 Nm 4 Undothe refrigerantline on the condenser Im mediatelyclose connectionsand lineswith plugs so that theyare air tight Whenlooseningor tighteningthe M8 refrigerant lineson the condenser alwayscounterwith a 21 mmopen ended wrench 5 Undothe fasteningscrews 2 screws from the condenserand pullthe condenserto the side out of the holder 4 Determinethe quantityof the refrigeranto...

Страница 46: ...n be removedmanually Removethe spacer washers 2 Installthe Seegercirclip ring The slanted sur face arrow of the Seegercirclip ring faces up wards to the fasteningscrew 3 Use standardSeegercirclip ring pliers to removethe Seegercirclip ring Manually removethe beltpulley 4 Unscrewthe cable of the magneticcoil from the compressorhousing Removethe Seeger circlip ring Removethe magneticcoil from the co...

Страница 47: ...ter edge of the belt pul ley Usea depthgaugeto measureup to the pressureplate Applybattery voltageto the magneticcouplingand measurethe distance air gap to the attracted pressureplate Al waysmeasureat at leastthree pointson the pressureplate in order to obtaina meanvalue Distance 0 5 mm t 0 15 mm 3 Iftheairgapis notinthetolerance range it mustbeadjusted withtheaidofthespacer washers www WorkshopMa...

Страница 48: ...er and disengagethe deflectionlever Drive motor for temperature valve 3 Unscrew drivemotorofthe heating air condi tioningunitanddisconnect theelectrical plug connection vr Drive motor for footwelljdefrost nL 549 96 Drive motor for central valve V 552 96 I 1 Unscrew drivemotorwithbracket fromthe heating air conditioning unit 2screws 2 Swivel drivemotorto thesideanddisengage thedeflection lever 3 Di...

Страница 49: ...ly plastichousing 3 Engageelectrical plug connectionsand route wire carefully 4 Perform functiontestafterinstallation ofthe drivemotors Removing and installing drive motors of the heating air conditioning unit 9868733 Printed in Germany 5 1996 87 34 87 20 19 www WorkshopManuals co uk Purchased from www WorkshopManuals co uk ...

Страница 50: ...is position re circulation 2 Ensure thatthedeflection leverofthe outside airvalveis seatedcorrectly 2 Remove footwellandrightairguide Discon nectelectrical plugconnection ofthedrive motorandundofastening screw 3 Tighten fastening screwcarefully plastic housing 4 Engage electrical plugconnection androute wirecarefully 3 Disengage pivotpinontheadjusting leverwith a screwdriver 5 Perform a function t...

Страница 51: ...1 Placetemperaturesensoron the intake duct andturn by 900 tighten 2 Engage electrical plugconnection androute thewirecarefully 2 Pull off electrical plug connectionon the out side temperaturesensor Turntemperature sensor by 900 and pull it out 3 Installdrive motor for fresh air recirculation valveand perform a functiontest I 1 0 I i 607 1 96 87 37 87 59 19 Removing and installing outside temperatu...

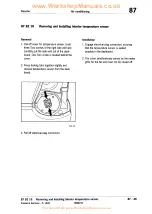
Страница 52: ...tion 1 Engageelectricalplugconnection ensuring that the temperaturesensoris seated properly inthedashboard 2 Thecoversimultaneously servesastheintake grillefor thefanandmustnotbeclosedoff 2 Presslockingtabstogetherslightly and remove temperature sensorfromthedash board 608 96 3 Pulloffelectrical plugconnection 87 39 87 82 19 Removing and installing interior temperature sensor Printed in Germany 5 ...

Страница 53: ...khead Unclipcentre con sole cover at the front and removethe foot well vent 3 screws 2 Engage theelectrical plugconnection and routethewirecarefully 2 Turnbloweroutletsensorby900andpullit out 609 96 3 Pullelectrical plugconnection offbloweroutlet sensor 87 41 87 58 19 Removing and installing footwell blower outlet sensor Printed in Germany 5 1996 9868737 www WorkshopManuals co uk Purchased from ww...

Страница 54: ...d slidethe blower driver into the upper bracket 2 Tighten thefastening screwcarefully plastic housing Install theairguideandfootwellbulk head 3 Perform functiontestonheater fresh air blowermotor I IV I n E 1 610 96 2 Pullblower driver out of the upper bracket and removein downwarddirection 3 Pullofftheelectrical plugconnection 87 43 87 78 19 Removing and installing blower driver Printed in Germany...

Страница 55: ...www WorkshopManuals co uk Purchased from www WorkshopManuals co uk ...

Страница 56: ...tion checkwhetherthe fan can ro tate freely 2 Tightenfrontwheelto thespecified torque 130 Nm 96 ftlb 87 53 19 9868737 7 46 Removing and installing fan for condenser Printed in Germany 5 1996 www WorkshopManuals co uk Purchased from www WorkshopManuals co uk ...

Страница 57: ...n 1 Disconnect the batteryandcovertheterminal or battery 2 Unclipballastresistorfromtheholder from below 8 Carefullyroutethe wires and if necessary fix in placewith plastic tape i 645 96 3 Cutoffwiresapprox 30 mmbehind theold ballast resistor 4 Slideheat shrinktubing over the wires to the plug connection 2 x andto the fan motor 1 x 5 Shorten wiresofthe newballast resistorto ap prox 30 mmandstripap...

Страница 58: ... Volt supplyvoltage OK Enginetemperature 110 C Outside temperature 3 C Note Basic adaptationto the system mustbe performedwith a newheating air conditioning control This is indicated byflashing of the displaysfor approx 5 to 10 secondseachtime the ignition is switchedon Basic adaptationis performedduringthe system test The following tests are performed Displayof all segmentsin the control module T...

Страница 59: ...theDME All fault pathsare tested and anyfaultsare stored Basicadaptationhas beencompletedafter the systemtest The displaymust no longerflash Installing and removing the heating air conditioning control 9868749 Printed in Germany 12 1997 87 50 87 02 19 www WorkshopManuals co uk Purchased from www WorkshopManuals co uk ...

Страница 60: ...TechnicalManual TL Technicallnformation Group 9 Electrics www WorkshopManuals co uk Purchased from www WorkshopManuals co uk ...

Страница 61: ...transmission 3 Transmission automatictransmission 4 Runninggear 5 Body 6 Body equipment exterior 7 Body equipment interior 8 9 Air conditioning Electrics 9 Circuitdiagrams part 1 up to and includingthe 99 model 5 9 Circuitdiagrams part 2 as of the 00 model 6 1 ThetwofolderswithGroup0 areto be regarded asonefolder i e filethe Technical Information noticesonlyin frontoftherepairdescriptions inthefol...

Страница 62: ...ata Instructionson repairs As can be seenfrom the breakdown the publishedTechnicalInformationis in the front part of each folder numbered according to the Groups TheTable of Contentsassignedto each Groupwill be periodicallyupdated Followingthe TechnicalInformation separated by a title page the instructionson repairs assigned accordingto the Groupsor brokendown into RepairGroups are includedin the ...

Страница 63: ...24 25 26 27 28 Group 2 Fuel exhaust engine electronics Fuelsupply control Exhaustsystem turbocharging Fuelsystem electronicinjection Fuelsystem K Jetronic Exhaustsystem Starter power supply cruise control Ignitionsystem 3 30 34 35 39 Group 3 Transmission manual transmission Clutch control Manualtransmission Actuation housing Manualtransmission Gears shafts intogearsh Finaldrive differential differ...

Страница 64: ...pment Interior equipment Passengerprotection iroup7 Body equipment interior Linings insulation Seatframes Seatupholsteries covers 7 70 72 74 8 80 85 87 88 iroup 8 Air conditioning Heating Ventilation Air conditioning Auxiliaryair conditioningsystem 9 90 91 92 94 96 iroup 9 Electrics Instruments alarmsystem Radio telephone on board computer navigation Windshield wiperandwashersystem Lights lamps sw...

Страница 65: ...19 92 72 19 92 1 92 3 92 5 92 7 92 9 92 11 92 13 92 15 92 17 Windshield wiper and washer system Removing and installing wiper link Removing and installing wiper blades Removing and installing wiper motor Non adjustable spray nozzles Removing and installing tank for windscreen washer system Removing and installing pump for windscreen washer system Removing and installing pump for headlight washing ...

Страница 66: ...itronic headlight dipped beam Removing and installing angle sensor for automatic headlight beam adjustment Removing and installing angle sensor for automatic headlight beam adjustment Removing and installing control module for automatic headlight beam adjustment 9498 19 94 49 Lights lamps switches interior theft protection Removingand installingsignalconverter immobiliser 96 1 Removingand installi...

Страница 67: ...ol modules if the battery has been completelydischarged 5 Alwaysdisconnect thebatteryterminals be forecarryingoutwelding workonthevehicle 6 Wiringharnessplugs of control modulesor other electronic componentsmustbe con nected or disconnectedwith the ignitionoff Exception vehicleswith the additional equipmentM 536 alarmsirenwith tilt sensor Remedy Deletethe supplyvoltage entry from the control modul...

Страница 68: ...dal Remedy Manually close each power windowas far as it will go then press the rocker switchfor closing the windowagain The limit position of the re spectivepower windowis nowstored in the control moduleagain Switchoff ignitionfor at least10seconds Thiscompletes theadaptation ofthethrottlead justingunit 90 25 Instrument cluster With all DMEsystems theenginemustrun for severalminutesbeforethe engin...

Страница 69: ... to the instrumentcluster Ifthe time is then manuallychanged by means of the instru ment cluster this time is adopted bythe PCM and synchronisedwith GPStime The radio reverts to the Codefunctionwhenthe battery is disconnectedand is thus no longer readyfor operation Remedy Inputtheradiocode Ifthecodecardis un available theradiocodecanbereadfromthe DME controlmodule under Vehicle data The codeis als...

Страница 70: ...gageelectrical plug connectionsandfasten the dashboardinserton the dashboard 3 The hazardwarning light switch 8 is held in the dashboard insertby two lockinghooks Pressthe right locking hooktoward the switch grip the button holderwith a pair of pliers and pull out the switch toward the front 2 Installhazardwarning lightswitch Press button A onto the hazardwarning lightswitch untilthe button engage...

Страница 71: ...ectronic unit at the bottom centre The releasedgreen guidetabs are heldoutwardswith a screwdriver The electronic unitis taken up off of the display unit evenlyon alternatesides 486_98 The instrument cluster must be laid on a soft dust free surface to open it When the instrument cluster is open no dial or solder joints on the display unit and electronic unit should be damaged or touched 5 Removefas...

Страница 72: ...ngclip underneathin the centre Pressthe lockingtab in the upper part of the electronic unittogether and into the front frame holder 4 Pressboth green guide tabs inwardsover the contact plugswith a screwdriver do not tilt 5 Pressthe sheetmetalbraceson the left and right over the fasteningeyelets 6 Replace adjusting knob for clock and daily trip mileage display 90 25 37 Disassembling and assembling ...

Страница 73: ...ough thesoundoutletopening Pull offelectrical plugconnection andobserve in stallation positionofthehorn 2 Unscrew the M6 hexagon nutfromthe bracketandremove thehigh pitch horn through thesoundoutletopening Installation 1 Observe installation positionofthehorns The hornmustnottouchthebodyor a bracket 2 Atoothedwashermustbefittedbetween the hornandbracket Tighteningtorque of the M 6 hexagonnut 10 Nm...

Страница 74: ...elect vehicletype Boxster Select control modules Select instrumentcluster Select total mileage Input VehicleIdentificationNumber Confirm with key F7 Input kilometrereading Code with key F8 2 Thetotalmileage is adopted inthe newinstru mentclusteraftercoding 90 7 90 12 15 Setting ahead total mileage counter in instrument cluster Printed in Germany 9 1997 986907 www WorkshopManuals co uk Purchased fr...

Страница 75: ...1 free Position 2 Nokia 2110 Position3 Motorola 11 97 Setting 1 Carefully uncliphandsfree microphone from thedashboard insertandpullout 2 Usea smallscrewdriver to setthepositionof theinstalled telephone system e g Nokia 2110 pos 2 Thesettingasdelivered in new carsis position 3 3 Carefully clipthehandsfree microphone into thedashboard insertagain 91 1 91 57 15 Setting handsfree microphone to the te...

Страница 76: ...removea defectivesensor The sensorsare arrangedin the order outer left innerleft inner right and outer right l i j 39 97 The sensor with holder in the rear spoiler consists of six parts 1 Rosette 2 Washer 3 Sensor housing 4 Isolating ring 5 Sensor 6 Retaining spring 91 3 91 75 19 Removing and installing sensor for ParkAssistent Printed in Germany 12 1997 986913 www WorkshopManuals co uk Purchased ...

Страница 77: ...ittedfrom the inner left and inner right sensors The holdingspring Figure413 97 with new supportfacing the rear spoiler is installedfor these two parts 413 97 Removing and installing sensor for ParkAssistent 986913 Printed in Gennany 12 1997 91 75 19 911 4 www WorkshopManuals co uk Purchased from www WorkshopManuals co uk ...

Страница 78: ...ush sensorinto the sensorhousing 2 Slideretainingspring over the sensorhousing and press on until it meetsthe stop 3 Engageelectricalplug connectionsand fit rear spoiler Note Theelectricalplug connectionin the sensor must alwayspointto the centre of the vehicle The plugconnectionwith marking white adhesivetape on the wiring harnessis always connectedto outer left sensor 412 97 3 The washer remains...

Страница 79: ...tened nextto the alarm system centrallocking systemcontrol moduleunderthe driver s seat Whenremoving removethe seatand detachthe retainingplate two M6 x 16 hexagon head bolts Theouter plug connectionwith marking white adhesivetape on the wiring harnessis always connectedto outer left sensor I I 429 97 430 97 Removing and installing sensor for ParkAssistent 986913 Printed in Gennany 12 1997 91 75 1...

Страница 80: ...yand operator control unit and disconnectthe electrical plug connections 3 Disconnectelectricalplug connections from the displayand operator control unit Note The mountingpoints on the displayand operatorcontrol unitfor fastening it in the retainingbracket were modified in the currentmodelyear The retainingbracketwas adaptedaccordingly Asthe result of the modification the previouslyinstalledretain...

Страница 81: ...users Both codes must be inputwhenthe system is commissioned Inputthe devicecode for the displayand operator control unitfirst Onlythe navigationcode hasto be input again if the navigationunitis exchanged Connectand switch on the PorscheSystem Tester2 Switchon ignition Switchon PCM by pressingthe volume control displayremains dark Establishcommunicationwiththe Porsche SystemTester 2 and select PCM...

Страница 82: ...coverfromthenavigation unit onthe leftandright 2 Insertspecialtool V 160 into the recesses of the navigationunitandengage Device code input The navi ationunit is protected againsttheft by a devicecode Onlythe navigationcode hasto be inputagain if the navigationunit is exchanged 2 tj 0 0 0 0 OL I J C l c J D1 P 73 97 3 Carefullypush out the navigationunitrearward and disconnectplug connections 91 1...

Страница 83: ...e accommodatedin this housing The GPSis fastened underneath with a magnet Note The GPSantennamust not be covered by metallicor moist objects Removal 1 Unclipcoverfrombehind andtakeout 2 Undo bothTorx T20 fastening screws with an angledscrewdriver Caution Fasteningscrewscouldfall out 1 1 73o_97 3 Removehousingwith GPSantenna disconnectelectrical plug connection on the bottom and removeGPSantenna ma...

Страница 84: ...temsandtheir wiring harnesses especiallysensor wires is notpermitted In the Driver sManualof its vehiclesPorsche has approvedmobiletelephonesand two way radios with a maximumtransmissionpower of 10 W Observethe installationspecifications and recommendationslisted there Porsche permits the installation and operation of two way radios over 10 W for the radio services listed below under the following...

Страница 85: ...e it is necessaryto haveEMVexperts inspect the Porschein order to observethe protectivegoals The optimumrange of the two wayradios can onlybe reachedwith an externalantenna Excessiveelectro magneticfields can occur in the vehiclefrom the operation of mobilephones and two wayradios withoutan externalantenna or with an externalantennathat is incorrectly installed or defective In this case malfunctio...

Страница 86: ... The distancesensor transmitsthe distancetravelledto the PCM navigationunit Thedistancesignal changes if the circumferenceof the tyre changes e g tyre change This modificationmust be calibrated by the PCMnavigationunit afterwards Switchon the PCMwith a free panoramic viewfor approx 20 minutes to load GPS almanac Driveon a motorwayif possible at a speedgreater than 60 km h for a distance of approx ...

Страница 87: ...motorway if possible at a speed greater than 60 km h for a distance of approx 50 km Calibrationof the distancemeasurement Procedure after the power supply has been in1terrupted Switch on the PCMwith a free panoramic viewfor approx 20 minutes to load GPS almanac Adjusting calibrating PCM navigation unit Printed in Germany 25 1999 9JL 16 911215 9869115 www WorkshopManuals co uk Purchased from www Wo...

Страница 88: ... remove thecowlpaneloverthewiperlink 3 Removethe left dome strut Undothe wiper link on the body 3 screws M6 and discon nectthe electrical plug connectionon the wipermotor L 2 3 1 l 4 96 2 Tightening torques xx ftlb M8 M6 17 Nm 12 5 10 Nm 7 4 Wiperarm nut Hexagon head bolts 3 Beforeinstallingthe domestrut the vehicle mustbe on its wheels 4 96 4 Carefullyremovethe wiper linkwith wiper motor to the f...

Страница 89: ...driver s side is straight Onthe passenger sside it is curved see illustration This arrangementappliesto left handdrive and right handdrivevehicles A B 0 B 143 96 A Clip for left handdrive vehicles B Clip for right handdrive vehicles 142 96 A Passenger s side B Driver s side Note The spoiler edge of the wiper bladeon the driver s side mustface downwards 92 3 92 27 19 Removing and installing the wip...

Страница 90: ...dspanner width acrossflats 21 mm Removethe link 3 Undothe fastening screwson the wiper motor 3 screws M6 andthe lowerfasteningscrew on the body Carefullyraise the wiper link and removethe wiper motor downwards 6 2 Connect the battery 3 Switchon the wiper motor and check the wiper position Tightening torques M6 M8 M6 8Nm 17 12 10 Nm Fastening screw motor Fastening nut link Hexagon head bolt 5 96 5 ...

Страница 91: ...adjustable Do not insert a pointed object needle into the nozzlebore The new spray nozzlesmust not be installed together with old spray nozzles A Old version adjustable B New version not adjustable 662_97 92 7 92 66 Non adjustable spray nozzles Printed in Germany 21 1998 986927 www WorkshopManuals co uk Purchased from www WorkshopManuals co uk ...

Страница 92: ...refullypull off the hosefor the windscreen washer system 5 Undofastening screws and swingthe holder inward 010_99 Installation 7 I tank or 3 I tank 1 Firstpush 7 I tank underthe wing at front then engageelectrical plug connectionof the pumps 009_99 2 Pushtank rearwardinto the holderand engagethe electrical plug connectionfor the fluid level indicator 6 Pulltank forward out of the holderand swivel ...

Страница 93: ...ghtcleaning system and carefullypush on the hose for the windscreenwasher system 5 Engagefiller neck and fill in water Perform a functiontest 6 Install wheel housing liner and mount the left front wheel tightening torque 130 Nm 96 ftlb 92 60 19 Removing and installing tank for windscreen washer system 986929 Printed in Germany 29 1999 92 10 www WorkshopManuals co uk Purchased from www WorkshopManu...

Страница 94: ...ehoseto the spraynozzlesat the tank and turn the pump outletto the rear 2 Installpumpand tank fill in water and perform a functiontest 3 Lift pump out of the rubber sleeve 012_99 4 Pullhose off the pump Note A stuck hose can be pulled off more easilyif it is heatedwith a hot airgun 92 11 92 56 19 Removing and installing pump for windscreen washer system Printed in Germany 29 1999 986929 www Worksh...

Страница 95: ...nozzlesat the tank and turn the pump outletto the rear 2 Installpump and tank fill in water and perform a functiontest 3 Remove spacer between the pumps and lift pump out of the rubber sleeve 011_99 4 Pullhoseoffthepump Note A stuck hose can be pulled off more easilyif it is heatedwith a hot airgun 92 13 92 78 19 Removing and installing pump for headlight washing system Printed in Germany 29 1999 ...

Страница 96: ...oval 1 Removetank for windscreenwashersystem refer to ServiceNo 92 60 19 2 Pullsensorfor fluid levelindicator out of the tank to the side 2 Installsensor and tank fill in water and perform a functiontest 016_99 92 15 92 67 19 Removing and installing fluid level indicator Printed in Germany 29 1999 986929 www WorkshopManuals co uk Purchased from www WorkshopManuals co uk ...

Страница 97: ...r 4 Separateplug incouplingandtake outthe spray nozzle 207_99 8 Loosenhoseclamp and pull hose off the spraynozzle L 206_99 5 Loosenhose clamp and pull hose off the spraynozzle Installation 1 Pushhose asfar as it will go onto the new spraynozzleandfasten the hoseclamp Note A stuck hose can be pulled off more easilyif it is heatedwith a hot airgun 2 Reinstallnew spraynozzlewith holderin the sameposi...

Страница 98: ...tand check position of the spray nozzlein the covertrim Remove the mainhead againand centre the spray nozzle if necessary 5 Installmainheadlight check it and perform a functiontest 92 18 92 72 19 Removing and installing spray nozzle for headlight washing system 986929 Printed in Germany 29 1999 www WorkshopManuals co uk Purchased from www WorkshopManuals co uk ...

Страница 99: ...r opening and closingtheheadlights 2 Wheninstalling pressheadlights firmlyinto thewing 3 Insertplugsafterinstallation Note Headlights mustnotbecovered witha front apronor foilwhenswitched on 94 1 94 15 19 Removing and installing headlights Printed in Germany 5 1996 986941 www WorkshopManuals co uk Purchased from www WorkshopManuals co uk ...

Страница 100: ...be made onlyin the eventof an accident repair or replacement of head lights Note The fasteningnuts of the adjustingcomponents are fitted at the factory as shownin Figure293 96 Adjustment instructions A 293 96 353 96 ItemA Thetransitionfrom the headlighthousingto the bodyis in the sameplane level 94 15 05 Headlights basic adjustment in the body Printed in Germany 1996 986941 94 3 www WorkshopManual...

Страница 101: ...sto thesameheightas theoldversionandsetup byhand Figureshowsmountingplate removed J M 294 96 354 96 2 Pressheadlight housing firmlyintothe body andlock 3 Thecorrectadjustment is described initems A C 4 Afteradjustment tightenthefastening nutsto 8 f 2 Nm 6 f 1 5ftlb Theheadlight washer nozzle canbeadjusted attheholder 94 15 05 Headlights basic adjustment in the body 986941 Printed in Germany 1996 9...

Страница 102: ...e figure Note For headlightadjusbnentpleasereferto Group0 Entirevehicle General RepairGroup03 Pages03 6 to 03 9 dl fg8 I gl t F3 355 96 Before installingthe headlighthousing ensure that the headlamp ventis pluggedonto the plug housing 94 5 94 15 05 Headlights basic adjustment in the body Printed in Germany 12 1997 986941 www WorkshopManuals co uk Purchased from www WorkshopManuals co uk ...

Страница 103: ...r 509 96 4 Disconnect electrical plugconnections 5 UndoM16 x 1 hexagonnut of the light switch 6 Pullthelightingunitswitchout ofthesidevent to the frontbyapprox 5 mm 508 96 3 Undothree 4 0 x 18 Torx screws of the left side ventand carefullypullthe side vent out of the dashboard OneTorx screwis locatedin the light switch on the right 9405 19 Removing and installing main light switch Printed in Germa...

Страница 104: ...tly in counter clockwise direction Tightening torqueofthe M16x 1 hexagon nut 3 5 Nm 2 5ftlb 2 Engage electrical plugconnections andinstall sidevent 3 Connect the batteryandperformafunction test 94 05 19 Removing and installing main light switch 986947 Printed in Germany 5 1996 9 8 www WorkshopManuals co uk Purchased from www WorkshopManuals co uk ...

Страница 105: ... button there are small openingsthat project beyondthe dashboard insert Inserttwo small screwdriversinto the openingsand pull off the button A toward the front 507 96 3 The hazardwarning light switch 8 is heldin the dashboardinsert bytwo lockinghooks Pressthe right locking hooktoward the switch grip the button holderwith a pair of pliers and pull outthe switch toward the front 94 47 19 Removing an...

Страница 106: ...exterior Boxster 94 15 13 Masking film for left right hand traffic 94 11 94 15 13 Masking film for left right hand traffic Printed in Germany 16 1997 9869411 www WorkshopManuals co uk Purchased from www WorkshopManuals co uk ...

Страница 107: ...in linewith the outer line on the right handheadlightlens refer to Figure454_97 PointsC and D on the inner line of the left handheadlightlens refer to Figure455_97 The maskingfilm with the points notch A and B in the figure mustbe affixed in linewith the outer line on the left handheadlightlens refer to Figure457_97 PointsC and 0 on the innerline of the right handheadlightlens refer to Figure456_9...

Страница 108: ...traffic Rightside Leftside 454_97 455_97 For right hand drive vehicles in countries with right hand traffic Rightside Leftside 456_97 457 97 94 15 13 Masking film for left right hand traffic Printed in Germany 16 1997 9869411 94 13 www WorkshopManuals co uk Purchased from www WorkshopManuals co uk ...

Страница 109: ... x 9 5D W3W Additional brakelight SV8 5 C5W Number plate light Installing bulbs Onlybulbs specified in the bulbtable maybe used Bulbswith a higherwattage maycause damageto the bulb housing To prevent shortcircuits theloadsin question mustbe switchedoffwhilebulbsarechanged Newbulbs must be cleanandfree of grease Therefore never touch bulbs with your bare hands Use a cloth or soft paper for changing...

Страница 110: ...installmainheadlight Performa function test of both bulbs A Dipped beam headlight B High beam headlight 098_98 1 Removeand installmain headlight referto ServiceNo 94 15 19 2 Openrear cover and disconnectthe electrical plug connectionof the defectivebulb 3 Pressdown retainingbracket arrow and swivelto the side Removedefectivebulb 94 23 19 Removing and installing halogen bulb Printed in Germany 20 1...

Страница 111: ...e parking light bulb socket arrow out of the headlight reflector do not pull on the wires 2 Closecoverandinstallmainheadlight Perform a function test Note The bulb H6W specifiedin the PartsCatalogue is to be installedfor Litronic headlights I I V 099_98 3 Removedefective bulbfrom the parking light bulb socket 94 19 94 27 19 Removing and installing bulb for parking light Printed in Germany 24 1998 ...

Страница 112: ...t housing clockwise andremove 2 Attach retainingbracketand engageelectrical plug connection 3 Disconnectelectrical connectionof defective bulb do not pull on the wires 3 Closecover and installmainheadlight Performa functiontest 4 Pressdown retainingbracket arrow and swiveldownwards Removedefectivebulb 100_98 94 21 94 67 19 Removing and installing bulb for fog light Printed in Germany 20 1998 98694...

Страница 113: ...orrectly seated bayonet lock 2 Turnbulbsocketcounter clockwise andremove fromthe headlight housing 2 Rotatebulb socket clockwiseand engage Installmain headlightand perform a function test 0 101_98 3 Takedefective bulboutofthebulbsocket bayonet lock 94 23 94 56 19 Removing and installing bulb for direction indicator light Printed in Germany 20 1998 9869415 www WorkshopManuals co uk Purchased from w...

Страница 114: ...the bulb socketand install bayonetlock 2 Engageelectricalplug connectionand install directionindicatorlight Inserttabs of direction indicator light arrowA forwardsinto the wing Engageretainingspring arrowB in the wing 2 Releaseand pull off electrical plug connection Turn bulb socket counter clockwise and remove bayonetlock 3 Removedefective bulb A lO 98 3 Perform a function test 94 53 19 Removing ...

Страница 115: ...kinglever A B 3 Performa functiontest of all bulbs E D c A Direction indicator light B Reversing light C Rear fog light D Taillight Brake light 103_98 1 Takeoutcarpetliningof taillight 2 Pushuplockingleverof taillight bracket andremovebulbholder 3 Take defective bulb out of the bulbholder bayonetlock 94 27 94 33 19 Removing and installing bulb for taillight Printed in Germany 20 1998 9869415 www W...

Страница 116: ...sof the contact springs 2 Pushthe rubber cover protects againstwater leakingin carefullyover the numberplate light andfasten 3 Performa functiontest 104_98 2 Pushback the rubber cover and remove defectivebulb from betweenthe contact springs 94 29 94 29 19 Removing and installing bulb for number plate light Printed in Germany 20 1998 9869415 www WorkshopManuals co uk Purchased from www WorkshopManu...

Страница 117: ...calplug connection 2 Secureadditionalbrake lightand perform a functiontest 2 Unscrewboth fastening screwsand removethe cover Disconnectelectrical plug connectionand disengageall fastening tabs of the bulb holder 3 Closeconvertible top or convertible top compartment lid 105_98 3 Removebulb holder andtake out defective bulb 94 70 19 Removing and installing bulb for additional brake light Printed in ...

Страница 118: ...r with control moduleand insert headlight housinginto the wing 2 Engagethe electrical plug connectionof the automatic headlightbeam adjustmentand lock the headlighthousinginto thewing Removal 1 Switchofflight Disengage headlight housing andpullforwards a little 2 Disconnectthe electrical plug connectionof the automatic headlightbeam adjustment ALWR take out headlighthousing 3 Carryout a functionch...

Страница 119: ...oduleto the cover and engageelectrical plug connection Removal 1 Switchofflight Disengage headlight housing andpullforwards a little 2 Lockcoverwithcontrolmodule andinsert headlight housing intothewing 2 Disconnectthe electrical plug connectionof the automatic headlightbeam adjustment ALWR take out headlighthousing 3 Engagethe electrical plug connectionof the automatic headlightbeam adjustmentand ...

Страница 120: ...id betweenthe headlight housingandthe ignitionunit Removal 1 Switch off light Disengage headlight housing andpullforwards a little 2 Disconnectthe electrical plug connectionof the automatic headlightbeam adjustment ALWR take out headlighthousing 2 Lock cover with control moduleand insert headlighthousinginto the wing 3 Engagethe electrical plug connectionofthe automatic headlightbeam adjustmentand...

Страница 121: ... reflector and in the installedheadlight 4 Removeignition unit 2 fasteningscrews 5 Pressdownunlockinglever with a screwdriver and pulldrive motor out towardsthe rear Removal 1 Switch off light Disengage headlight housing and pull forwards a little 2 Disconnectthe electrical plug connectionof the automatic headlightbeam adjustment ALWR take out headlighthousing 3 Releasecover with control moduleand...

Страница 122: ...Installignitionunit 2fastening screws 4 Lock cover with control moduleand insert headlighthousinginto the wing 5 Engagethe electrical plug connectionof the automatic headlightbeam adjustmentand lock the headlighthousinginto the wing 6 Carryouta functioncheckoftheheadlights 94 40 94 94 19 Removing installing drive motor for automatic headlight beam adjustment 9869433 Printed in Germany 24 1998 www ...

Страница 123: ... tourist setting Thegas dischargelamp 02S lamp should onlybe operated wheninstalledin the reflector and in the installedheadlight 0 Note The masking film for left right hand traffic should not be removed from litronic headlights In the headlight there is a changeover lever for driving in countries with left or right hand traffic The changeover lever is located on the left and right of the housing ...

Страница 124: ...ninstalledin the reflector and in the installedheadlight Note For a faulty dipped beam headlight the individual components gas discharge lamp ignition unit control module can be replaced from the second headlight Only the battery voltage can be checked with the headlight removed on the plug connection to Pin 9 56 b and Pin 4 31 according to the wiring diagram in the wing The gas discharge lamp sho...

Страница 125: ...glesensorfrom the retaining bracketand removeit Installation 1 Fastenanglesensor on the retainingbracket andinstall 419_98 3 Detach retainingbracketfor anglesensor fromthe sidememberunderneath 2 Engageelectricalplug connectionand pull rubber cover carefullyover the plug connection protects againstwater leakingin 3 Secureintermediatelink on rotary lever tighteningtorque 7 Nm 5 ftlb and installunder...

Страница 126: ...ts must be readjusted with a commercially available 5 mm ball head screwdriver Note For details of headlightadjustment refer to Group0 Entirevehicle General Repair Group03 Pages03 6 to 03 8 9 46 94 78 19 Removing linstalling angle sensor for automatic headlight beam adjustment 9869433 Printed in Germany 24 1998 www WorkshopManuals co uk Purchased from www WorkshopManuals co uk ...

Страница 127: ...ainstwater leakingin 2 Undo bothfasteningscrews on the bracket and removeangle sensor 3 Secure intermediate link on rotary lever tightening torque 7 Nm 5 ftlb 4 Once the angle sensor has been installed the control module must be recalibrated with the Porsche System Tester 2 After this the main headlights must be readjusted with a commercially available 5 mm ball head screwdriver r Note For details...

Страница 128: ...alibrated with the Porsche System Tester 2 After this the main headlights must be readjusted with a commercially available 5 mm ball head screwdriver Removal 1 Remove footwellbulkhead andrightairguide 2 Undocontrol modulefrom below 2 sheetmetalscrews Unlockthe electrical plug connectionand take out control module Note For details of headlightadjustment refer to Group0 Entirevehicle General Repair ...

Страница 129: ...g rockhousing canberemoved through the opening inthedashboard 4 Openthelockingbuttonwitha short cross headscrewdriver 1 4turncounter clockwise Pullthesignalconverteroutoftheholderto therear Thefigureshowsthesignalconverter without dashboard 529 96 I Installation 1 Closelockingbuttonofthesignalconverter housing 1 4turnclockwise 1 2 Engage electrical plugconnections andinstall sidevent 1 j 3 Connect...

Страница 130: ...96 2 Remove lockinghookholderandpulloff electri calplugconnections 2 Engage electrical plugconnections androute wirecarefully donotpinch 3 Unclippassenger compartment monitoring sen sor atthesideandremove fromthelocking hookholder Tightening torqueofthe M6 fastening screws 10 Nm 7 5ftlb 3 Thecoverlensesmustnotbesoiledor smudged withgrease Clipincoverlensesagain 96 3 96 85 19 Removing and installin...

Страница 131: ...ing and installing actuating element for lid release 1 Remove handle liner 2 Remove bracket withactuating elements 3 Undofastening screws Removing alarm siren and tilt sensor 1 Remove coverfor fluidreservoir aircondition ing 2 Pulloffconnector onthealarmsiren 3 Pulloffconnector onthetilt sensor 4 Undonut 71 643 1 96 i I l 642 1 96 96 5 96 Additional alarm system M 534 Printed in Germany 5 1996 986...

Страница 132: ...erated more than 256 times withoutreachingthe associatedreceiver e g vehicleoutside range or vehiclebattery dis connected the vehiclewill not recognisethe radio transmitter the nexttime it is operated If the number of operationsis less than 1024 it is possibleto perform re synchronisation as de scribed below 4 Energy saving mode active Inorderto keep breakdowns resulting froman emptybatteryto a mi...

Страница 133: ... to avoidtriggering the alarm the ve hicle keywith valid transpondermustbe turned in the steeringlock withinthe vehicle entering delayof 10 seconds Thisalso appliesif the vehiclewas parked unlockedfor longerthanfive days dueto the passivearming function automaticarming of the alarm system 30 secondsafter the ve hicle is left with the ignition key removed the central lockingsystem is not activatedi...

Страница 134: ...io remote control is not desired by the importer Singapore Brunei Lebanon SaudiArabia Dubai Chile Korea Hungary CzechRepublic Brazil Vehicles for thesecountries areequipped with two keygripswithlampsinsteadofwithradio keygrips 96 9 96 62 Vehicles with alarm system without radio remote control Printed in Germany 9 1997 986967 www WorkshopManuals co uk Purchased from www WorkshopManuals co uk ...

Страница 135: ...lybulbs specified in the bulbtable maybe used Bulbswith a higherwattage maycause damageto the bulbhousing To preventshort circuits the loads in question must be switched off while bulbsare changed Newbulbs must be clean andfree of grease Therefore never touch bulbs with your bare hands Usea cloth or soft paper for changingbulbs 96 11 96 22 Bulb table and installation instructions Printed in German...

Страница 136: ...ver arrow Installation 1 Insertnewbulbinthebulbsocketandinstall 2 Installdoor warning light in the door trim paneland perform a functiontest 106_98 2 Remove bulbsocketfromthedoorwarning lightandremovedefective bulb 96 13 96 16 19 Removing and installing bulb for door warning light Printed in Germany 20 1998 9869611 www WorkshopManuals co uk Purchased from www WorkshopManuals co uk ...

Страница 137: ...screwdriver arrow Installation 1 Insert newbulb in the holes of the contact springs 2 Install luggage compartment light in the trim panel and perform a function test 107_98 2 Removedefective bulbfrom between the contact springs 96 41 19 Removing and installing bulb for luggage compartment light Printed in Germany 20 1998 9869611 96 15 www WorkshopManuals co uk Purchased from www WorkshopManuals co...

Страница 138: ...driver arrow Installation 1 Insertnewbulb in the bulb socketand install bayonetlock 2 Installinterior light in the lockinghook holder and perform a functiontest 108_98 2 Disengagethe bulb socket bayonetlock and removedefective bulb 96 22 19 Removing and installing bulb for interior light Printed in Germany 20 1998 9869611 96 17 www WorkshopManuals co uk Purchased from www WorkshopManuals co uk ...

Страница 139: ...uster open Disassembleand assembleinstrument cluster refer to ServiceNo 90 25 37 1 Removeand install instrumentcluster refer to ServiceNo 90 25 19 2 Detachbulb socket usinga small screwdriver bayonetlock 0 0 Q 0 343_98 Installation 1 Installnewbulb bayonet lock 109_98 2 Installinstrument clusterandperform afunction test 3 Remove defective bulb Thebulbsocket andbulbcompriseonesparepart 96 30 19 Rem...

Страница 140: ...additionalhand held transmitterfor the transponder Ifthe key is stolenor the hand held transmit ter is faulty all keysstill in the customer s possessionwill be required a Teachingan additionalhand held transmitter Note Duringmaintenancework pleasebear in mind that the transmissionfrequencyof the hand held transmitter is differentaccordingto the country of use Thecorrespondingreceptionfrequency is ...

Страница 141: ...sponder code of the vehicle key that is presently insertedin the ignitionlock Comparethis transpondercode with the transpondercodes at positions1 to 4 Thiscomparisonallows the position of the lost hand held transmitter transpondercode to be identified as one transpondercode is ultimatelyleft over at positions1 to 4 Insertthe vehiclekey equippedwith the newhand held transmitter into the ignitionloc...

Страница 142: ...i fied positionusingthe arrow keys 1 and v then deletethe radiocode with key F3 Then pressthe F8 key 13 Carefullyinputthe 24 digit code numberwith the arrow keys 1 or v and pressthe double arrow key 14 Thefollowingmessageappearson the screen Pleaseconfirminput Checkthe inputand pressthe F7 key 15 Nowthe hand held transmitter istaught Go back to the menuitem Learningfunction removethe keyand switch...

Страница 143: ... controls and transpondercoils are correct and functional 5 SelectLearningfunctionsfrom the selection list and pressthe double arrow key 6 Selectmenuitem Readout remote control and pressthe double arrow key Information Whenthe remote control is read out and transferred onlythe remote control data are read out and transferred Thetranspondercoil of the individualkeys must be adaptedto the control mo...

Страница 144: ...m Learningfunctionswith the arrow key v and pressthe double arrow key 17 Thefollowingmessageappearson the screen Pleaseconfirm inpuf Checkthe input keylearningcode and press the key F7 12 The menuitem Immobilizeris already selected Pressthe double arrow key L 18 Thefollowingmessageappearson the screen Remotecontrols were transferred Caution The immobilizer code can be input only once An incorrect ...

Страница 145: ...nsand pressthe F8 key the locationwill be allocatedthe associated transpondercode 23 Withdrawthe key and repeatSteps 19 to 22 for the remainingkeys All remote controls have nowbeentransferred from the old control moduleto the newcontrol module and the transpondersadaptedto the newcontrol module Checkhandheldtransmitter for operation lock and unlockthe vehicle Checkfunctioning of all transpondercoi...

Страница 146: ...he bottom part 1 In order to removethe keyfrom the bottom part the compressionspring in the sliding latch is compressedand heldwith a small screwdriver 3 Insertthe cap from aboveand relievethe compressionspring 4 Press the top and bottom parts of the hand held transmitter together firmly 2 Lift outthe cap and relievethe compression spring Q c 96620001 3 Pushthe sliding latch back and pullthe key o...

Отзывы: