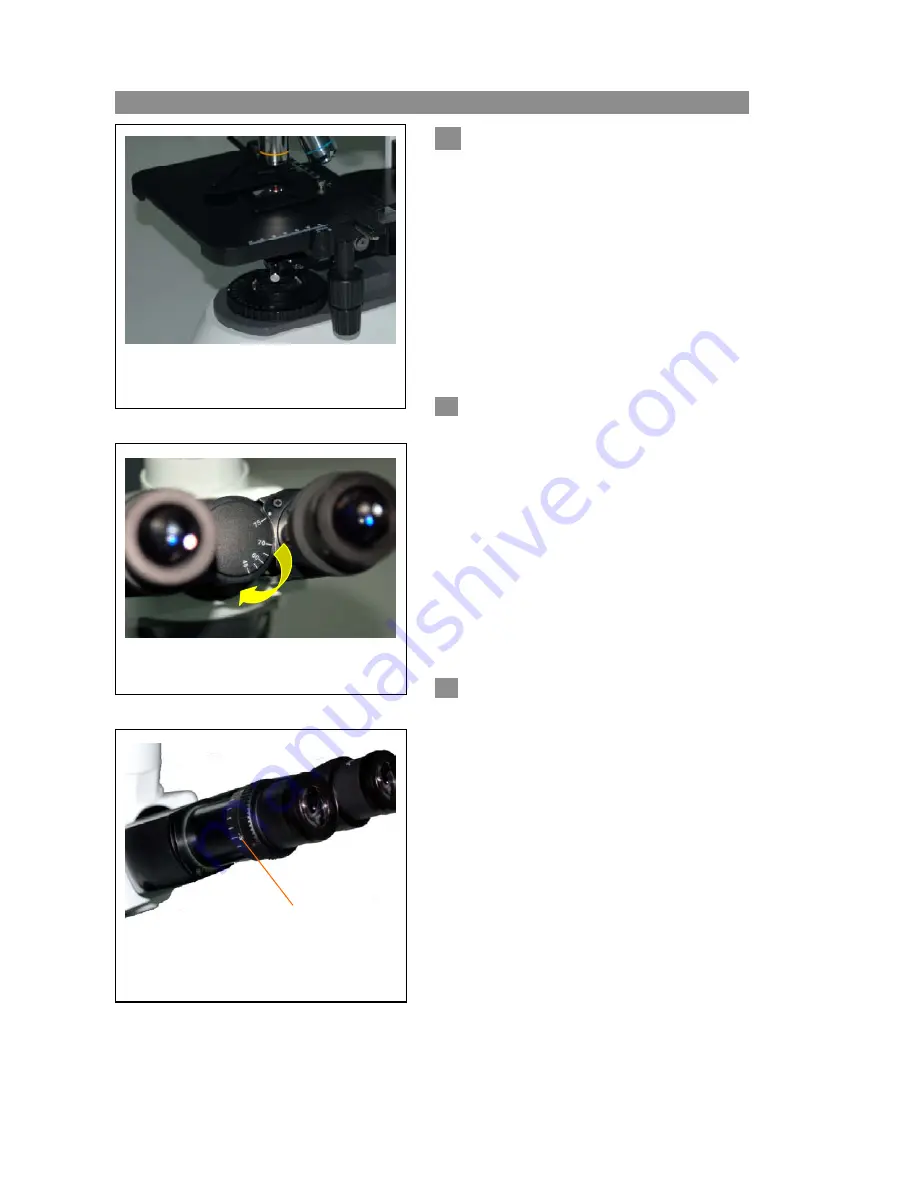
PolySciences 3025 series Скачать руководство пользователя страница 16

                                                                                                                        3025


      12 


Figure 18 

4

44

4-

--

-4

44


Placement of Specimen

 (Fig. 18)


Place  the  slide  on  the  mechanical  stage.  Use  the  slide 

holder to  gently secure the slide.

  Turn the X and/or Y 

stage  movement  adjustment  knobs  to  position  the 
specimen. 


Use  caution  when  changing  objectives.  Do  not 

allow an objective to touch a specimen slide. Doing so 

may damage the objective and specimen. 

4-5 Adjusting the Interpupillary Distance 

  (Figure 19) 


The interpupillary distance range: 48mm

75mm.   

    While  observing  with  two  eyes,  hold  the  left  and  right 

eyetubes.  Rotate  the  eyetubes  around  the  central  axis. 

Adjust the interpupillary  distance  until the left and right 

fields of view coincide completely with one image. 


4-6 Adjusting the Diopter (Figure 20) 

1.    Using the 10x objective and your right eye 

only, observe your specimen through the right 
eyepiece only and bring it into focus. 

2.    Then  observe  the  specimen  with  your  left  eye 

only through the left eyepiece. If the specimen 
is not in focus, rotate the diopter collar (Fig.20) 
until a sharp image is obtained. 

    The diopter range is ±5   


Figure 19 


Figure 20 


Diopter Collar 

12

Содержание 3025 series

Страница 1: ...wan 10595 886 2 8712 0600 886 2 8712 2677 fax info polysciences tw Polysciences Inc 400 Valley Road Warrington PA 18976 800 523 2575 215 343 6484 800 343 3291 215 343 0214 fax info polysciences com ww...

Страница 2: ...y notes i Care and Maintenance ii 1 Components Illustration 1 2 Installation of Components 4 2 1 Installation Diagram 4 2 2 Installation Procedures 5 3 Operation 11 4 Technical Specifications 15 5 Tro...

Страница 3: ...and wipe up the spillage Otherwise the instrument may be damaged 5 CAUTION the lamp lamp housing and adjacent parts will become very hot Do not touch these parts until they have completely cooled Nev...

Страница 4: ......

Страница 5: ...1 COMPONENTS ILLUSTRATION...

Страница 6: ...2...

Страница 7: ...Microscope Body Lamp House Mechanical Stage Mounting Assembly 10 Wide Field Eyepiece Infinity Plan Objectives Trinocular Viewing Head Video Port optional 3...

Страница 8: ...Figure 2 2 2 Assembly 3025 4 Guide Board Figure 3 Locking Block and Bolt Figure 1 4...

Страница 9: ...ench to connect the mechanical stage mounting support assembly and the guide board Ensure the connection is tight and secure 2 Place the mechanical stage mechanical assembly Figure 2 onto the top of t...

Страница 10: ...g the Lamp Figure 6 Halogen Lamp 6 Volt 30 Watt Do not use a lamp of a different voltage or wattage 1 Turn the power switch to the off position and remove the power cord 2 Allow the lamp house and bul...

Страница 11: ...l the lowest magnification objective into the nosepiece Fig 9 Then in a clock wise direction rotate the nosepiece and install the objectives in succeeding higher magnification sequence Fig 10 Inspect...

Страница 12: ...ive caps from the eyepiece tubes Insert the eyepieces into the eyepiece tubes Fig 11 2 2 7Installing the Video Port optional Remove the protective cap from the vertical tube of the viewing head Insert...

Страница 13: ...Upper Stage Limit Control Fine Focus Knob Coarse Focus Knob Field Diaphragm Condenser Adjustment Knob 9...

Страница 14: ...ng Out Condenser with Iris Diaphragm Tension Control Collar Y Stage Movement Adjustment Knob X Stage Movement Adjustment Knob Interpupillary Distance Indicator Variable Light Intensity Adjustment Dial...

Страница 15: ...able intensity dial Use of the lamp at a lower intensity will prolong its life 4 3Adjusting Tension Adjustment Collar Figure 17 The tightness of the tension adjustment collar is factory adjusted If th...

Страница 16: ...tance range 48mm 75mm While observing with two eyes hold the left and right eyetubes Rotate the eyetubes around the central axis Adjust the interpupillary distance until the left and right fields of v...

Страница 17: ...ve in position raise the mechanical stage slowly using the coarse focusing knob until the specimen is in focus Then rotate the fine focus until a sharp image is obtained Do not allow the objective to...

Страница 18: ...14...

Страница 19: ...ut condenser N A 0 9 Configuration Table Viewing Head Compensation Free Trinocular Head Eyepiece Extra Wide Field Eyepieces EW10x 22 Objectives Infinite Plan objectives 4x 10x 40x 100x Oil Infinite Pl...

Страница 20: ...16...

Страница 21: ...pside down Turn the slide over so the high power objectives cover glass faces up Cover glass is to thick Use a 0 17mm cover glass High power objective contacts Slide upside down Turn the slide over so...

Страница 22: ...Dual Observation 1 unit Order online anytime at www polysciences com Polysciences Europe GmbH Handelsstrasse 3 D 69214 Eppelheim Germany 49 6221 765767 49 6221 764620 fax info polysciences de Asia Pa...

Отзывы: