background image


INSTALLATION 


- Please read the safety instructions in this manual completely before installation. 
- Install your TV in an area where direct sunlight will not fall upon the screen.   
- Soft, indirect light is best for television viewing. 
- Allow enough space (at least 4 in.) between the TV and any walls or enclosures for proper ventilation. 
- Optimum television viewing distance is 3-5 times the screen's size. 
   

Auto-Degaussing 

Color television can be easily affected by magnetism, which shows as color distortion on the screen. If your TV is affected 
by nearby magnetic components or appliances, turn it off for a few minutes. The built-in auto-degaussing circuit will 
eliminate the magnetic interference. 


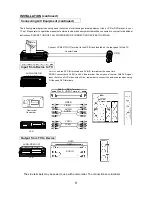
 Connecting the Antenna  


Notes: 

1. It is recommended that a 75 ohm coaxial cable be used in order to 

    eliminate interference and noise which may occur due to nearby radio transmissions.   

2. The antenna cable should not be tied together with other wiring. 

3. Set up a lightning rod and check it regularly when an outdoor antenna is used.   


  Installing the Remote Control Batteries   


1. Remove the battery compartment lid. 

2. Insert two AAA batteries (included). Make sure the positive (+) and negative (-) polarities are correctly aligned. 

3. Reattach the battery lid. 


Notes: 

  1. Alkaline batteries are recommended for longer life.   

  2. Always replace both batteries at the same time.   

  3. Do not expose batteries to fire or break them open. 

  4. To avoid battery leakage, remove batteries from the remote control when it is not being used for a long period of time. 

5. If the remote control can’t control the TV properly after new batteries installed, remove the batteries from the remote 

control and hold down the F key for over 5 seconds. Insert the batteries and try again. 

VHF 

UHF 

or Cable 

VHF 

UHF 

75-ohm coaxial cable (not supplied) 

300-ohm twin-lead cable (not supplied) 

Antenna adapter 
(not supplied) 

U/V mixer 
(not supplied) 

RF Input   
(back of TV unit) 

Содержание TTM-2901L

Страница 1: ...29 Pure Flat Tube Stereo Television TTM 2901L 20060630 ...

Страница 2: ... TV Installer This reminder is provided to call your attention to Article 820 40 of the National Electrical Code Section 54 of the Canadian Electrical Code Part 1 which provides guidelines for proper grounding and in particular specifies that the cable ground shall be connected to the grounding system of the building as close to the point of cable entry as practical Customer Record You will find t...

Страница 3: ...n serious injury or death from electrical shock and may increase the risk of fire IMPORTANT STAND AND BASE SAFETY INFORMATION Choose the location for your TV carefully Place the TV on a stand or base that is of adequate size and strength to prevent the TV from being accidentally tipped over pushed off or pulled off This could cause personal injury and or damage the TV Refer to the Important Safety...

Страница 4: ...Remote Control Features 12 ADDITIONAL FEATURES Programming the Remote Control 14 TROUBLESHOOTING GUIDE 15 SPECIFICATIONS MODEL TTM 2901L Television System NTSC M Channel Coverage VHF 2 13 UHF 14 69 Cable TV Coverage Mid Band A 8 A 1 A I Super Band J W Hyper Band AA ZZ AAA BBB Ultra Band 65 94 100 125 Channels Preset 181 Antenna Input 75 ohm unbalanced Screen Dimensions 21 26x 15 94 in 540x405 mm A...

Страница 5: ...mal Movie and Sports Selectable Sound Modes preset standards for TV sound User Normal Speech Music and Movie Trilingual On Screen Display OSD TV s on screen display can be either English French or Spanish MTS Stereo Video Stereo stereo sound for superior TV viewing experience Favorite Channel used to set favorite channels Channel Label used to label channels Full used to switch the TV between Wide...

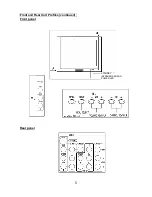
Страница 6: ...5 Front and Rear Unit Profiles continued Front panel Rear panel STANDBY INFRARED SENSOR POWER LED ...

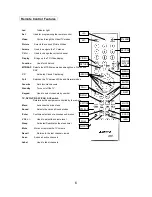
Страница 7: ...e Sets favorite channels Standby Turns on off the TV Keypad Used to select channels by number TV DVD VCR SAT CAB AUX switch Determines the equipment controlled by the remote Menu Accesses the main menu Sound Selects the various Sound modes Enter Confirms selections or accesses sub menus VOL Used to adjust the volume level Sleep Activates Deactivates the sleep timer Mute Mutes or restores the TV vo...

Страница 8: ...arby radio transmissions 2 The antenna cable should not be tied together with other wiring 3 Set up a lightning rod and check it regularly when an outdoor antenna is used Installing the Remote Control Batteries 1 Remove the battery compartment lid 2 Insert two AAA batteries included Make sure the positive and negative polarities are correctly aligned 3 Reattach the battery lid Notes 1 Alkaline bat...

Страница 9: ...cal Connect VCR s RF OUT terminal to the RF IN jack located on the rear panel of the TV Coaxial Cable DO NOT use the DVD IN terminals and AV IN 3 terminals at the same time DO NOT connect both AV IN 1 and S Video terminal Use only one of the two With DVD signal input there is no DVD video output Also remember to connect the audio cables when using S Video and DVD terminals DVD Player Camcorder VCR...

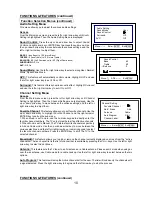
Страница 10: ...l Navigation of the menu be done with the arrows and ENTER keys on the remote and CH and VOL keys on the top panel Exit with the MENU key Video Setting Menu This menu allows you to adjust the various picture settings Access From the Main menu screen press the left or right arrow key until Video Setting is highlighted Then the Video Setting menu is displayed Picture Control Press the up or down arr...

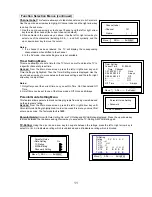
Страница 11: ...or down arrow key to highlight Favorite Channel and the right arrow or ENTER key to call up the sub menu 1 When Mode is set to Auto use the numeric keypad to directly enter the favorite channel numbers The TV only stores the last five effective channels 2 When Mode is set to Manual The TV stores favorite channels respectively in Air and Cable mode Use the up or down arrow key to move between the v...

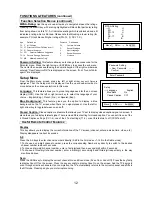
Страница 12: ...et the current time can you set On Time On Channel and Off Time 2 On off time can be set to one of the three modes Off Once and Always Parental Guide Setting Menu This feature allows parents to block certain programs from being viewed based on the programs rating Access From the Main menu screen press the left or right arrow key until Parental Guide Setting is highlighted In order to access this m...

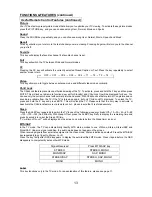
Страница 13: ...oggle between on and off Closed Caption Closed caption is a feature that allows your TV set to display closed caption signal on screen It also allows you to display teletext signal There is nine different setting for closed caption You can set it to one of the 4 Closed Caption settings CC1 4 one of the 4 Text settings T1 4 or set this feature to off CCD Text off Useful Remote Control Features Disp...

Страница 14: ...ock set before turn off no picture and no sound are available from the TV if the TV is turned on again but only Child Lock On displayed To unlock the TV press and hold the F key and press MUTE This will unlock the TV Please note that the only way to activate or deactivate the Child lock feature is via remote control please insure that it is stored securely Sleep Press the SLEEP key repeatedly to s...

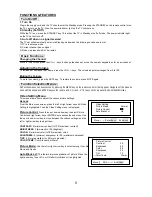
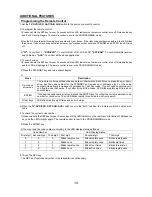
Страница 15: ...r the STANDBY key increases or decreases by 1 or the code number automatically increases or decreases by 1 per 3 seconds Try each code separately until you find the one that works If not after trying all the codes LED blinks rapidly eight times and search stops ENTER If the desired code number is found press the ENTER key to confirm the current searched code number for your device Then LED blinks ...

Страница 16: ...ain Unplug the antenna connection from the back of the TV unplug the TV from the wall wait 30 seconds then try again Stripe or purple interfe rence appears in the screen Verify the speakers around the TV set are shielded Picture becomes snowy Verify the antenna lead wire is in working condition Verify the antenna is connected securely to the RF in jack Picture with multi image Move the antenna aro...

Страница 17: ...16 ...

Отзывы: