background image

36

Polaroid t1234 Digital Camera User Guide

www.polaroid.com

37

Polaroid t1234 Digital Camera User Guide
www.polaroid.com

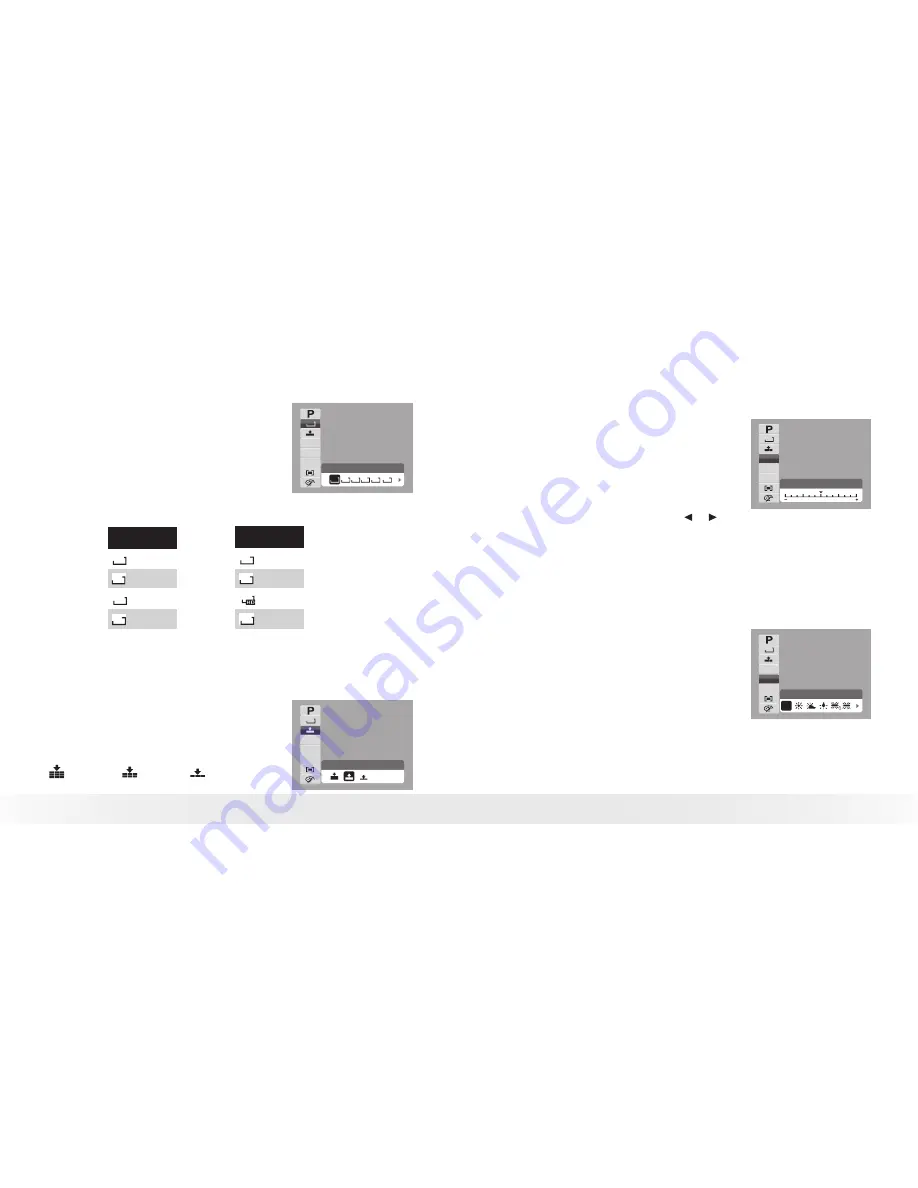
Resolution

The Resolution function is used to set the 
resolution  before  you  capture  the  image. 
Changing the resolution affects the number 
of  images  that  can  be  stored  in  your 
memory  card.  The  higher  the  resolution, 
the more memory space is required.

N

AWB

ISO

AUTO

0.0EV

5M

3:2 8M

16:9


12M


12M


4000x3000

   3M

The table below shows the resolution values for still images.

Icon

Pixel Size

Print Size

Suggestion

4000 x 3000 A2 Size

4000 x 2672 A2 Size

3672 x 2064 HDTV

3264 x 2448 A3 Size

12M

3:2

16:9

8M

Icon

Pixel Size

Print Size

Suggestion

2595 x 1944  A4 Size

2048 x 1536 4” x 6”

1920 x 1080 HDTV

640 x 480

E-mail

5M

3M

16:9

VGA

Quality

The  Quality  function  lets  you  adjust  the 

quality settings of your photos before you 

capture  them.  The  quality  determines  the 

amount  of  compression  applied  to  your 

photos. More compression results in a more 

detailed  image.  However,  the  higher  the 

quality, the more memory space is required 

in your memory card. The available settings 

for still images are as follows:
 

Super fine, 

 Fine, and 

 Normal.

Fine

N

AWB

ISO

AUTO

0.0EV

 12M

EV Compensation

EV stands for Exposure Value. In difficult 

lighting  conditions,  sometimes  the  auto 

exposure function of your camera may not 

be  right  for  the  scene  you  are  capturing. 

The EV Compensation function allows you 

to adjust the exposure value and correctly 

expose  your  images.  Available  for  still 

images only.

0.0EV

N

AWB

ISO

AUTO

0.0EV

 12M

•  To adjust EV settings, press the   or   keys to increase/ decrease the 

value. As you adjust the settings, the LCD display changes the image 

by applying the EV settings. Press the 

OK

 button to save and apply 

changes.

•  The available settings are” 0EV(Default), -2.0, -1.7, -1.3, -1.0, -0.7, 

-0.3, +0.3, +0.7, +1.0, +1.3, +1.7 & 2.0 EV

White Balance

The  White  Balance  function  allows  you  to 

adjust  the  camera  setting  according  to  the   

light in your scene when recording still images 

and movies.

•  As  you  move  through  the  selection,  you 

can see the preview on the LCD display.

Auto

N

AWB

ISO

AUTO

0.0EV

AWB

 12M

2

Содержание T1234 - Digital Camera - Compact

Страница 1: ...s Manual Questions Need Some Help This manual should help you understand your new product or visit www polaroid com support If you still have questions call our help line found on the insert with this...

Страница 2: ...ing the AF Area 47 Setting the AF Lamp 47 Setting Sharpness 48 Setting Saturation 48 Setting Contrast 49 Setting the Digital Zoom 49 Setting the Date Stamp 50 Setting Auto Review 51 Recording Movies 5...

Страница 3: ...POF 73 PictBridge 75 7 Using the Setup Menu 76 Setting Sounds 77 Setting Power Save 78 Setting Date Time 78 Setting Language 79 Setting File Numbering 79 Setting TV Out 79 Setting LCD Brightness 80 Se...

Страница 4: ...Increase the distance between the equipment and the receiver Connect the equipment to an outlet on a circuit different from that to which the receiver is connected Consult the dealer or an experience...

Страница 5: ...Call our toll free customer service number Look for the insert with this icon Or visit www polaroid com 2 Introduction Thank you for selecting the new Polaroid t1234 digital camera for your imaging n...

Страница 6: ...ge compatibility Slideshow feature to review your pictures and movies A V output to view your pictures and movies on your TV USB port to transfer photos and movies to your PC Need help with your digit...

Страница 7: ...6 3 18 9mm F 3 1 5 6 Flash Self timer LED AF Assist Lamp Zoom Lens Microphone Back View Zoom buttons Play button OK button 4 way navigation control LCD screen Menu button SCN Delete button scn m Top...

Страница 8: ...tions of these buttons are as follows OK button Flash Right button Down button UP button Macro Left button Button Usage OK 1 Confirm a selection when using the OSD menus 2 In Record and Playback mode...

Страница 9: ...tdown is set between 3 to 10 seconds Operation Sound Your camera is equipped with a buzzer for user feedback Buzzer Camera Status Two beeps Denotes the start of an operation like recording and printin...

Страница 10: ...before inserting removing batteries 1 Open the battery SD card door at the bottom of the camera 2 Insert the battery into the compartment with the terminal facing inside the camera and the battery ind...

Страница 11: ...Off section There are two ways to turn on the camera Press the Power button The start up image displays briefly and the startup sound plays if enabled The zoom lens extends and the camera is turned o...

Страница 12: ...edit captured images and playback videos and audio clips You can also attach voice memo to images in this mode When you turn on your camera using the Power button the camera is automatically set to t...

Страница 13: ...e remaining shots available 6 Battery Indicates battery level 7 Storage media Indicates current storage media in use 8 Date stamp Indicates date stamp is enabled 9 Image Stabilizer Indicates image sta...

Страница 14: ...e button to press on the camera to play a movie or audio file 9 DPOF Indicates the file is marked for printing 10 Resolution Displays the resolution settings Playback mode of videos 6 09 2008 1 57 6 0...

Страница 15: ...e file 7 Button intro Indicates the button to press on the camera to play a movie or audio file 8 Played time Indicates played time 9 Key indicator Indicates the buttons to press on the camera to appl...

Страница 16: ...now ready to take your photos Taking photos with your camera is very simple 1 Turn on the camera by pressing the Power button 2 Frame you shot using the focus bracket on the LCD display See illustrat...

Страница 17: ...nd up to 5x of digital zoom 1 Press the Zoom buttons to zoom in or zoom out an image 2 The zoom indicator appears on the LCD onitor Press to zoom in Press to zoom out Zoom buttons To adjust the zoom 1...

Страница 18: ...is displayed on the LCD display 307 307 12M macro enabled Using the SCN Menu The Function Menu is used to adjust capture settings in the Record Mode It contains My Mode Resolution Quality EV Compensat...

Страница 19: ...sults in a more detailed image However the higher the quality the more memory space is required in your memory card The available settings for still images are as follows Super fine Fine and Normal Fi...

Страница 20: ...ill images or movies As you move through the selection you can see the preview on the LCD screen Multi N AWB ISO AUTO 0 0EV 12M Icon Item Description Multi The camera measures the exposure readings fr...

Страница 21: ...mode See Switching between the Record mode and Playback Modes on page 23 Record Mode Drive Mode AEB AF Area AF Lamp Sharpness OFF OFF 2 Press m to launch the Record Menu 3 Use the or keys to move thro...

Страница 22: ...ds This feature is used to capture still images of moving kids Night Scene This feature is used to capture images with night scenery background Fireworks This feature slows shutter speed to capture fi...

Страница 23: ...ing scenery Use photo stitch to combine your scenic pictures to make one picture or combine different images into one Enter to the scene mode use the navigation controls to select Photo Stitch item an...

Страница 24: ...n to save and apply changes Record Mode Drive Mode AEB AF Area AF Lamp Sharpness OFF OFF On Off OFF Setting the AF Area AF stands for Automatic Focus This feature determines the area on which the came...

Страница 25: ...Menu select Saturation 2 Use the or keys to go through the selection 3 Press the OK button to save and apply changes Saturation Contrast Digital Zoom Date Stamp Auto Review OFF OFF High Normal Low Th...

Страница 26: ...e Stamp functions are as follows Available for still images only May slowdown AEB continuous shooting when Date Stamp is enabled in AEB Burst mode If Date Stamp is enabled digital zoom is automaticall...

Страница 27: ...AWB 640 640 320 16 9 HDTV Icon Frame Size Image Quality 848 x 480 HDTV 640 X 480 High Quality 320 x 240 Default Normal 640 x 480 For YouTube To set other movie mode settings please refer to Using the...

Страница 28: ...com 6 Playback View images videos and audio clips through your camera s Playback mode Viewing in Single Navigation The Single navigation mode displays the images one by one on the LCD display To view...

Страница 29: ...cord Indicates a voice recording file File Error Indicates an error file Zooming images The zoom view function works with still images only In normal view press the button repeatedly until the desired...

Страница 30: ...e key to stop the playback The LCD monitor displays the image in Single navigation mode Playing Voice Memo Voice memo is separately recorded and attached to a captured image See Voice Memo on page 67...

Страница 31: ...ton Slide Show Delete Protect Red eye Correction Voice Memo Photo Edit 5 Change the submenu settings using the 4 way navigation control 6 Press the OK button to save and apply settings Slideshow The S...

Страница 32: ...on the LCD display select Delete Delete Cancel 4 Press the OK button to delete 5 The next image is shown on the LCD display To delete another file use the or to scroll through the images videos audio...

Страница 33: ...ock Exit 3 When the desired file is shown on the LCD display select Lock Unlock 4 Press the OK button to protect unprotect the file and go back to Playback mode To protect unprotect multiple files 1 S...

Страница 34: ...Red eye correction a menu selection appears Select whether to Overwrite Save and replace the old file with the new one Save As Save the new file as a new one Cancel Cancel red eye correction 8 Press...

Страница 35: ...Description N Normal No effect is added to the image S Sepia Image is saved with a sepia tone BW B W Image is saved in black and white Neg Negative Image appears to be the opposite of the original ima...

Страница 36: ...n function NOTE Each time you press the OK button to rotate image the image is rotated at 90 clockwise Trim The Trim function allows you to trim an image to another image size This function is only av...

Страница 37: ...the new file as a newone Cancel Cancel resize 7 Press the OK button to save cancel changes NOTE Resize function is not available for photos with image size set to VGA Startup Image The Startup Image...

Страница 38: ...lect All on the DPOF submenu 2 Specify number of copies Use the or number keys to increase decrease 3 Press the Func button to toggle between turning on off the date stamp 00 00 Copies DPOF Date stamp...

Страница 39: ...ation control 6 Press the OK button to save and apply settings Need help with your digital camera Call our toll free customer service number Look for the insert with this icon Or visit www polaroid co...

Страница 40: ...K 2 Press the OK button to apply changes Setting Language The Language menu allows you to choose the language of the on screen display OSD menu Language English Deutsch Fran ais Espa ol Italiano Neder...

Страница 41: ...tware onto a Computer Software Included with Your Camera The t1031 software CD contains the following software Polaroid Digital Camera Driver Driver is ready for Windows 98se Users only Your computer...

Страница 42: ...tions open on your computer 2 Insert the camera CD into your computer CD ROM drive 3 The CD User Interface screen will automatically launch If the setup screen does not appear after loading the CD you...

Страница 43: ...e operation system for your computer is Windows 98se please install the t1234 camera driver from the supplied CD first Connecting the Camera a PC You can transfer photos videos and audio files to your...

Страница 44: ...ode are saved in this folder Folder names begin with a 3 digit number from 100 to 999 and followed by DICAM or _AUCT or _UTUBE Each folder holds up to 9999 files If new files are saved a new folder na...

Страница 45: ...he write protect switch to its unlock position LCD screen displays Copy error The memory card is protected Remove the card and slide the write protect switch to its unlock position The memory card is...

Страница 46: ...ght Night Portrait Soft Skin Soft Flowing Water Food Buliding Text Auction Smile Capture Blink Detection Sensitivity Auto 50 100 200 400 800 1600 3200 6400 White Balance Auto Manual 6 modes in manual...

Страница 47: ...p OFF Auto Review On Active D Lighting Off Photo Frame Off Video Mode Video Resolution 640 x 480 Metering Multi White Balance for Video Clips Auto Setup Mode Capture mode Still Image Auto Review ON Po...

Страница 48: ...US 0708 Part No OMT1234US001...

Отзывы: