background image

40

Polaroid Digital Camera User Guide

www.polaroid.com

41

Polaroid Digital Camera User Guide
www.polaroid.com

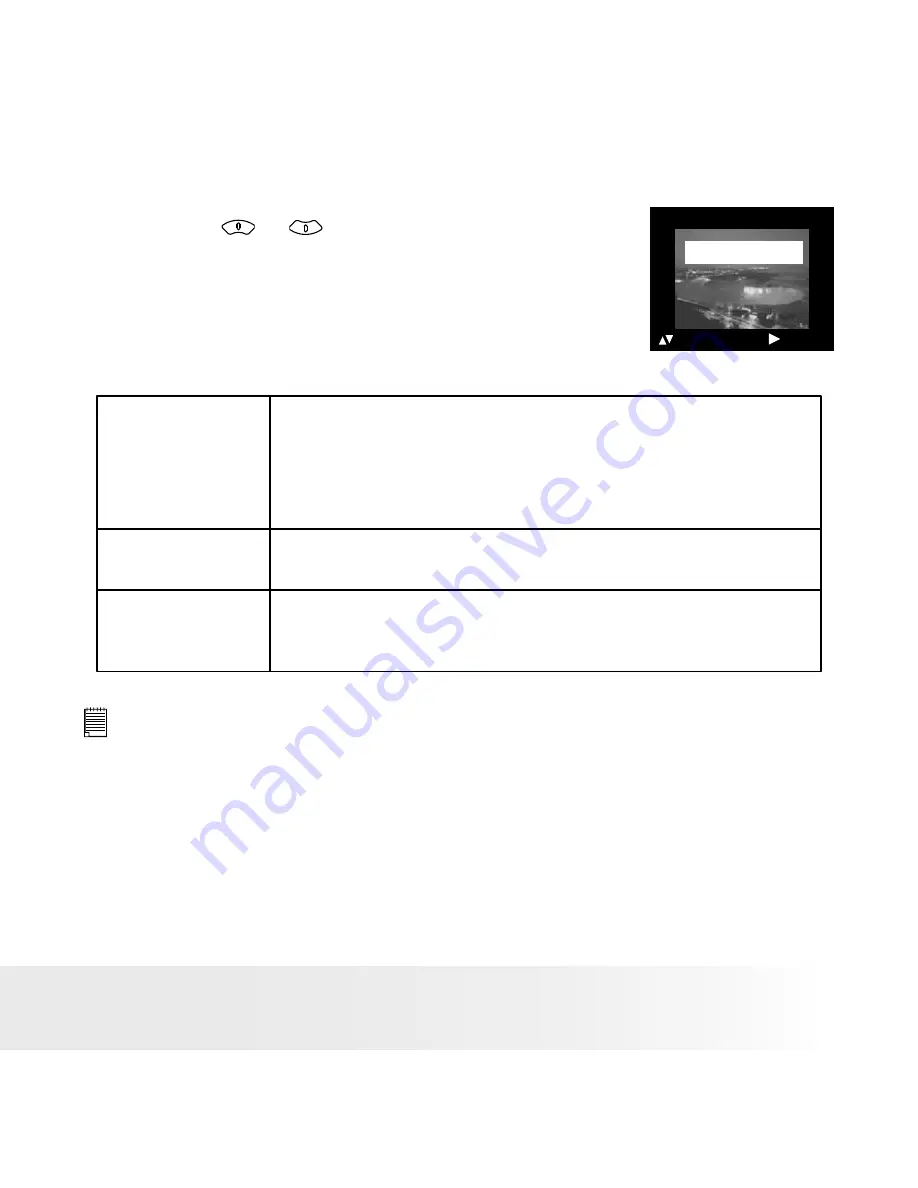
Selecting Print Settings

1.  Press the 

 or 

 button to select the print 

mode. 

PICTBRIDGE

THIS IMAGE

ALL IMAGES
ALL INDEX

:  SET

2.  The following options are available. 

ALL IMAGES

THIS IMAGE

Print the selected image in the camera’s internal 

memory or a memory card according to specified 

settings. 

Print all images in the camera’s internal memory or 

a memory card according to the specified settings. 

ALL INDEX

All images in the camera’s internal memory or 

a memory card are given an index and printed 

according to the specified settings. 

   NOTE:

• To print a single image, select the image before enabling PictBridge. 

• Print settings are configured for images only. Make sure there are no video 

clips or other file besides images in the memory before printing, otherwise, 

an error will occur if trying to print using the “ALL IMAGES” or “ALL INDEX” 

option. 

• Not all printers will support all these print options. Please refer to the printer 

user guide for options available. 

Содержание A520 - Digital Camera - Compact

Страница 1: ...www polaroid com 5 0 Megapixels Digital Camera User Guide...

Страница 2: ...5 Lens 6 Microphone P O L A R OID DIGITAL CA M E R A Front View 7 Zoom in button 8 Zoom out Thumbnail button 9 Power LED 10 Flash LED 11 LCD Screen 12 Left button 13 Menu button 14 Wrist strap holder...

Страница 3: ...3 Polaroid Digital Camera User Guide www polaroid com 21 Tripod mount 22 USB port 23 Battery SD card door Bottom View...

Страница 4: ...e Menus 14 Setup Menu 15 Formatting the Internal Memory Or SD Card 16 Setting the Current Date and Time 17 Auto Power Save Setting 18 Setting the Beep Sound On Off 19 Setting Frequency 19 Setting Disp...

Страница 5: ...Deleting Picture s or Video Clip s 37 6 Print Settings 38 About PictBridge 38 DPOF Digital Print Order Format 45 7 Using the SD Secure Digital Card 48 Using the SD Card 48 To Copy Pictures and Video C...

Страница 6: ...Polaroid Online Services 64 Customer Support 64 ArcSoft Software Help 64 12 Appendix 65 Technical Specifications 65 Storage Capacities 67 Uninstalling Polaroid Digital driver PC Only 70 Camera Defaul...

Страница 7: ...a few examples of what you can do with your camera Enjoy point shoot operation Adjust the resolution for print or email Store pictures and video clips to the internal memory or an SD card Playback you...

Страница 8: ...ac ArcSoft PhotoPrinter 5 PC ArcSoft PhotoPrinter 4 Mac Adobe Acrobat Reader PC Mac User Guide in PDF format Registration Card Digital Imaging Products 201 Burlington Road Bedford MA 01730 1434 First...

Страница 9: ...tery 1 Open the camera battery door by pushing it outwards as illustrated 2 Insert the battery as shown 3 Close the battery door by pressing it downwards then slide it back to lock 1 1 2 2 3 1 2 4 To...

Страница 10: ...nserve battery life After a specified period of inactivity the camera automatically powers off Checking the Battery Power Level Check the battery power level before taking pictures 1 Turn the camera o...

Страница 11: ...of the flash WARNINGS Batteries should be replaced by an adult Insert the battery with the correct polarity Remove exhausted battery from the camera immediately Do not short the supply terminals Do no...

Страница 12: ...Still Image mode Digital Zoom Status Number of remaining pictures Still Image Mode Image Size 2592 X 1944 2048 X 1536 1600 X 1200 640 X 480 SD Card Inserted 0 5 2048 X 1536 0005 X1 0 White Balance Aut...

Страница 13: ...to Daylight Cloudy Tungsten Fluorescent Resolution 640 X 480 320 X 240 Remaining Time Recording Indicator 640 X 480 00 00 28 Default Setting Playback Mode 1600 x 1 200 Picture Locked File Play Pause T...

Страница 14: ...apture and play settings as well as other camera settings like the date time and auto power off 1 Press the button to enter the menu bar Press it again to exit 2 Press the button to enter the submenu...

Страница 15: ...LANGUAGE 1 Press the Mode button until you see the or on the display 2 Press the button 3 Press the or button to select SETUP 4 Press the button 5 Press the or button to select the desired setting 6...

Страница 16: ...FORMAT submenu REALLY WANT TO FORMAT OK SET FORMAT CANCEL 3 Press the or button to select the desired setting 4 Press the button NOTE Data deleted by a format operation cannot be recovered Make sure y...

Страница 17: ...s the button Setting the date format 4 Press the or button to select DATE FORMAT 5 Press the button 6 Press the or button to select the desired setting 7 Press the button DATE FORMAT DD MM YY MM DD YY...

Страница 18: ...the SETUP menu 2 Press the or button to select AUTO OFF 3 Press the button SETUP SET FORMAT DATE TIME AUTO OFF BEEP FREQUENCY SETUP 4 Press the or button to select the desired setting 5 Press the but...

Страница 19: ...FREQUENCY SETUP 4 Press the or button to select the desired setting 5 Press the button BEEP ON OFF OK SET Setting Frequency In order to take a better indoor picture the camera needs to be set to suit...

Страница 20: ...ess the or button to select the desired setting 5 Press the button LANGUAGE ENGLISH DEUTSCH FRAN AIS ITALIANO ESPA OL OK SET Setting the Date Stamp On and Off Use the date stamp to imprint the date on...

Страница 21: ...u on page 15 to access the SETUP menu 2 Press the or button to select DEFAULT 3 Press the button 4 Press the or button to select the desired setting 5 Press the button SETUP BEEP FREQUENCY LANGUAGE ab...

Страница 22: ...Digital Camera User Guide www polaroid com Video Mode Press Press 2048 X 1536 0005 X1 0 2048 X 1536 0005 X1 0 Press Playback mode 07 55 01 01 06 0024 0023 2048 X 1536 07 55 01 01 06 0024 0023 Press P...

Страница 23: ...res Make sure that the sun is behind the camera to properly light up your scene Taking a Picture Taking pictures at approximately 3 2 feet to infinity 1 meter to infinity 1 Set the camera to Still Ima...

Страница 24: ...mode Flash Off The flash does not fire Use this setting for outdoor pictures or where flash is prohibited or may be distracting or when shooting towards a reflective surface such as a window or a mir...

Страница 25: ...select the one you need Display Option Description 2 2 SEC Take a picture after a count down of 2 seconds 10 10 SEC Take a picture after a count down of 10 seconds 3 The icon 2 or 10 will appear on th...

Страница 26: ...nlarged portion of the picture 1 Set the camera to Capture mode 2 Press the button to zoom out Press the button to zoom in The zoom factor is shown on the LCD screen 2048 X 1536 0005 1 5 H Digital Zoo...

Страница 27: ...r printing Image Size Setting 1 Set the camera to Still Image mode 2 Press the button 3 Press the or button to select IMAGE SIZE 4 Press the button 5 Press the or button to select the desired setting...

Страница 28: ...tc 1 Set the camera to Still Image mode 2 Press the button 3 Press the or button to select EXPOSURE 4 Press the button 5 Press the or button to select the desired setting 6 Press the button AUTO EXPOS...

Страница 29: ...et the camera to Still Image mode 2 Press the button 3 Press the or button to select WHITE BALANCE 4 Press the button AUTO DAYLIGHT CLOUDY TUNGSTEN FLUORESCENT WHITE BALANCE 5 Press the or button to s...

Страница 30: ...14 for more details Recording Video Clips Use the Video mode to record video clips The recording time displayed on the LCD screen will decrease and the icon will blink while recording 1 Set the camer...

Страница 31: ...resolution that the camera applies when the video clip is recorded Higher resolution makes better quality which occupies more memory space 1 Set the camera to Video mode 2 Press the button 3 Press the...

Страница 32: ...ble 1 Set the camera to Video mode 2 Press the button 3 Press the or button to select WHITE BALANCE 4 Press the button 5 Press the or button to select the desired setting 6 Press the button WHITE BALA...

Страница 33: ...and video clips The icon is shown on the LCD screen when a picture is selected The icon is shown on the LCD screen when a video clip is selected Reviewing Picture and Video Clip Files in Thumbnail Yo...

Страница 34: ...and interval according to the following steps 1 Set the camera to Playback mode 2 Press the button 3 Press the or button to select AUTO PLAY 4 Press the button AUTO PLAY ON SETUP 5 Press the or butto...

Страница 35: ...PLAY ON SETUP OK SET The camera will automatically run from the last file that you have reviewed Every file will display according to your interval setting You may press the or button to stop the aut...

Страница 36: ...ET LOCK THIS Protect the selected picture or video clip UNLOCK THIS Remove protection from the selected picture or video clip LOCK ALL Protect all pictures and video clips in the current memory UNLOCK...

Страница 37: ...the desired setting 6 Press the button ERASE ERASE THIS ERASE ALL SET 7 Press the or button to select the desired setting 8 Press the button You can cancel the deletion by choosing NO ERASE THIS NO Y...

Страница 38: ...fore printing Refer to the user guide that comes with your printer and make preparations paper ink cassette cartridge etc as required Turn on the camera and the printer 2 Selecting PictBridge mode Set...

Страница 39: ...ions Printing may resume once the problem is solved PRINT SETTING ERRORS CANCEL CONTINUE Printing operation may still fail with some errors even if you press the button after selecting CONTINUE In tha...

Страница 40: ...ECTED displays on the LCD screen indicating a proper connection to the printer Do not connect the USB cable to the camera until PictBridge is enable and when prompted by the PLEASE CONNECT TO DEVICE s...

Страница 41: ...ry card according to the specified settings ALL INDEX All images in the camera s internal memory or a memory card are given an index and printed according to the specified settings NOTE To print a sin...

Страница 42: ...pear on the LCD screen after select a particular setting and begin to print The camera s print settings are not supported by the printer In this case select DEFAULT for this particular setting or visi...

Страница 43: ...File Name On Off 1 Press the or button to select FILE NAME 2 Press the or button to select DEFAULT ON or OFF FILE NAME 0 1 1 DEFAULT DEFAULT DEFAULT DEFAULT Print settings differ according to the pri...

Страница 44: ...following paper sizes are available 8 x 10 4 x 6 A4 and default SIZE 0 1 1 DEFAULT DEFAULT 4 X 6 DEFAULT Print settings differ according to the printer model Printing 1 Press OK after all options def...

Страница 45: ...era you should always select images by viewing them on the LCD screen Do not specify images by file name without viewing the file contents NOTE Print settings are configured for images only Make sure...

Страница 46: ...card will be printed up to 99 copies for each picture NOTE To print a single image select the image before enabling DPOF mode 11 Press the or button to select the desired setting 12 Press the button...

Страница 47: ...aroid Digital Camera User Guide www polaroid com 14 Press the Print button on the printer to start printing 1 2 Gently push the SD card inwards and release it for the SD card to eject from the SD card...

Страница 48: ...recautions 1 Use only an SD memory card with this camera 2 Electrostatic charge electrical noise and other phenomena can cause data corruption or even loss Always make sure that you always back up imp...

Страница 49: ...onto it format it or delete its files Files contained in the SD card recorded by other cameras may conflict with your camera and valuable data in your existing SD card may be distorted or lost when th...

Страница 50: ...the camera is powered on Doing so can cause the recording operation to fail and even damage the memory card Formatting the SD Card Formatting the SD card erases all files stored in it including the pr...

Страница 51: ...O CARD COPY CANCEL 7 Press the or button to select the desired setting 8 Press the button COPY TO CARD COPY CANCEL OK SET In the above operation you can exit to the normal Playback mode by choosing CA...

Страница 52: ...software IMPORTANT For Windows 98SE Windows 98SE needs to install your camera driver for Mass Storage function After the installation please restart the Windows before connecting the camera to the PC...

Страница 53: ...n screen instructions Open Close NOTE If the setup screen does not appear after loading the CD then you can manually start it by double clicking the My Computer icon on your desktop then double clicki...

Страница 54: ...also edit and retouch your photos then add special effects or place them in cards calendars frames and fantasy templates ArcSoft PhotoImpression also includes a wide variety of printing options ArcSo...

Страница 55: ...equivalent processor 128MB RAM 256 MB recommended USB Port DirectX 9 0 or higher 500MB free disk space Color monitor with high color 16 bit graphic capability or higher CD ROM drive Standard mouse an...

Страница 56: ...the Software Onto a Computer Connecting to Your Computer Connecting with the USB Cable USB Series Mini B Plug connects to your Camera USB Series A Plug connects to your PC 1 Turn off the camera 2 Plug...

Страница 57: ...video clips and drag them to a folder of your choice You can also create sub folders to group them or use the PhotoBase software to edit and manage the pictures or video clips For Macintosh Users Mac...

Страница 58: ...sion 5 will detect the connection between the camera and the computer automatically When you connect the camera to the computer PhotoImpression 5 will launch on your desktop automatically PhotoImpress...

Страница 59: ...lect the destination which the photos are copied to Click the folder icon Browse for folder Click the OK button to confirm Click OK to start copying The photos have been copy to the computer successfu...

Страница 60: ...lure Check all cable connections are secured I cannot run the Polaroid Digital Camera Driver Conflict with another camera driver or capture device If you have another camera installed on your computer...

Страница 61: ...y digital camera by pressing the Power button Insufficient battery power or batteries are missing Replace batteries Symptom Problem Solution Camera does not turn on Batteries are not oriented correctl...

Страница 62: ...he Removable disk is not created The removable disk crashes with the network drives Disconnect the crashed network drive and reserve this drive letter for the camera Symptom Problem Solution Sunlight...

Страница 63: ...no video clips or other file format in the current memory before printing Valuable data in the existing SD card is distorted or lost when the card is inserted in your camera Files contained in the SD...

Страница 64: ...pport Center Ireland Hangzhou Tel 353 0 61 702087 Tel 86 571 88210575 Fax 353 0 61 702001 E mail support arcsoft com cn E mail eurosupport arcsoft com Web http www arcsoft com cn new support For Japan...

Страница 65: ...m Focal Distance Normal Focus 3 2 ft to 1 m to The focusing range is the distance from the lens surface to the subject Focus Zones center LCD Screen TFT color panel Built in Flash Modes Auto Flash Red...

Страница 66: ...IF 2 2 compatible format JPEG compression Video Clip AVI format Power Supply 4 AAA batteries Self timer 2 10 seconds with beep sound Connectivity With computer via USB cable Dimension Size W 94 mm x D...

Страница 67: ...d on the internal memory and different capacities of SD card Recordable Images Units Images Resolution Quality 16MB Internal Memory 11MB for data storage 32MB SD 64MB SD 2592 X 1944 High 6 21 47 Norma...

Страница 68: ...1944 High 98 200 399 808 Normal 150 306 609 1231 Low 212 428 852 1723 2048 x 1536 High 148 299 596 1206 Normal 228 462 918 2024 Low 309 625 1243 2511 1600 x 1200 High 216 437 869 1755 Normal 335 676 1...

Страница 69: ...s 02 secs 128MB SD 640 x 480 9 mins 08 secs 320 x 240 22 mins 04 secs 256MB SD 640 x 480 18 mins 16 secs 320 x 240 44 min 08 secs 512MB SD 640 x 480 36 min 32 secs 320 x 240 88 min 16 secs 1GB SD 640...

Страница 70: ...indows 98SE users only because only Windows 98SE needs to install your camera driver 1 Open Add Remove Program Properties in Control Panel and select Polaroid Digital Cam program then click Add Remove...

Страница 71: ...Exposure Compensation White Balance for Pictures Flash Mode Video Resolution White Balance for Video Clips Date Format Auto Power Off Beep Frequency Language Date Stamp Default 2592 X 1944 High Auto A...

Страница 72: ...fe or image quality may be affected outside these conditions Camera Cautions NEVER immerse any part of the camera or its accessories into any fluid or liquid ALWAYS disconnect the camera from your PC...

Страница 73: ...provide reasonable protection against harmful interference in a residential installation This equipment generates uses and can radiate radio frequency energy and if not installed and used in accordanc...

Страница 74: ...t be used with this unit to ensure compliance with the Class B FCC limits Under the environment with electrostatic discharge the product may malfunction and require user to reset the product US 0606 P...

Отзывы: