background image

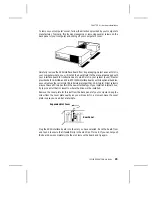
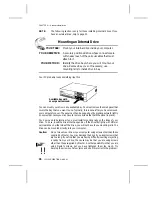
Double-check your work; you must ensure the side of the SCSI cable with
the red stripe is matched to pin 1 on the interface board and on the drive.

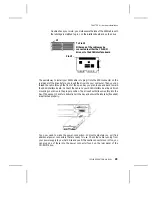
The easiest way to install your SCSI cable is to plug it into the SCSI connector on the
rear panel of the drive before you insert the drive into your computer. Then you can
thread the cable through the front of the open bay you plan to use and back toward
the SCSI interface board. Connect the cable to your SCSI interface board and finish
mounting your drive in the proper position. The drive should slide smoothly into the
bay. If it does not, check for obstructions in the bay and ensure the side rails (if needed)
are attached properly.

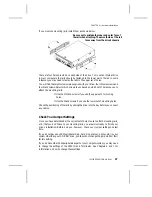
You now need to make the power connection. In most computers you will find
additional power connectors that are ready for use. Check the cable running from
your power supply to your hard disk and see if it has extra connectors on it. If so, you
can plug one of these into the power connector found on the rear panel of the
CD-ROM drive.

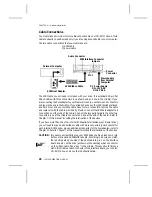
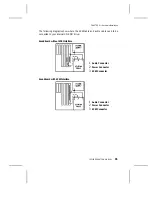
Pin #1

CHAPTER 8 ---- Hardware Installation

#1

To Pin #1

Either end of the cable may be
connected to either the CD-ROM
drive or to the SCSI interface board

12PLEX OPERATION MANUAL  

29

Содержание 12X-2

Страница 1: ...as will multi tasking 2 Use a soundboard that also has a SCSI interface built onto it This helps save a slot in your computer by combining the functions of two boards SCSI interface board and soundbo...

Страница 2: ...of board you elect to use There are dozens of SCSI interface boards and soundboards on the market Each one is installed somewhat differently Therefore our instructions for this section should only be...

Страница 3: ...the correct slot 16 bit slots are longer than 32 bit slots Older systems may not have a PCI slot as this is the newer technology If you install an internal drive try to pick a slot that is closest to...

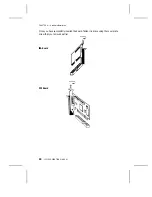
Страница 4: ...Once you have successfully inserted the board fasten it in place using the cover plate screw that you removed earlier PCI Board ISA Board CHAPTER 8 Hardware Installation 24 12PLEX OPERATION MANUAL...

Страница 5: ...uter If you have an external drive find an open space on your desktop The12PleXmaybeinstalledeitherhorizontallyorvertically If installedvertically make sure that the eject button is positioned near th...

Страница 6: ...cases you may have to remove screws that hold the panel in place You now need to determine if you must install mounting rails on the sides of your drive To do so insert the drive into the open bay If...

Страница 7: ...ore you connect any cables Check Your Jumper Settings Once you have determined a the correct set of holes to use to attach mounting rails or b that you don t have to use mounting rails you are almost...

Страница 8: ...f this manual for setting the termination of the devices If you have more than one other internal SCSI peripheral besides your Plextor drive you will need to acquire a SCSI ribbon cable with more conn...

Страница 9: ...your drive in the proper position The drive should slide smoothly into the bay If it does not check for obstructions in the bay and ensure the side rails if needed are attached properly You now need t...

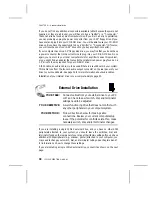
Страница 10: ...utput connector on the rear panel of your drive to your soundboard See page 34 for more information about audio cables Installation of your internal drive is now complete Skip to page 33 External Driv...

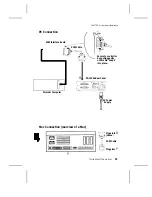
Страница 11: ...SCSI Cable Secure to controller by pushing gently until cable snaps into place Personal Computer AC Power Supply PX 12XSe Rear Panel X Y SCSI Cable Plugs into Y Plugs into X above CHAPTER 8 Hardware...

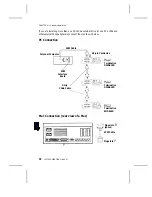
Страница 12: ...hem as shown below Y CHAPTER 8 Hardware Installation PC Connection Mac Connection rear view of a Mac SCSI Interface Board Personal Computer Termination DISABLED SCSI Cable Daisy Chain Cable 50 pin Cen...

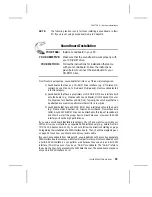
Страница 13: ...ve a SCSI CD ROM drive interface built onto the board e g Media Vision Spectrum 16 Diamond SonicSound Prometheus Aria 16SE Any SCSI CD ROM drive can be attached to this type of soundboard and should w...

Страница 14: ...ound cards The cable delivered with your external drive has two RCA type color coded connectors at one end which connect to your drive and a single stereo mini jack at the other end which plugs into t...

Страница 15: ...be connected to your internal CD ROM drive CHAPTER 8 Hardware Installation Soundboard without SCSI Interface 1 Audio Connector 2 Power Connector 3 SCSI Connector Soundboard with SCSI Interface 1 Audio...

Страница 16: ...t use a device driver or you use an outdated version of the required device driver you will not be able to operate your CD ROM drive The lack of a device driver or the use of an improper version of a...

Страница 17: ...r Mac desktop After restarting your Mac you should see the CD ROM device driver as the Mac boots up If the icon appears crossed out check to see that the CD ROM drive power is on and that the SCSI ID...

Страница 18: ...ed to verify that your SCSI interface board is supported by OS 2 Check your OS 2 manual and the README file on the floppy disk that comes with the OS 2 CD ROM for information on which SCSI interface b...

Страница 19: ...manual for information on which SCSI interface boards NT supports If your SCSI interface board is on NT s list of supported hardware you can follow the installation instructions provided by Microsoft...

Страница 20: ...d check the startable box This procedure is fully outlined in the Windows NT manual 5 Reboot Your 12PleX drive should now be visible to the system Windows NT Troubleshooting Tip If you have difficulty...

Отзывы: