background image

Page

 16

Gas Hob 

User Manual

Gas Conversion – Natural Gas / ULPG

This appliance is factory fitted with Natural 
Gas Injectors (burner nozzles) and is also 
supplied with a ULPG conversion kit. To adapt 
the cooktop to a different type of gas, the gas 
injectors must be changed as follows:

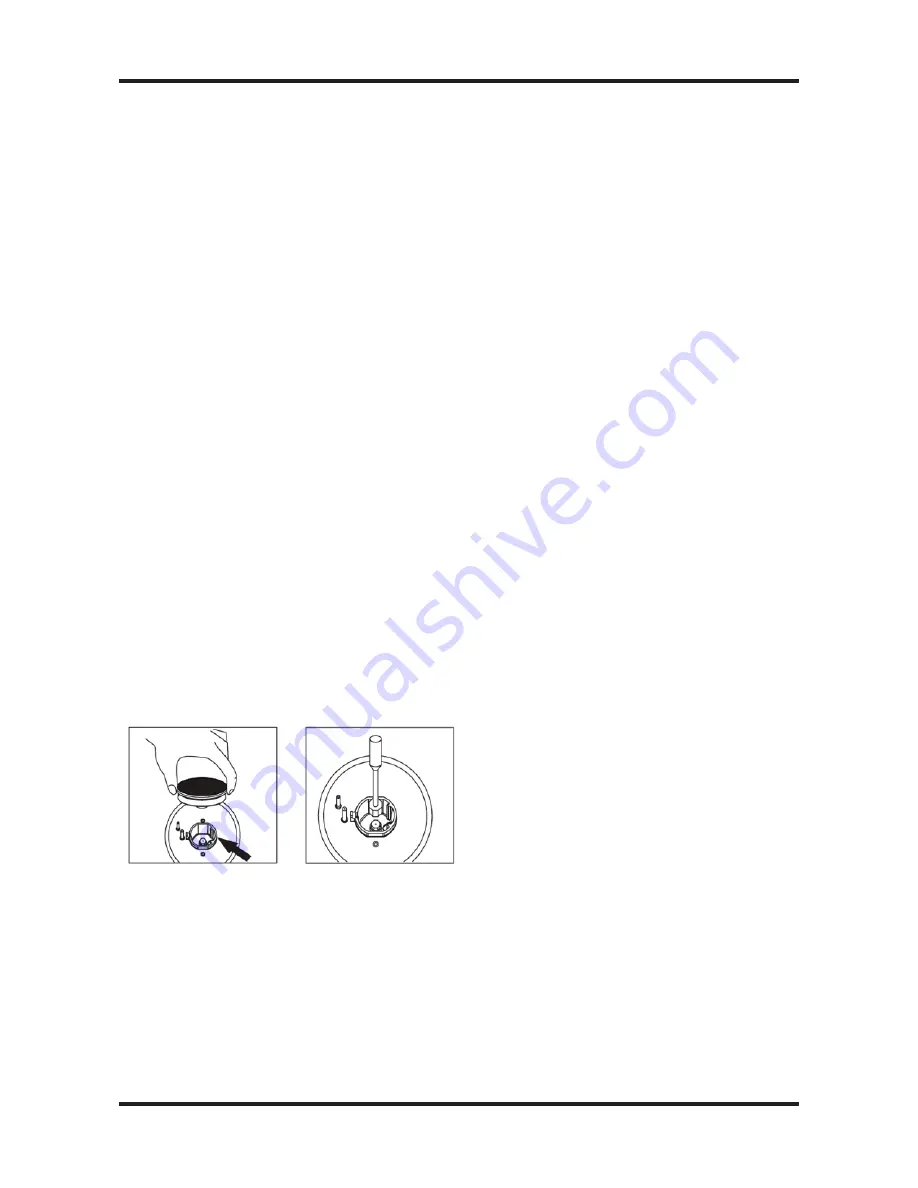
1.  Remove the pan supports (trivets), burner 

caps and burner diffusers.

2.  Unscrew the injectors using a 7mm socket 

wrench.

3.  Replace the injectors with those supplied 

corresponding to the gas available (see 
burner and injector characteristics table)

IMPORTANT // 

On completing the operation, 

replace the old gas label with the one showing the 
new type of gas; the sticker is available in the User 
Manual package

Adjusting the minimum flame intensity

The minimum flame intensity is adjusted at 
the factory. However, when the gas injectors 
are replaced or in special mains pressure 
conditions, it may be necessary to readjust the 
intensity of the minimum flame.

Follow the operations below for each burner in 
order to adjust the minimum flame intensities:

1.  Light the burner.

2.  Turn the knob control anti-clockwise to the 

weakest flame.

3.  Remove the knob from the valve shaft (and 

gasket if there is one).

4.  Use a thin blade screwdriver to turn the 

bypass screw located on top of the gas 
valve shaft.

 ULPG


Gently turn the bypass screw clockwise until 
it is completely tightened. 


Natural Gas


Gently turn the bypass screw clockwise 
until it is completely tightened, then slowly 
turn it anti-clockwise for adjustment of the 
flame. The correct length of the flame is 
around 3 to 4mm. 

5. Put the knob back on and test if the flame 
goes out when quickly turning the knob 
control from the strongest flame to the 
weakest flame positions.

6. For burners with flame failure device, make 
sure that the regulation obtained is sufficient 
to maintain the thermocouple activated when 
operating with the weakest flame. If it is not, 
increase the minimum flame intensity.

Installation

Содержание AUPL-GF61SS

Страница 1: ...ortant information to ensure optimal performance and keep you safe Please retain your proof of purchase as this will be needed in the event that you require a warranty service Remember to keep this us...

Страница 2: ...Page 2 Gas Hob User Manual Contents 2 Warning Safety Instructions 3 Product Specifications 4 Product Overview 5 6 Operating Instructions 7 9 Installation 10 17 Notes 18 19 Contact Details 20 Contents...

Страница 3: ...supervised to ensure that they do not play with the appliance Insure adequate ventilation i e the use of a rangehood when cooktops other appliances burning gas or other fuels are in use If the supply...

Страница 4: ...Capacity 4 Burners Gas Burners 1 Rapid 2 Semi rapid 1 Auxiliary Dimensions W590 x D500 x H90mm Bench Cut out Dimensions W553 x D473mm Voltage Frequency 220 240V 50Hz Power 1W Capacity 4 Burners Gas Bu...

Страница 5: ...e 5 Product Overview Model AUPL GWF61SS Model AUPL GF61SS Model AUPL GWF91SS 3 2 2 1 5 4 6 2 3 2 1 5 6 6 2 4 2 1 5 1 Auxiliary burner 2 Semi rapid burner 3 Rapid burner 4 Triple ring Wok burner 5 Cont...

Страница 6: ...Page 6 Gas Hob User Manual Product Overview Burners 1 Burner cap 2 Inner burner cap 3 Outer burner cap 4 Burner head diffuser 5 Burner base cup 6 Ignition candle 7 Flame failure device thermocouple...

Страница 7: ...table below PAN SIZES BURNER min diameter mm maxdiameter mm Auxiliary 120 180 Semi Rapid 180 200 Rapid 180 220 Wok 220 260 The position of the corresponding gas burner is indicated on each control kn...

Страница 8: ...the knob pressed in for a few seconds after the flame ignites 5 Regulating the flame IMPORTANT Adjust the flame intensity so that it does not spread out beyond the side of the pan The tips of the fla...

Страница 9: ...burner caps and burner diffusers by pulling them away from the burner cup 2 Soak them in hot water with a small amount of washing detergent 3 Softly scrub off any remaining pieces of food 4 Rinse the...

Страница 10: ...tutory regulations Follow carefully the safety instructions and clearance requirements given below NOTE Thedimensionspresentedinthismanualaregiveinmillimetres mm IMPORTANT The veneer or laminate coati...

Страница 11: ...s located underneath the appliance towards the rear left hand side 100mm from the rear edge The Electrical terminal 4 is also located underneath the appliance approximately in the centre of the rear e...

Страница 12: ...ctrical Connection IMPORTANT Electricalconnectionsshouldbe carriedoutbyasuitablyqualifiedandcompetent personinstrictaccordancewiththewiringrules andnationalandlocalsafetyregulations Installation Proce...

Страница 13: ...loured greenorgreenandyellow Thebluewiremustbeconnectedtothe terminalthatismarkedwiththeletterNor colouredblack Thebrownwiremustbeconnectedtothe terminalthatismarkedwiththeletterAor colouredred NOTE T...

Страница 14: ...test point until it is free in its housing The screw is retained in this position 2 Connect the hose from the pressure gauge 3 Reassemble one of the large burners turn on the gas and manually light t...

Страница 15: ...ure Wok burner x 1 1 60 12 96 1 0kPa 0 97 12 96 2 75kPa Semi rapid burner x 2 1 12 6 30 1 0kPa 0 68 6 30 2 75kPa Auxiliary burner x 1 0 83 3 60 1 0kPa 0 53 3 60 2 75kPa Total NHGC 29 16 29 16 AUPL GWF...

Страница 16: ...necessary to readjust the intensity of the minimum flame Follow the operations below for each burner in order to adjust the minimum flame intensities 1 Light the burner 2 Turn the knob control anti cl...

Страница 17: ...ut by the installer before leaving Check all burner flames are blue in colour stable and completely ignite at both high and low flame settings with no appreciable yellow tipping carbon deposition lift...

Страница 18: ...Page 18 Gas Hob User Manual Notes...

Страница 19: ...Gas Hob User Manual Page 19 Notes...

Страница 20: ...committed to ongoing research to ensure all information in this user manual is correct at time of going to print Dimensions should be used as reference only and actual dimensions should be taken form...

Отзывы: