background image

4 - ISTRUZIONI DI RIARMO E RICONFEZIONAMENTO

UTILIZZARE ESCLUSIVAMENTE IL KIT DI RICARICA PLASTIMO PER ASTA IOR

Si raccomanda di leggere completamente le seguenti istruzioni prima di procedere al riarmo dell'asta. 
Rispettare questi istruzioni per garantire il buon funzionamento dell'asta ad ogni nuovo utilizzo.

4.1 - Una volta recuperata, lavare l'asta con acqua dolce e far asciugare tutti i componenti all'aria 

aperta.

4.2 - Sgonfiare completamente l'asta, aiutandosi con il tubo di gonfiaggio: rimuovere il tappo nero e 

spingere tutta l'aria contenuta nell'asta verso la valvola, per favorirne l'uscita; ripetere l'operazione 
fino a totale svuotamento.

4.3 - Rimuovere la cima dal supporto. 
4.4 - Svitare la bombola di CO2 fissata alla base dell'asta. 
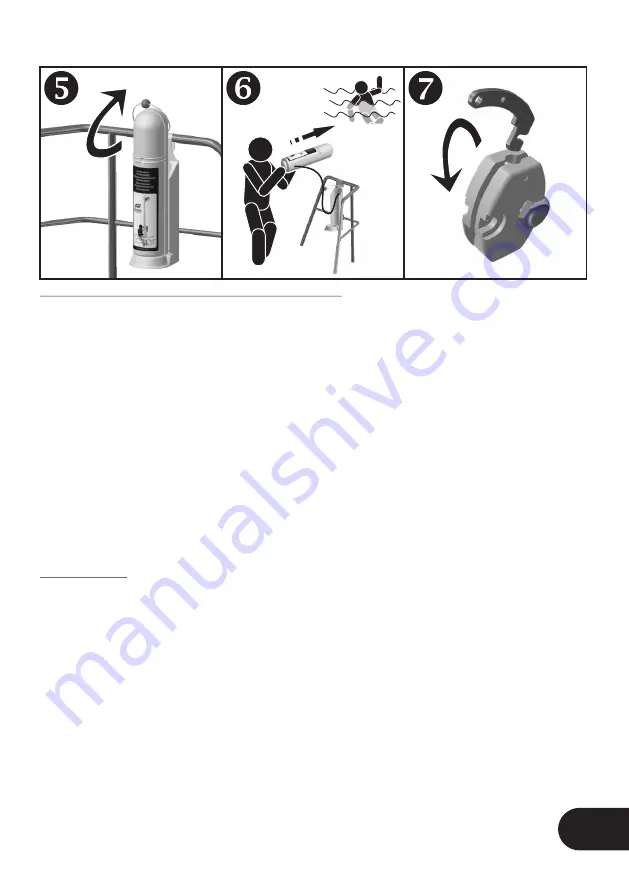
4.5 - Riposizionare la leva di disarmo nella testa di percussione (disegno 7).

ATTENZIONE: Non avvitare la bombola prima che la leva di disarmo sia stata riposizionata nella 
testa di percussione, per evitare di attivarla.

4.6 - Verificare il buon stato della guarnizione di alloggiamento della bombola nella testa di 

percussione. Avvitare manualmente una nuova bombola di CO2 sulla testa di percussione.

4.7 - In caso di sostituzione della lampada di sicurezza, sganciare la lampada di sicurezza dal relativo 

supporto posto all'estremità superiore dell'asta, sostituendola con quella nuova, compresa nel kit di 
ricarica.

5 - PIEGATURA

5.1 - Seguire attentamente gli schemi di piegatura e riconfezionamento alle pagine 18 e 19.
5.2 - Verificare che la testa di percussione sia visibile e che la cima di percussione sia libera (14). 
5.3 - Chiudere il coperchio del contenitore (15-A). Il coperchio deve star fermo in posizione senza 

aprirsi. Collegare la cima al supporto (15-B). ASSICURARSI CHE IL NODO SIA ROBUSTO E CHE 
NON RISCHI DI SCIOGLIERSI AL MOMENTO IN CUI IL CILINDRO SARA' GETTATO IN MARE.

5.4 - Avvolgere 2 m di cima sul fondo del supporto (16-A) e reinstallare il cilindro sul supporto (16-B). 

Riposizionare l'elastico di tenuta del cilindro (16-C). Assicurarsi che la cima di percussione non sia 
visibile. L'asta è ora nuovamente pronta all'uso.

- 17 -

I

IMPRESSION PANTONE 540

SUPPORT : OFFSET 80 GRS

61569_01.cdr
31 mars 2014

Содержание INFLATABLE DAN BUOY

Страница 1: ...E DANBUOY HINCHABLE GB INFLATABLE DAN BUOY F PERCHE IOR GONFLABLE D AUFBLASBARE MARKIERUNGSBOJE NL OPBLAASBARE OPSPORINGSSTAAK S UPPBL SBAR DAN BUOY ASTA IOR GONFIABILE I ISAF ORC...

Страница 2: ...ISAF ORC...

Страница 3: ...3...

Страница 4: ...2m lanyard at the bottom of the holder and reinstall the canister on the holder diagram 2 1 4 Replace the securing strap on the canister diagram 3 Ensure that the firing lanyard is not visible The Da...

Страница 5: ...until the firing lever has been replaced as this will cause the cylinder to fire 4 6 Check that the cylinder housing seal in the inflator is in good condition Screw the new CO2 cylinder on to the infl...

Страница 6: ...nd du support et r installer le coffret sur le support sch ma 2 1 4 Replacer l lastique de maintien du coffret sch ma 3 S assurer que le filin de percussion n est pas apparent La perche est pr te l em...

Страница 7: ...le levier de d clenchement n ait t r introduit dans la t te de percussion car cela d clencherait la percussion 4 6 V rifier le bon tat du joint de logement de la bouteille dans la t te de percussion...

Страница 8: ...r leicht anziehen damit der B gel unter Spannung steht Durch zu festes Anziehen k nnte der B gel rei en 1 3 die 2 m Leine im Boden der Halterung aufrollen und den Kasten wieder auf der Halterung anbri...

Страница 9: ...in eingesetzt sein Ansonsten w rde sofort ein Aufpumpen erfolgen 4 6 Die Dichtung der Zylinderaufnahme im Ausl sekopf auf einwandfreien Zustand pr fen Von Hand einen neuen CO2 Zylinder auf den Ausl se...

Страница 10: ...De 2m aan lijn onderaan de houder oprollen en de container weer op de houder plaatsen schema 2 1 4 Het bevestigingselastiek van de container weer terugplaatsen schema 3 Controleren dat de boei lijn n...

Страница 11: ...stekingsmechanisme terug zolang de ontstekingshendel nog niet is teruggeplaatst Hierdoor zal de cilinder weer doorboord raken 4 6 Controleer de goede staat van de afdichtingshuls van de fles bovenop d...

Страница 12: ...podr a distorsionar y da ar el soporte enroscar para dar una ligera tensi n al gancho 1 3 Recoger los 2m de cabo al fondo del soporte y reinstalar el malet n sobre el soporte esquema 2 1 4 Reemplazar...

Страница 13: ...scar el cartucho en la cabeza de hinchado hasta que el percutor haya sido repuesto podr a ponerle fuego al cartucho 4 6 Comprobar el buen estado de conservaci n de la junta del cartucho en la cabeza d...

Страница 14: ...er l nga linan inuti f stet och s tt fast beh llaren p f stet igen bild 2 1 4 F r tillbaka den elastiska snodden ver toppen p beh llaren bild 3 Se till att dan buoyens lina inte r synlig Nu r dan buoy...

Страница 15: ...ld 7 OBS Skruva inte fast patronen f rr n uppbl snings mekanismen har termonterats eftersom detta leder till uppbl sning 4 6 Kontrollera packningen f r patronh llaren inuti uppbl sningsenheten Skruva...

Страница 16: ...l gancio e quindi del supporto porta cilindro 1 3 Avvolgere i 2 m di cima al fondo del supporto e reinstallare il cilindro sul supporto disegno 2 1 4 Riposizionare l elastico di tenuta del cilindro di...

Страница 17: ...ne per evitare di attivarla 4 6 Verificare il buon stato della guarnizione di alloggiamento della bombola nella testa di percussione Avvitare manualmente una nuova bombola di CO2 sulla testa di percus...

Страница 18: ...18 TOP B A A 45cm 25cm 25cm 25cm 45cm B C D E B A C B C A B C...

Страница 19: ...B 19 C B A A B A B A B From kit 63456...

Страница 20: ...61569_01...

Отзывы:

Похожие инструкции для INFLATABLE DAN BUOY