background image

4

Chapter 2. Physical Description and Installation

2.1  4-Ch Network Video Recorder

2.1.1 NVR-401 Package Content

1 x NVR

1 x Power Cord

1 x Power Adapter

1 x RJ-45 Cable

1 x CD-ROM

8 x HDD Screw

1 x Quick Installation Guide

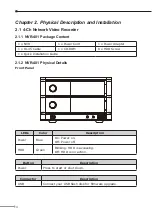
2.1.2 NVR-401 Physical Details

Front Panel

LEDs

Color

Description

Power

Blue

On: Power on.
Off: Power off.

HDD

Green

Blinking: HDD is accessing.
Off: HDD is no action.

Button

Description

Power

Press to start or shut down.

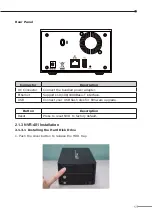
Connector

Description

USB

Connect your USB flash disk for firmware upgrade.

Содержание NVR SERIES

Страница 1: ...4 8 16 32 Ch Network Video Recorder NVR 401 NVR 810 NVR 1610 NVR 3210 Quick Installation Guide...

Страница 2: ...t 4 2 1 2 NVR 401 Physical Details 4 2 1 3 NVR 401 Installation 5 2 2 8 16 Ch Network Video Recorder 7 2 2 1 NVR 810 NVR 1610 Package Content 7 2 2 2 NVR 810 NVR 1610 Physical Details 7 2 2 3 NVR 810...

Страница 3: ...mera pictures It is possible to perform the settings or operate the NVR using a web browser installed on a PC connected to a network or remote controller Recorded video can be played back from remote...

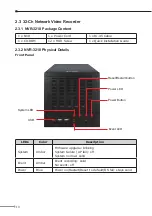
Страница 4: ...x RJ 45 Cable 1 x CD ROM 8 x HDD Screw 1 x Quick Installation Guide 2 1 2 NVR 401 Physical Details Front Panel LEDs Color Description Power Blue On Power on Off Power off HDD Green Blinking HDD is acc...

Страница 5: ...er Ethernet Supports 10 100 1000Base T interface USB Connect your USB flash disk for firmware upgrade Button Description Reset Press to reset NVR to factory default 2 1 3 NVR 401 Installation 2 1 3 1...

Страница 6: ...6 2 Pull out the HDD tray 3 Place the HDD on the tray and secure the HDD with the screws at the bottom as illustrate 4 Push the tray back in the unit and press down the black bar to secure the tray...

Страница 7: ...iption NVR 1610 IP Camera Status LED Reset Button Power Button Buzzer Button USB Port NVR Status LEDs NVR 1610 Network Video Recorder Power Reset Buzzer 1 2 3 4 5 6 7 8 9 10 11 12 13 14 15 16 Power St...

Страница 8: ...810 NVR 1610 Installation 2 2 3 1 Installing the Hard Disk Drive 1 Removing the screws on the side 2 Push the top housing forward then lift it up 3 Removing the screws on the HDD Tray left and right s...

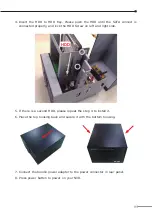
Страница 9: ...and lock the HDD Screw on left and right side HDD 5 If there is a second HDD please repeat the step 4 to install it 6 Place the top housing back and secure it with the bottom housing 7 Connect the bun...

Страница 10: ...llation Guide 2 3 2 NVR 3210 Physical Details Front Panel Reset Restart button Power LED Power Button Event LED USB System LED LEDs Color Description System Amber Firmware upgrade blinking System fail...

Страница 11: ...11 2 3 3 NVR 3210 Installation 2 3 3 1 Installing the Hard Disk Drive 1 Release the HDD tray by pulling the lock to the right 2 Pull the HDD tray out of the case...

Страница 12: ...12 3 Place the HDD in the tray and the bottom of the tray 4 Put the HDD tray back to the case 5 Push the tray door back to the case to secure it...

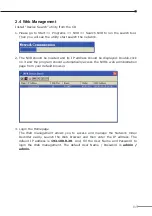
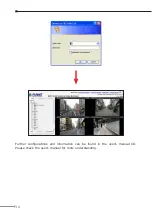
Страница 13: ...e displayed Double click on it and the program should automatically access the NVR s web administration page from your default browser 3 Login the Homepage The Web management allows you to access and...

Страница 14: ...14 Further configurations and information can be found in the user s manual CD Please check the user s manual for more understanding...

Страница 15: ...This page is intentionally left blank...

Страница 16: ...This page is intentionally left blank...

Отзывы: