background image

User’s Guide | v 


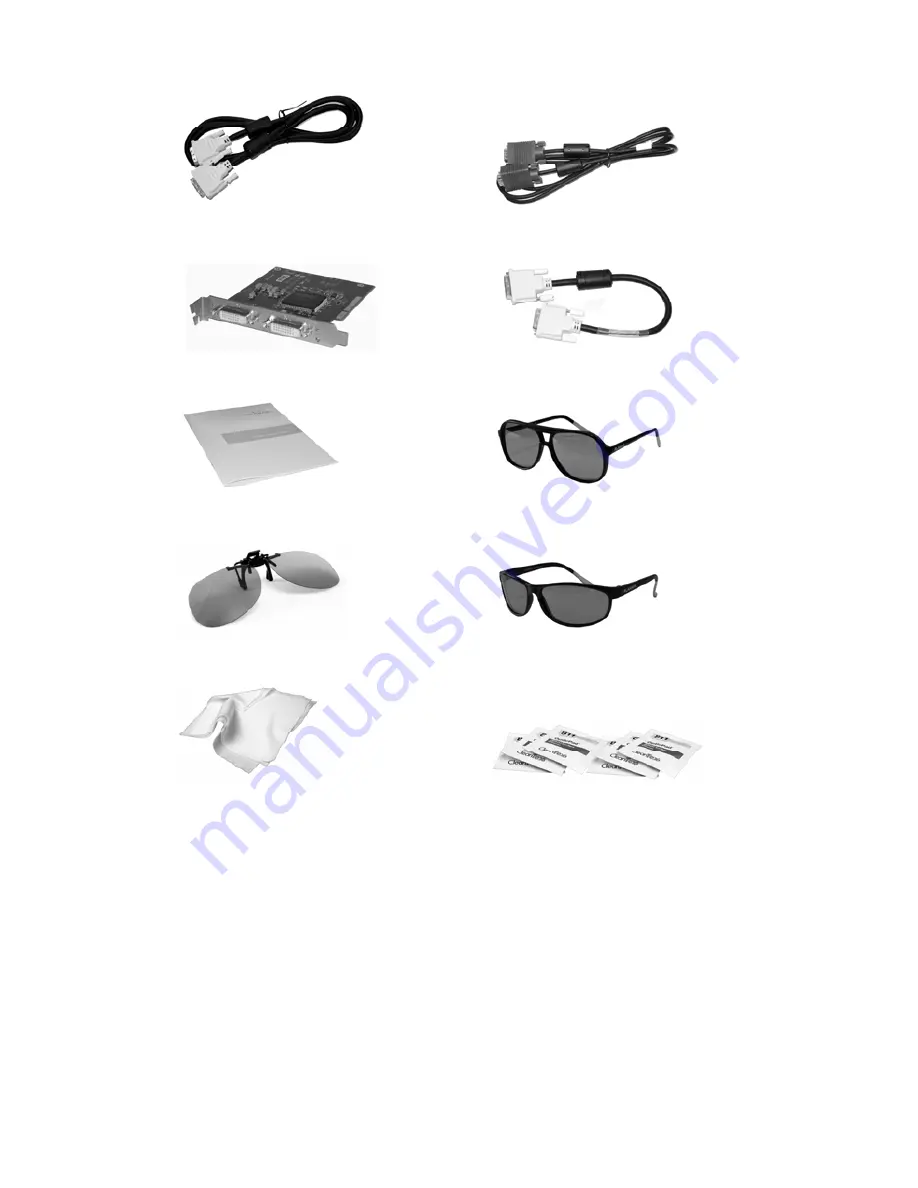
Two DVI cables (6-ft and 12-ft) 


Two Analog VGA cables (6-ft and 10-ft) 


Mirror-flip PCI card 


Short DVI cables (14-in) 


Product user’s guide 


Captain-style glasses (2 ea) 


Spring clip-style glasses (1 ea) 


Terminator-style glasses (2 ea) 


Soft, dry cloths (3 ea) 


Moistened cleaning pads (6 ea) 

 
NOTE:  Both the Captain-style and the Terminator-style glasses, for use with 
the SD2420W monitor, feature the Planar logo on each side and white arm 
tips.  These two markers differentiate the glasses from those shipped with 
other stereo monitors. 

Содержание SD2420W

Страница 1: ...SD2420W Stereoscopic Monitor USER S GUIDE www planar3d com ...

Страница 2: ...R 97006 1992 www planar com 2007 Planar Systems Inc Planar is a registered trademark of Planar Systems Inc Other brands and names are the property of their respective owners Technical information in this document is subject to change without notice 10 07 ...

Страница 3: ...r the half mirror Use a soft cloth moistened with water and or mild detergent to clean the display housing and stand Use only high quality and safety approved AC DC power adapters Disconnect the power plug from the grounded AC outlet if the product will not be used for a long period of time Don t Do not touch the LCD panel or half mirror surfaces with sharp or hard objects Do not use abrasive clea...

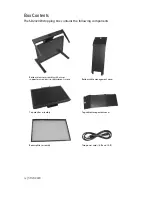
Страница 4: ...box contains the following components Bottom monitor assembly with mirror support arms and mirror adjustment screws Bottom cable management cover Top monitor assembly Top cable management cover Beamsplitter assembly Two power cords 6 ft and 10 ft ...

Страница 5: ...glasses 2 ea Spring clip style glasses 1 ea Terminator style glasses 2 ea Soft dry cloths 3 ea Moistened cleaning pads 6 ea NOTE Both the Captain style and the Terminator style glasses for use with the SD2420W monitor feature the Planar logo on each side and white arm tips These two markers differentiate the glasses from those shipped with other stereo monitors ...

Страница 6: ...ables 7 Connect the power cords 8 Check the alignment 8 Product Use 9 Operating in 2D mode 9 User controls and OSD menu 9 Power management 10 Monitor Specifications 11 Displays 11 Video 11 Plug and Play 12 Environment 12 Size and weight 12 System Care 13 Software Compatibility 13 Accessories 13 Troubleshooting 14 Warning Signals 15 Warranty 15 Product Registration 15 CRT Recycling 16 Important Rec...

Страница 7: ...n particular creates an unprecedented level of stereo 3D viewing quality and viewer comfort Stereo viewing is useful for the following applications Photogrammetry and remote sensing Geospatial image analysis Geophysical modeling Molecular modeling Computer games Oil and gas exploration Architecture and mechanical design Stereo photography or videography Medical imaging not as yet FDA 510 k approve...

Страница 8: ...on of depth or stereopsis In the StereoMirror design this stereo separation is achieved using the principle of conservation of polarization Liquid crystal displays operate based on the ability of liquid crystal material to modulate plane polarized light The two AMLCDs in the SD2420W model have been manufactured so that the polarized light emitted from the top monitor is 90 rotated from that of the...

Страница 9: ...per stereo effect Once the two view points have been defined the 3D scene is rendered identically for each of the two view points Many commercial 3D applications already have stereo viewing modes using the OpenGL stereo features Since the upper display of the monitor is seen in reflection a mirror flip operation must be performed on that data path In the current product this is accomplished using ...

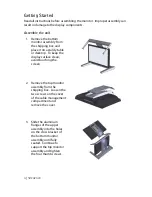
Страница 10: ...dy table or desktop To keep the display surface clean avoid touching the screen 2 Remove the top monitor assembly from the shipping box Loosen the two screws on the cover of the cable management compartment and remove the cover 3 Slide the aluminum flanges of the upper assembly into the holes on the cross bracket of the bottom monitor assembly until fully seated Continue to support the top monitor...

Страница 11: ...d bottom cable covers if desired 6 Remove the beamsplitter from the shipping case With the StereoMirror logo oriented to the lower right insert the pins located on either side of the mirror frame into the corresponding slots on the mirror support arms The pins should rest in the fully forward position of the mounting arm slots ...

Страница 12: ...r3d com for more details on graphics cards software configuration and using side monitors with the SD2420W unit Install the mirror flip PCI card Proper ESD electrostatic discharge handling precautions should be exercised when installing the mirror flip PCI card Consult the computer manual for proper installation of graphics cards Because the viewer will see a reflection of the top monitor this ima...

Страница 13: ... output of the dual channel graphics card Plug the other end into the input port labeled IN of the mirror flip PCI card 3 Plug one end of the 12 foot DVI cable into the output port of the mirror flip PCI card labeled OUT Plug the other end into the top monitor of the SD2420W unit The two monitors must be connected with an off the shelf video cable to comply with FCC regulations Ferrite core interf...

Страница 14: ...arms Rotating these screws raises or lowers the beamsplitter mirror Adjust the screws so that the corners of the reflected image of the upper monitor are aligned with the corners of the transmitted image from the lower monitor You may want to use a test image during the alignment process A sample is available at www planar3d com Perfect alignment between the two images is not required for stereo v...

Страница 15: ...fore lowering User controls and OSD menu The two monitors have a power switch on the right side of the bottom bezel The switch has a dual function the control for turning the monitor on or off and the LED indicator of monitor power status When the LED is green the power is on When the LED is amber the monitor is in power saving mode The Source button allows the user to select VGA or DVI input The ...

Страница 16: ...decrease to the overall luminance but a driving voltage adjustment of the LCD panel In other words setting the brightness to 0 zero does not reduce the luminance to 0 cd m2 NOTE Changing the Brightness setting can reduce the number of discernable gray levels To lock the OSD press and hold the Menu button while the monitor is off and press the power button to turn the monitor on To unlock the OSD p...

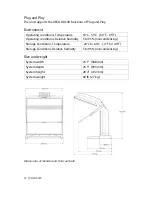
Страница 17: ...y to gray 6 ms typical Display color palette 16 7 million colors Refresh rate 56 75 Hz 60 Hz recommended Power requirements input voltage Single phase 100 240 VAC 50 60 Hz Power requirements input current 1 5 A maximum per monitor Power supply Internal Power consumption 80 W max per monitor 160 W total 3 W total standby Product approvals UL cUL CE CSA FCC B TOC 99 MTBF 50 000 hours at 40 C Video I...

Страница 18: ... F 95 F Operating conditions Relative humidity 5 to 95 noncondensing Storage Conditions Temperature 20 C to 60 C 4 F to 140 F Storage Conditions Relative humidity 5 to 95 noncondensing Size and weight System width 23 1 588 mm System depth 23 3 593 mm System height 28 4 722 mm System weight 60 lb 27 kg Dimensions of monitor unit front and side ...

Страница 19: ...or solvents for cleaning Software Compatibility OpenGL The SD2420W unit is compatible with OpenGL stereo An appropriate graphics card is required to drive the two monitors with DVI signals For professional applications that use OpenGL stereo support the graphics card should support OpenGL stereo as well Stereo viewing of professional applications is typically done in the so called clone mode where...

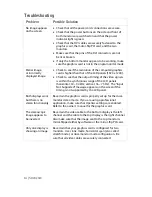
Страница 20: ...e synchronous range of the LCD panels horizontal 30 94 kHz vertical 56 75 Hz The Input Not Supported message appears on the screen if the timing is not supported by the LCD panel Both displays work but there is no stereo functionality Be certain the graphics card is properly set up for the dual monitor stereo mode If you are using a professional application make sure that OpenGL settings are enabl...

Страница 21: ... standard warranty includes a 1 year return to depot replacement warranty service Return the defective part of the system for a replacement with a comparable product All components have a 30 day inspection warranty period All system components have a 1 year warranty Two business day delivery Expedited Delivery Service available Extended Warranty Terms are available Go to www planar com for the com...

Страница 22: ... discarded with other refuse A number of recycling programs are available Do an online search of CRT Recycling for potential service providers in your area Important Recycle Instructions LCD lamps inside this product contain mercury This product may contain other electronic waste that can be hazardous if not disposed of properly Recycle or dispose in accordance with local state or federal laws For...

Страница 23: ...ntation view answers to frequently asked questions FAQs and get troubleshooting advice Visit www planar3d com for specific questions about configuring the stereo monitor Customer First Technical Support Call a customer service representative at 1 866 PLANAR1 1 866 752 6271 Service is available Monday through Friday 5 A M 5 P M Pacific time 8 A M 8 P M Eastern time E mail Support Send your inquirie...

Страница 24: ...Planar Systems Inc 1195 NW Compton Drive Beaverton OR 97006 1992 Customer Service E mail planarsupport planar com Online www planar com support Voice 1 866 Planar1 1 866 752 6271 020 0642 00A ...

Отзывы: