background image


15

OPERATING INSTRUCTIONS (cont.) 


Main 

Menu Item 

Main 

Menu 

Icon 

Sub Menu 

Item 

Sub 

Menu 

Icon

Description 

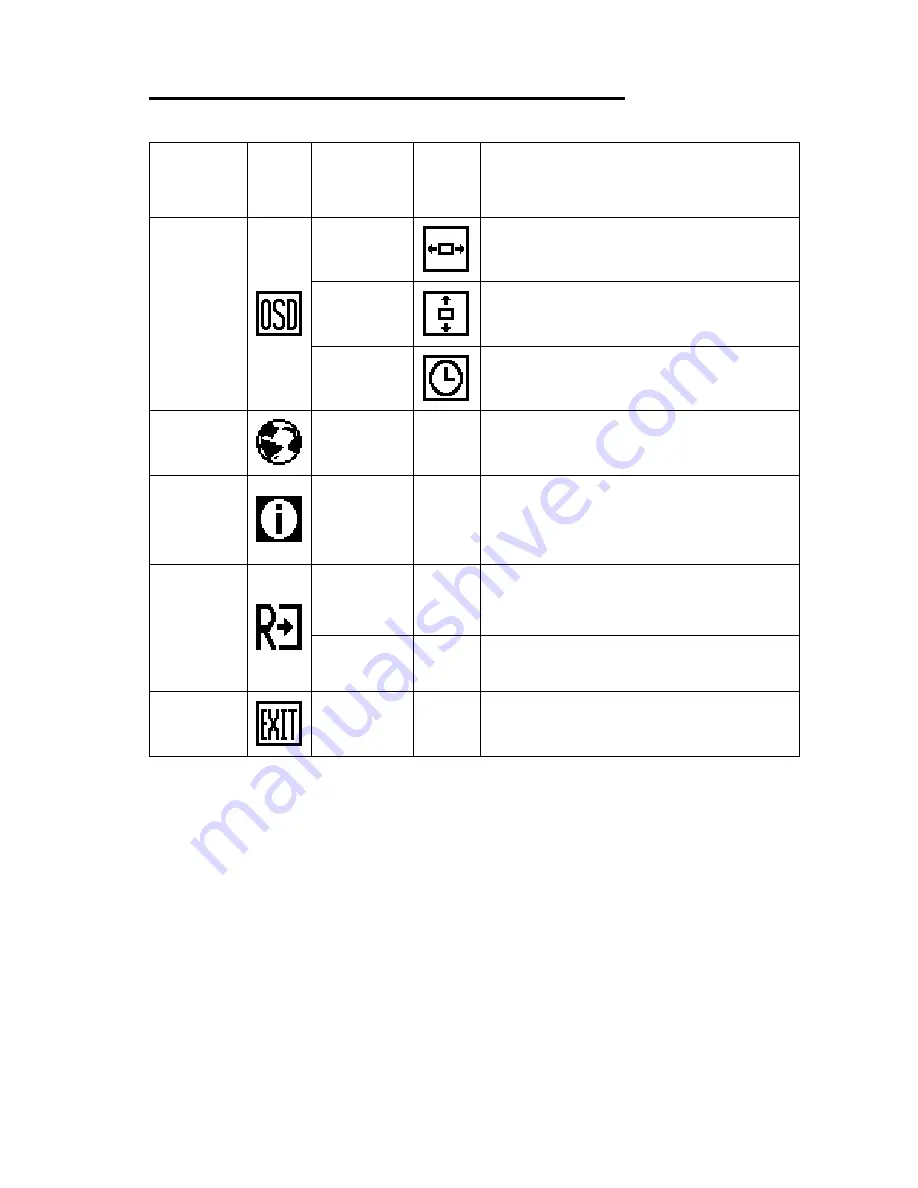
OSD 
Setup 


H.Position

Adjust the horizontal position of 
the OSD. 

V.Position

Adjust the vertical position of the 
OSD. 

OSD 
Timeout 

Adjust the OSD timeout. 

Language 


Language

N/A

Select the language you like. 

Information 


Information

N/A

Show the resolution,  

H/V frequency and input port of 
current input timing.


Reset 


Yes N/A

Clear each old status of  

Auto-configuration. 

No N/A

Do not execute reset, return to 
main menu. 

Exit 


N/A N/A

Exit 

OSD. 


Содержание PL1900

Страница 1: ...PL1900...

Страница 2: ...documentation view answers to frequently asked questions FAQs and get troubleshooting advice or email Planar your support question Talk to a Customer Service Representative To contact Planar s Custome...

Страница 3: ...1...

Страница 4: ...ghts are reserved No part of this document may be reproduced translated to another language or stored in a retrieval system or transmitted by any means electronic mechanical photocopying recording or...

Страница 5: ...the package 7 Installation Instructions Power source 8 Cable connection 9 Adjusting the viewing angle 10 Operating Instructions General Instructions 11 How to adjust a setting 13 Adjusting the pictur...

Страница 6: ...between the equipment and receiver 3 Connect the equipment into an outlet on a circuit different from that to which the receiver is connected 4 Consult the dealer or an experienced radio TV technicia...

Страница 7: ...z The monitor is equipped with a three pronged grounded plug a plug with a third grounding pin This plug will fit only into a grounded power outlet as a safety feature If your outlet does not accommod...

Страница 8: ...You may find slightly uneven brightness on the screen depending on the desktop pattern you use The LCD screen has effective pixels of 99 99 or more It may include blemishes of 0 01 or less such as a...

Страница 9: ...egister Your Planar Products Today Thank you for choosing Planar To assure you receive all the benefits of your Planar product and services register your Planar product today Visit our website to regi...

Страница 10: ...100 120V AC or 220 240V AC voltage area No user adjustment is required 3 Connect the AC power cord into your LCD monitor s External Adapter input socket and then plug the other end of External adapte...

Страница 11: ...uter s VGA port and tighten the two screws on the cable connector Connecting the Power Cord Plug the AC power cord into the External Adapter Then plug the DC jack power cable into DC IN Inlet Caution...

Страница 12: ...to your own preference Hold the stand so you do not topple the monitor when you change the monitor s angle You are able to adjust the monitor s angle from 5 to 20 Figure 2 NOTES Do not touch the LCD s...

Страница 13: ...ng these settings the picture can be adjusted to your personal preferences The power cord should be connected Connect the video cable from the monitor to the video card Press the power button to turn...

Страница 14: ...onds to lock the buttons Repeat this step to unlock Option 2 OSD Power button lock all 5 buttons including the POWER button are locked Press and hold the MENU and AUTO buttons for 3 seconds to lock al...

Страница 15: ...ed press the MENU button to activate it If the function selected has a sub menu press or again to navigate through the sub menu functions Once the desired function is highlighted press MENU button to...

Страница 16: ...Vertical Line noise Image Position H Position Adjust the horizontal position of the picture V Position Adjust the vertical position of the picture Color Temp Warm N A Recall Warm Color Temperature fro...

Страница 17: ...Position Adjust the vertical position of the OSD OSD Timeout Adjust the OSD timeout Language Language N A Select the language you like Information Information N A Show the resolution H V frequency an...

Страница 18: ...his monitor meets the Green monitor standards as set by the Video Electronics Standards Association VESA and or the United States Environmental Protection Agency EPA and The Swedish Confederation Empl...

Страница 19: ...Card should be snugly seated in its slot Make sure monitor s video cable is properly connected to the computer Inspect monitor s video cable and make sure none of the pins are bent Make sure computer...

Страница 20: ...he picture has horizontal disturbances in light picture For FOCUS and CLOCK adjustment use dot pattern or win 95 98 shut down mode pattern ERROR MESSAGE POSSIBLE SOLUTION CABLE NOT CONNECTED 1 Check t...

Страница 21: ...lock 135MHz Analog Max Resolution 1280 1024 75Hz Analog Plug Play VESA DDC2BTM EPA ENERGY STAR ON Mode 25W OFF Mode 1W Input Connector 15 pin D Sub Input Video Signal Analog 0 7Vp p standard 75 OHM Po...

Страница 22: ...tton MENU External Controls Functions Contrast Brightness Focus Clock H Position V Position Warm Color Cool Color sRGB RGB Color temperature Auto Config OSD Setup Language Information Reset Exit Power...

Страница 23: ...469kHz 70 0Hz VGA 640 480 31 470kHz 60 0Hz 640 480 37 500kHz 75 0Hz SVGA 800 600 37 879kHz 60 0Hz 800 600 46 875kHz 75 0Hz XGA 1024 768 48 363kHz 60 0Hz 1024 768 56 476kHz 70 0Hz 1024 768 60 023kHz 7...

Страница 24: ...6 10 11 15 15 Pin Color Display Signal Cable PIN NO DESCRIPTION PIN NO DESCRIPTION 1 Red 9 5V 2 Green 10 Ground 3 Blue 11 Ground 4 Ground 12 DDC Serial Data 5 Detect Cable 13 H Sync 6 R Ground 14 V S...

Страница 25: ......

Страница 26: ......

Страница 27: ......

Страница 28: ...R 97006 1992 www planar com 2010 Planar Systems Inc Planar is a registered trademark of Planar Systems Inc Other brands and names are the property of their respective owners Technical information in t...

Отзывы: