55
I
NTERNAL CLEANING
:
1. Clean the shelves and the inside with warm water and a mild detergent.
2. Use clear water to rinse.
3. Dry the cleaned surfaces with a cloth.
4. Check the water drain and clean it if needed.
D
OOR SEALS
:
¾
Clean with warm water and a mild, non- acidic detergent. Do not restart the
appliance until the door seals have dried completely.
Drain hole:
¾
Check the opening of the water drain on the back of the cooling compartment
regularly. Clean the opening with a small wooden rod. Do not use any sharp-
edged items; otherwise you will damage the appliance.
5.1 Defrosting
M
ANUAL DEFROSTING
(
FREEZING COMPARTMENT
)
WARNING!
Never use any mechanical items, knives or other sharp-
edged objects to remove the encrusted ice. RISK OF ELECTRICAL
SHOCK!
1. Remove the content from the freezing-compartment and put it into a cooling
box.
2. Switch off the appliance by turning the thermostat to position 0/AUS/OFF and
disconnect it from the mains.
3. When the encrusted ice melts put some dry cloths into the freezer-compartment
to hold the water back.
4. Remove the big pieces of ice first. Afterwards remove the small pieces of ice.
5. Wipe and dry the appliance and door seals with dry and soft cloths.
6. After cleaning leave the door open for some time to ventilate the appliance.
A
UTOMATIC DEFROSTING
(
COOLING COMPARTMENT
)
1. The
cooling compartment
is defrosted automatically. The water runs into a
container near the compressor.
2. If the automatic defrosting does not meet the requirements, e.g. on days with
high ambient temperatures and humidity, defrost the appliance manually as
described above.
Содержание KS 120.4A+ EB
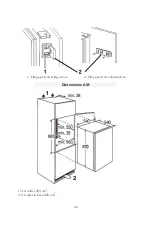
Страница 13: ...13 1 Scharnierteil an Kühlschranktür 2 Scharnierteil an Schranktür ...
Страница 14: ...14 Abmessungen A B 1 Luftaustritt 200 cm2 2 Lufteintritt im Sockel 200 cm2 ...
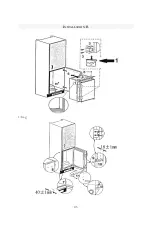
Страница 43: ...43 INSTALLATION B 1 bag ...
Страница 73: ...73 MONTAGE B 1 Sachet d emballage ...
Страница 104: ...104 1 Scharnier deel op koelkastdeur 2 Scharnier deel op de kastdeur ...

