46
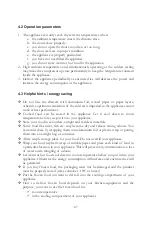
4. Operation
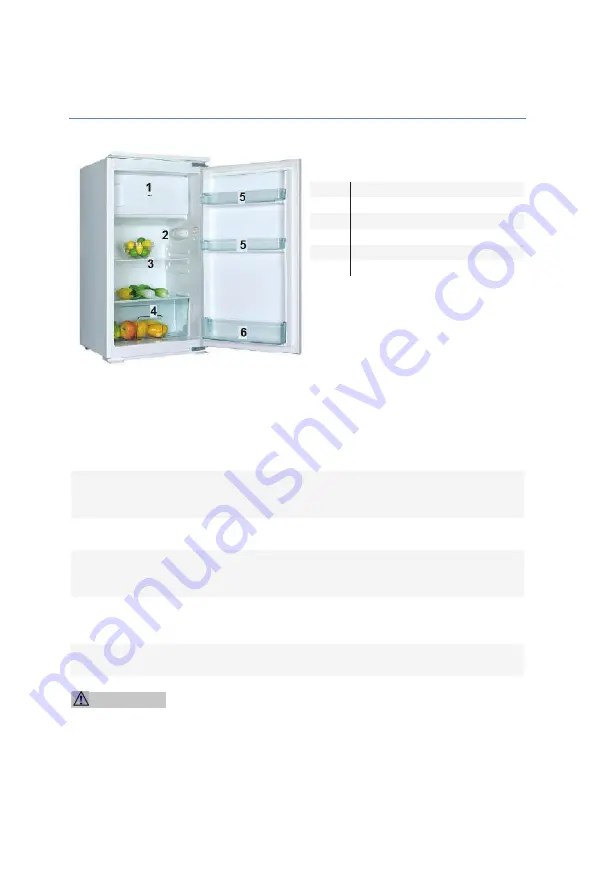
1.
F
REEZER FLAP
2.
T
HERMOSTAT
3.
A
DJUSTABLE SHELF
4.
C
RISPER
5.
D
ORR TRAYS
6.
B
OTTLE POCKET
4.1 Temperature setting
AFTER HAVING INSTALLED THE APPLIANCE WAIT 4 HOURS BEFORE
YOU CONNECT IT TO THE MAINS
.
1.
Set the thermostat to position 3 (daily-use-temperature) as soon as you have
switched on the appliance. After 5 hours the appliance has reached its
normal operating temperature and is ready for operation.
2.
If you desire a higher (warmer) temperature, set the thermostat from
position 3 to position 2 or lower.
3.
If the ambient temperatures are high (e.g. hot summer-days), set the
thermostat to position 4 or higher to decrease the temperature inside the
appliance.
4.
If you have set a lower (colder) setting, some ice may occur on the back of
the appliance. In such a case set the thermostat to a higher (warmer)
position.
5.
The setting 0/OFF switches off the compressor only.
You must unplug
the appliance to disconnect it from the mains.
WARNING!
Never use mechanic devices, knives or other sharp-edged
items to remove encrusted ice inside the appliance. RISK OF ELECTRIC
SHOCK caused by damaging the interior of the appliance.
Содержание KS 120.4A+ EB
Страница 13: ...13 1 Scharnierteil an Kühlschranktür 2 Scharnierteil an Schranktür ...
Страница 14: ...14 Abmessungen A B 1 Luftaustritt 200 cm2 2 Lufteintritt im Sockel 200 cm2 ...
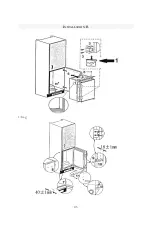
Страница 43: ...43 INSTALLATION B 1 bag ...
Страница 73: ...73 MONTAGE B 1 Sachet d emballage ...
Страница 104: ...104 1 Scharnier deel op koelkastdeur 2 Scharnier deel op de kastdeur ...

