TECHNOLOGIE FÜR DEN HAUSHALT
TECHNOLOGY FOR DOMESTIC USE
Bedienungsanleitung
Instruction Manual
Einbau-Backofen
Built-In Oven
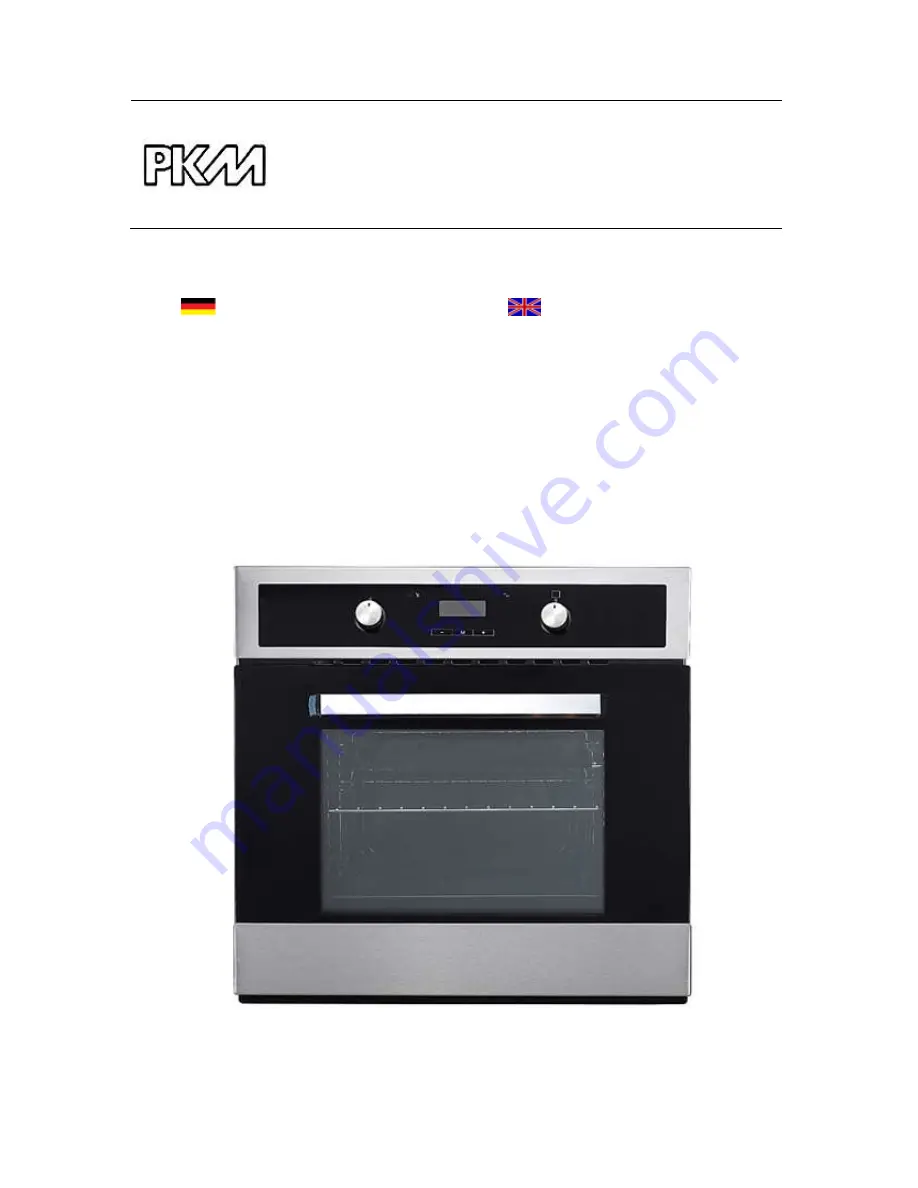
EBO 9.2
www.pkm-online.de
Страница 1: ...TECHNOLOGIE FÜR DEN HAUSHALT TECHNOLOGY FOR DOMESTIC USE Bedienungsanleitung Instruction Manual Einbau Backofen Built In Oven EBO 9 2 www pkm online de ...
Страница 2: ...n sämtlichen harmonisierten Anforderungen Die relevanten Unterlagen können durch die zuständigen Behörden über den Produktverkäufer angefordert werden Die in dieser Bedienungsanleitung enthaltenen Abbildungen können in einigen Details von dem tatsächlichen Design Ihres Geräts abweichen Folgen Sie in einem solchen Fall dennoch den beschriebenen Sachverhalten Lieferung ohne Inhalt Der Hersteller beh...
Страница 3: ...g des Geräts zu vermeiden Prüfen Sie auf jeden Fall auch das technische Umfeld des Geräts Sind alle Kabel oder Leitungen die zu ihrem Gerät führen in Ordnung Oder sind sie veraltet und halten der Geräteleistung nicht mehr Stand Daher muss durch eine qualifizierte Fachkraft Elektrotechniker in eine Überprüfung bereits vorhandener wie auch neuer Anschlüsse erfolgen Sämtliche Arbeiten die zum Anschlu...
Страница 4: ...n durchgeführt werden können zu ernsthaften Verletzungen und Schäden führen Falls Ihr Gerät nicht ordnungsgemäß funktioniert kontaktieren Sie das Geschäft in dem Sie das Gerät erworben haben Lassen Sie nur Original Ersatzteile einbauen 5 Wenn das Netzanschlusskabel beschädigt ist darf es ausschließlich vom Hersteller oder einem vom Hersteller autorisierten Kundendienst oder einer qualifizierten Fa...
Страница 5: ...m Gerät um Sorgen Sie auch für eine angemessene Belüftung des Raums in dem das Gerät betrieben wird Falls das Gerät über ausgedehnte Zeiträume betrieben wird kann eine zusätzliche Belüftung notwendig werden Fragen Sie in einem solchen Fall eine qualifizierte Fachkraft um Rat1 13 Dunstabzugshauben müssen entsprechend den Anweisungen ihrer Hersteller angebracht werden 14 Benutzen Sie das Gerät nicht...
Страница 6: ... diese Entsprechung nichts an der Tatsache ändert dass die Oberflächen des Geräts während der Benutzung heiß werden und nach dem Ende der Benutzung noch Restwärme ausstrahlen HINWEIS 1 Wenn Sie das Gerät bewegen halten Sie es immer am unteren Ende fest und heben Sie es vorsichtig an Halten Sie das Gerät dabei aufrecht 2 Benutzen Sie niemals die Tür selbst zum Transport des Geräts da Sie dadurch di...
Страница 7: ...Ihres Geräts 5 Entfernen Sie vor Inbetriebnahme sämtliches Verpackungsmaterial innerhalb und Außerhalb des Ofens 6 Das Typenschild befindet sich im Inneren des Geräts oder außen an der Rückwand Einbau des Backofens 1 Die Öffnung des Umbauschranks muss über die auf Abbildung 1 Kapitel 8 EINBAUZEICHNUNGEN genannten Abmessungen verfügen 2 Entfernen Sie vor der Installation die Rückwand der Einbauöffn...
Страница 8: ...mmen 2 Das Gerät muss geerdet werden 3 Es muss sorgfältig darauf geachtet werden dass die Temperatur des Netzanschlusskabels 500 C nicht überschreitet 3 BEDIENUNG 3 Zubehör A Grillrost C Backblech B Seitenführung D Teleskopauszug 1 4 Mögliche Einschubhöhen Bedienfeld Display 1 Einstellen der Ofentemperatur von 500 bis 2500 C 2 Die Temperaturleuchte erlischt wenn die eingestellte Temperatur erreich...
Страница 9: ...ie den Drehschalter hierbei auf die gewünschte Einstellung 2 Zur Einstellung der Temperatur bewegen Sie den Drehschalter für die Temperaturkontrolle 5 des Ofens auf die gewünschte Einstellung Sie können hierbei eine Temperatur von 500 C bis 2500 C wählen Zum Abschalten des Geräts müssen Sie beide Drehschalter auf 0 OFF AUS stellen Überprüfen Sie immer dass beide Drehschalter auf 0 OFF AUS stehen w...
Страница 10: ...ät erstmalig benutzen können die aktuelle Uhrzeit einstellen 1 Setzen Sie das Gerät in den MANUELLEN BETRIEBSMODUS siehe oben 2 Drücken Sie dazu die MANUELL TASTE 12 einmal um die Uhrzeit einzustellen Während der DEZIMALPUNKT 9 blinkt können sie mit den PLUS 11 und MINUS 13 TASTEN die Uhrzeit einstellen 3 Sobald die aktuelle Uhrzeit auf dem Display angezeigt wird geben Sie die PLUS und MINUS TASTE...
Страница 11: ...re Countdown Zeit beträgt 23 Stunden und 59 Minuten 4 Sobald die gewünschte Countdown Zeit auf dem Display angezeigt wird geben Sie die PLUS und MINUS TASTEN frei Der Countdown beginnt umgehend 5 Das MINUTENWÄCHTERSYMBOL verbleibt auf dem Display so erkennen Sie dass die Countdown Zeit läuft 6 Nach einigen Sekunden zeigt das Display wieder die aktuelle Uhrzeit an 7 Am Ende der Countdown Zeit ertön...
Страница 12: ... reset sind die ursprünglichen Temperatur und Funktionseinstellungen wieder aktiv Sie müssen daher die Drehschalter für die Temperatur und Funktion auf die AUS Position stellen um ein erneutes Aufheizen des Geräts zu unterbinden 3 Die Funktion Ende der Backzeit Diese Funktion ähnelt der halbautomatischen Backfunktion doch anstelle einer Countdown Zeit stellen Sie den Zeitpunkt ein an dem sich das ...
Страница 13: ...lay 4 Mit den PLUS 11 UND MINUS 13 TASTEN können Sie die gewünschte Backzeit einstellen Die maximal einstellbare Dauer beträgt 10 Stunden 5 Drücken Sie nun umgehend die MANUELL TASTE 9 Auf dem Display blinkt die aktuelle Uhrzeit Mit den PLUS 11 und MINUS 13 TASTEN können Sie das gewünschte Ende der Backzeit einstellen Das maximal einstellbare zukünftige Backzeitende beträgt 10 Stunden 6 Wenn die g...
Страница 14: ...sprünglichen Temperatur und Funktionseinstellungen wieder aktiv Sie müssen daher die Drehschalter für die Temperatur und Funktion auf die AUS Position stellen um ein erneutes Aufheizen des Geräts zu unterbinden 6 Einstellen des akustischen Signals Das akustische Signal verfügt über 3 Töne Verfahren Sie zum Einstellen wie folgt 1 Der Timer darf sich nicht in einem der Countdown Modi befinden und da...
Страница 15: ...s Grillgut geben Ideal für mittlere oder große Portionen Würstchen Steaks Fisch etc Der Grill mit Oberhitze und Umluft nutzt das obere Element zusammen mit dem Ventilator was zu einer schnellen Hitzezirkulation führt Ideal zum schnellen Bräunen von Steaks Hamburgern einigen Gemüsearten etc Heißluft ist die Verbindung des Ventilators mit dem ihn umgebenden Heizelement Die Heißluft wird somit in der...
Страница 16: ...elle Aufheizmethode obere und untere Heizelemente angewandt wird die Nutzung solcher Formen kann zu einer zu geringen Aufheizung des unteren Teils des Kuchens führen Bevor der Kuchen aus dem Ofen herausgenommen wird kontrollieren Sie ob das Backen abgeschlossen ist indem Sie ein Holzstäbchen verwenden der Kuchen ist ausgebacken wenn das Stäbchen trocken und sauber herauskommt nachdem Sie es in den...
Страница 17: ...Benutzung Schalten Sie beim Reinigen die Innenbeleuchtung des Ofens ein Reinigen Sie das Innere des Ofens nur mit warmem Wasser und ein wenig Spülmittel Nehmen Sie dazu einen Schwamm oder ein weiches Tuch Benutzen Sie keine aggressiven und ätzenden Reinigungsmittel Wischen Sie nach der Reinigung das Innere des Ofens trocken Reinigen Sie die äußeren Bereiche des Ofens mit warmem Seifenwasser Nehmen...
Страница 18: ...s der Fassung und ersetzen Sie es durch ein neues derselben Art und Leistung Hitzeresistentes Backofenleuchtmittel 3000 C 230V 25W E 14 Gewinde 4 Verwenden Sie kein anderes Leuchtmittel 5 Bringen Sie die Abdeckung wieder an Entnahme der Seitenführungen2 1 Drücken Sie auf die Unterseite der Seitenführung bis sie aus ihrer Befestigung gelöst ist 2 Halten Sie die Seitenführung zur Entnahme vertikal z...
Страница 19: ...d das Scharnier beim Schließen der Tür beschädigt Glasscheibe herausnehmen 1 Schrauben Sie den Halterungsverschluss los der sich in der Ecke oben an der Tür befindet und lösen Sie ihn 2 Nehmen Sie als Nächstes das Glas aus dem zweiten Blockier Mechanismus heraus und entfernen Sie es 3 Setzen Sie nach dem Reinigen die Glasscheibe ein und blockieren Sie diese 4 Schrauben Sie dann den Blockier Mechan...
Страница 20: ...nen arbeiten aber die anderen Funktionen arbeiten nicht Überprüfen Sie ob die richtigen Funktionen aktiviert wurden Entsprechende Funktion aktivieren Das Backgut gart ungleichmäßig Ordnungsgemäße Installation und Ausrichtung des Geräts überprüfen Installierung und Ausrichtung ordnungsgemäß durchführen 5 TECHNISCHE DATEN 5 Geräteart Einbaubackofen Bedienfeld Edelstahlblende Energieeffizienzklasse A...
Страница 21: ...gt werden können gesundheitsgefährdende Stoffe ins Grundwasser gelangen Somit gelangen solche Stoffe in die Nahrungskette und schädigen Ihre Gesundheit und Ihr Wohlbefinden 5 Bevor Sie ein beliebiges Altgerät entsorgen machen Sie dieses vorher unbedingt funktionsuntüchtig Das bedeutet immer den Netzstecker ziehen und danach das Stromanschlusskabel am Gerät abschneiden und direkt mit dem Netzstecke...
Страница 22: ...m Käufer durch Vorlage des Kaufbelegs mit Kauf und oder Lieferdatum nachzuweisen und uns oder in der Bundesrepublik Deutschland unserem Kundendienst unverzüglich nach Feststellung und innerhalb von 24 Monaten nach Lieferung an den Erstendabnehmer zu melden Für unsere Geräte leisten wir Garantie gemäß nachstehenden Bedingungen Mängel am Gerät die nachweislich auf einem Material oder Herstellungsfeh...
Страница 23: ...ht fachkundige Personen 3 Schäden verursacht durch den Verkäufer Installateur oder dritte Personen 4 unsachgemäße Installation oder Inbetriebnahme 5 mangelnde oder fehlerhafte Wartung 6 Geräten die nicht ihrem vorgesehenen Zweck entsprechend verwendet werden 7 Schäden durch höhere Gewalt oder Naturkatastrophen insbesondere aber nicht abschließend bei Brand oder Explosion Garantieleistungen bewirke...
Страница 24: ...ent design of your appliance Nevertheless follow the instructions in such a case Delivery without content Any modifications which do not influence the functions of the appliance shall remain reserved by the manufacturer Please dispose of the packing with respect to your current local and municipal regulations The appliance you have purchased may be an enhanced version of the unit this manual was p...
Страница 25: ...nce with its intended use only Do not allow anybody who is not familiar with this instruction manual to operate the appliance This appliance may be operated by children aged from 8 years and above as well as by persons with reduced physical sensory and mental capabilities or lack of experience and knowledge if they are supervised or have been instructed concerning the safe use of the appliance and...
Страница 26: ... furniture or housing and all materials used for installation must be able to resist a temperature of min 850 C above the ambient temperature of the room the appliance is installed in during operation 10 Remove the back of the kitchen unit to ensure adequate ventilation around the appliance The appliance must have at least 45 mm of free space at its back 11 Do not install the appliance in rooms or...
Страница 27: ...the hot parts of the oven or the steam which will escape the oven 7 Always use oven gloves 8 This appliance complies with the current European safety legislation We do wish to emphasize that this compliance does not negate the fact that the surfaces of the appliance will become hot while operating and will retain and emit heat even if it has stopped operating NOTICE 1 When you move the appliance h...
Страница 28: ...n 7 The nameplate is situated inside the appliance or at the back Installation of the oven 1 Provide an opening meeting the dimensions on figure 1 chapter 8 Installation Drawings 2 Ensure that the rear panel of the furniture housing unit has been removed Electrical connection DANGER The appliance must be connected to the mains by a qualified professional who is familiar with and adheres to the loc...
Страница 29: ... 4 Different rack heights Control panel 1 Setting of the temperature from 500 to 2500 C 2 The temperature indicator goes off when the set temperature has been reached 3 Programming unit 4 The operation indicator goes on when the appliance is used 5 Setting of the functions 6 LED Display ...
Страница 30: ...thin a range of 50 250 The oven can be switched off by setting both of these knobs to position 0 OFF AUS Always check that the rotary knobs are set to 0 AUS OFF when you do not operate the appliance Proper positioning of the trays is mandatory for safe operation of the appliance Otherwise hot food or cookware can slide off the trays when removing them Cooling fan A tangential cooling fan is instal...
Страница 31: ...e Plus and MINUS BUTTONS and wait a few seconds The DECIMAL DOT 9 stops flashing The appliance is ready for operation now Before initial operation 1 To remove any residue from the oven that may have been left from the manufacturing process you should select the fan oven function and set the thermostat to its maximum temperature setting generated smells are perfectly normal Please open the windows ...
Страница 32: ... in use while operating the minute minder function the oven WILL NOT be switched off at the end of the countdown time YOU MUST turn the oven function rotary knob and the oven temperature rotary knob to their OFF positions 2 The semi automatic function This function allows you to set a countdown time similar to the minute minder function however the oven is switched off at the end of the cooking ti...
Страница 33: ...stable end of the cooking time is 10 hours in the future 5 Release the PLUS and MINUS BUTTONS as soon as the desired end of the cooking time is displayed Cooking starts immediately After a few seconds the countdown begins 6 At the end of the cooking time the appliance is switched off An acoustic signal sounds the AUTOMATIC FUNCTION SYMBOL 7 and the MINUTE MINDER SYMBOL 10 flash on the display 7 Pr...
Страница 34: ... for 3 seconds The time display flashes after the first pressing after the second one the OVEN IN USE SYMBOL occurs on the display and the AUTOMATIC FUNCTION SYMBOL 7 goes out 11 WARNING When you have stopped the acoustic signal and reset the appliance the initial temperature and function settings are activated again So you have to set the rotary knobs temperature and function to the OFF position ...
Страница 35: ... 2 See the information given in Setting of the time of the day The functions 50 2500 C You can set the temperature from 50 2500 C Bottom heat with fan Suitable for delicate cooking warming up pre cooked food and sterilizing of preserving jars Bottom and top heat conventional cooking Conventional heating of the oven The oven has to be preheated Bottom and top heat with fan A traditional method for ...
Страница 36: ...aluminium foil will reflect the heat of the grill so the appliance can be damaged Helpful hints We recommend to use the supplied baking tray provided with your appliance It is also possible to bake in cake tins and trays bought somewhere else For baking it is better to use black trays which conduct heat better and shorten the baking time Shapes and trays with bright or shiny surfaces are not recom...
Страница 37: ...ct the appliance from the mains before maintenance Oven Clean the oven after use Switch on the internal light while cleaning Clean the interior with warm water and a little bit of washing liquid Use a sponge or a soft cloth Never use abrasive or aggressive detergents Dry after cleaning Clean the outside of the oven with warm soapy water Use a sponge or a soft cloth Never use abrasive or aggressive...
Страница 38: ... 3 Lift the door and pull it towards your direction 4 To reassemble proceed in reverse order 5 Check that the groove of the hinge bracket is positioned properly in its guide 6 After reassembling the door close the safety catch carefully 7 If the safety catch is not closed properly you will damage the hinges when closing the door Removing of the glass panel 1 Unscrew and unfasten the bracket latch ...
Страница 39: ...from the mains fuse box of your household power supply 3 Contact your aftersales service Check the schedule below before you contact your aftersales service MALFUNCTION POSSIBLE CAUSES MEASURES Appliance does not work at all 1 Check that the manual operation mode is activated 2 Check the information about setting 1 Enable manual operation mode 2 Follow the relevant information about proper install...
Страница 40: ... TECHNICAL DATA 5 Model Built in oven n Control panel Stainless steel panel Energy efficiency category A Energy consumption conventional Energy consumption hot air fan 0 86 kW h 0 78 kW h Net volume oven in l 60 00 Size of the appliance Medium 35 l volume 65 l Functions Grill Fan Hot air fan Telescopic guides 2 Timer Full glass inner door Oven door Glass sheets Black glass 2 Body cooling Handles k...
Страница 41: ...nd labelled with relevant information When recycling materials or other parts from used appliances you make a significant contribution to the protection of our environment 8 Dispose of any paper and cardboard into the corresponding containers 9 Dispose of any plastics into the corresponding containers 10 If suitable containers are not available at your residential area dispose of these materials a...
Страница 42: ...given over or submitted to our after sales If the repair work is refused by us or if the repair work finally fails the old appliance if requested will be replaced by an appliance of the same kind quality and type within the period of guarantee If the old appliance is no longer produced at the time the defect occurred PKM will be entitled to deliver a similar appliance The exchange of the appliance...
Страница 43: ...rantee period for installed replacement parts ends with the guarantee Provided that a product related malfunction is not covered by this guarantee the vendee has to bear the cost when the appliance is checked including any labour costs that may arise If the holder of the guarantee has requested repair work then the holder of the guarantee must be informed about the non intervention of the guarante...
Страница 44: ...rauben Sie die 4 Schrauben A durch das Gehäuse des Geräts in die Einbaueinheit GB Ensure that the oven has been securely fixed into the housing unit The fixing of the oven on the housing is carried out by using four screws A These screws should be screwed through the oven cabinet and into the housing unit ...
Страница 45: ...n alle Informationen zum Kundendienst auf der Einlage in dieser Bedienungsanleitung Aftersales service information on the leaflet inside this instruction manual Änderungen vorbehalten Stand September 2014 Subject to alterations Updated September 2014 PKM GmbH Co KG Neuer Wall 2 47441 Moers ...