


Chapter 3
20
••••
Camera Live View UI Settings
PD736 User’s Manual
Click
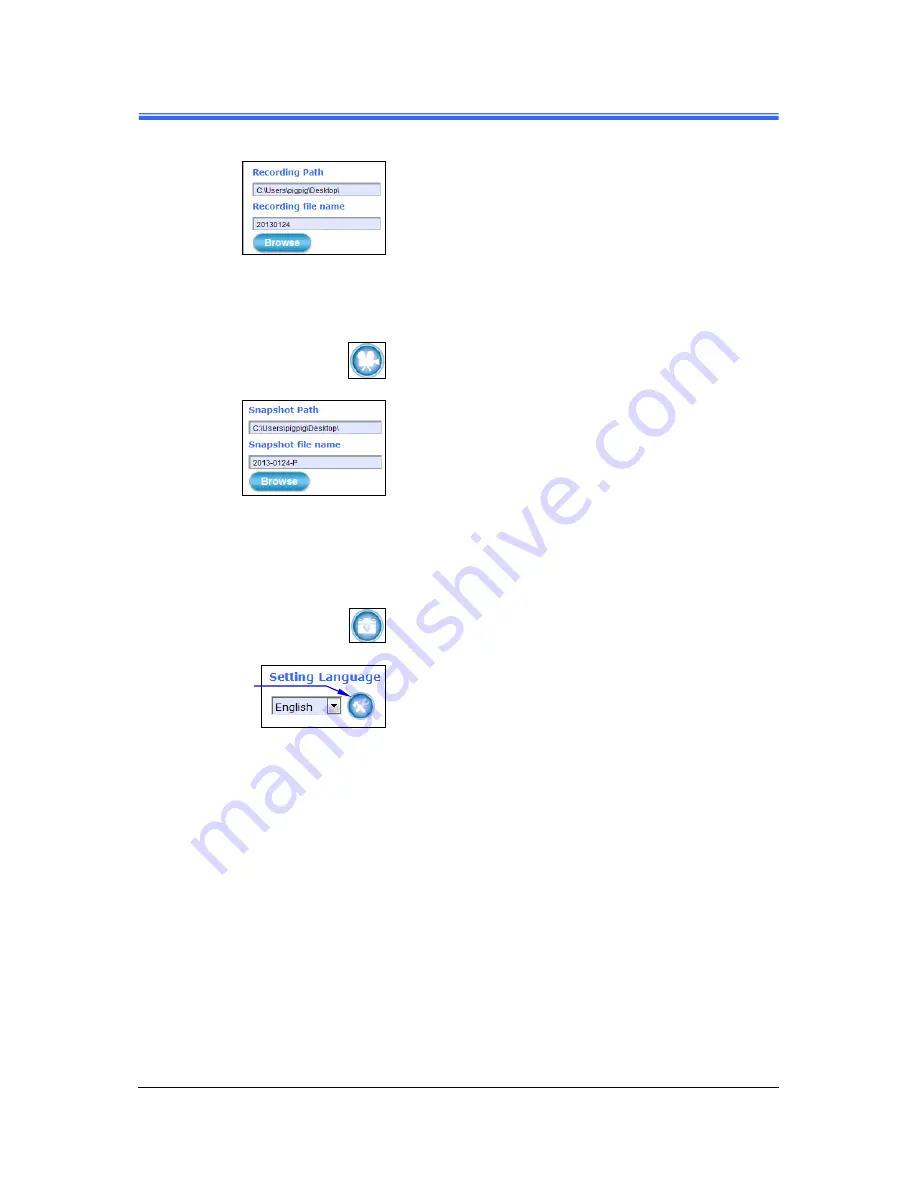
Browse
button to define Recording Path and
Recording Filename for the video you are preparing to
record.
Recording Path
:
Specify a storage destination path for
the video you are going to record.
Recording file name
:
Define a base filename for the
video recordings you are going to take.
The base filename will auto-expand for
each saved video recording.
To start recording, click the
Recording
button.
Click
Browse
button to define Snapshot Path and
Snapshot Filename for the snapshots you are preparing to
capture.
Snapshot Path
:
Specify a storage destination path for the
snapshot images you are preparing to
capture.
Snapshot file name
:
Define base filename for the
snapshots you going to capture. The
base filename will auto-expand for each
saved snapshot.
To start capturing snapshots, click the
Snapshot
button.
Setting Language
:
Select the default language of the
user-interface.
Click
Setup
button
to change or update
more Camera
settings.
Содержание PD736
Страница 2: ......
Страница 4: ......
Страница 8: ......
Страница 49: ...Chapter 4 PD736 User s Manual Setup Execution 39 4 3 2 Video Tab Figure 4 16 Video Tabbed Pane...


