86
XR-A550MD
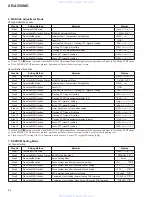
Step No.
Setting Method
Remarks
Display
Step 14
Press the MENU button.
Equalizer coefficient B, C (low reflectance groove) setting
[ GDEQBC_
♦♦
]
Step 15
Press the MENU button.
Auto level slicer gain (high reflectance) setting
[ HALSG_ _ _
♦♦
]
Step 16
Press the MENU button.
Auto level slicer gain (low reflectance pit) setting
[ LALSG_ _ _
♦♦
]
Step 17
Press the MENU button.
Auto level slicer gain (low reflectance groove) setting
[ GALSG_ _ _
♦♦
]
Step 18
Press the MENU button.
Auto level slicer offset (high reflectance) setting
[ HALSOFS_
♦♦
]
Step 19
Press the MENU button.
Auto level slicer offset (low reflectance pit) setting
[ LALSOFS_
♦♦
]
Step 20
Press the MENU button.
Auto level slicer offset (low reflectance groove) setting
[ GALSOFS_
♦♦
]
(e) CONTROL Setting
Step No.
Setting Method
Remarks
Display
Step 1
EJECT status (or No Mechanism status)
[ _ _ EJECT_ _ _ ]
Step 2
Press the DISP/CHARA button.
CONTROL 1 setting
[ CONTRL1_
♦♦
]
Step 3
Press the MENU button.
CONTROL 2 setting
[ CONTRL2_
♦♦
]
♦♦
: Set value
If the
¡
button is pressed while a setting item is being displayed, the set value will increase and the new set value will be set in LSI.
If the
1
button is pressed while a setting item is being displayed, the set value will increase and the new set value will be set in LSI.
If the
¡
/
1
buttons are pressed and held down, data will change continuously in 100ms cycles.
CONTROL 1
Pit 7: High-frequency weight ON/OFF during recording (0: OFF, 1: ON)
Pits 6 – 4: Play start SD number (30 – 100 sectors; 10-sector steps)
Pit 2 – 0: High-speed jump overrun amount (384 – 830 jumps; 64-jump steps)
CONTROL 2
Pit 4 – 0: EEPROM version (a –)
Step No.
Setting Method
Remarks
Display
Step 1
Test mode STOP state
[ tsm
????
e
??
]
Step 2
Press the ENTER button.
TEST-PLAY Menu
[ TEST_ PLAY_ ]
Step 3
Press the DELITE button.
ADRES setting (displays standard address initial setting)
[ ADRES _ 0050 ]
Press the
`
button.
Sets Search output to "H" during Search operation and returns to "L" at
start of playback.
(A C1 error display)
[ s
&&&&
c
????
]
(A C1 error display)
[ a
&&&&
c
????
]
(A ADIP error display)
[ a
&&&&
a
????
]
TEST-PLAY Menu
[ TEST_ PLAY_ ]
8. TEST-PLAY Mode
555
: Number of Jumps
) button is pressed while the TEST-PLAY Menu is displayed, operation moves to Test Mode STOP status.
=
........
Each time the DELETE button is pressed in Address Setting Mode, the digits will change as follows with the S.M. JOG button.
0050
=
0050
=
0050
=
0050
=
........
In Address Setting Mode, the designated address digits can be c01H / –01H with the S.M. JOG and DELETE buttons (0 – F).
If the S.M. JOG button is turned and held down, the data will change in 100ms cycles.
If the DISP/CHARA button is pressed in Continuous Play Mode, the number of Jumps will change as follows:
1 Jump
=
10 Jumps
=
400 Jumps
=
1 Jump
=
........
After the number of Jumps is displayed for 1 second, the Address display will be restored [
555
TR_JUMP ]
If the S.M. JOG button is turned in Continuous Play Mode, the designated number of Jumps will be executed in FWD/REV directions.
If the S.M. JOG button is turned and held down, the data will change in 100ms cycles.
www. xiaoyu163. com
QQ 376315150
9
9
2
8
9
4
2
9
8
TEL 13942296513
9
9
2
8
9
4
2
9
8
0
5
1
5
1
3
6
7
3
Q
Q
TEL 13942296513 QQ 376315150 892498299
TEL 13942296513 QQ 376315150 892498299


