79
XR-A550MD
Remarks
Display
[ tsm
????
e
??
]
Press the MENU button 3 times. RESULT Preliminary Menu
[ _RST_YOBI_ ]
Set value display
[ RFG: _ _ _ _ _
]
Step 4
Press the MENU button.
Set value display
[ RCG: _ _ _ _ _
]
Step 5
Press the MENU button.
Set value display
[ PTG: _ _ _ _ _
]
Step 6
Press the MENU button.
Set value display
[ GTG: _ _ _ _ _
]
Step 7
Press the MENU button.
Set value display
[ PCH: _ _ _ _
¶¶
]
Step 8
Press the MENU button.
Set value display
[ GCH: _ _ _ _
¶¶
]
Step 9
Press the MENU button.
Set value display
[ SAG: _ _ _
¶¶¶
]
Step 10
Press the MENU button.
Set value display
[ SBG: _ _ _
¶¶¶
]
Step 11
Press the MENU button.
Set value display
[ SEG: _ _ _
¶¶¶
]
Step No.
Setting Method
Remarks
Display
Step 1
Test mode STOP state
[ tsm
????
e
??
]
Step 2
Press the MENU button once.
AUTO Preliminary Adjustment Menu
[ _AUT_YOBI_ ]
Step 3
Press the
`
button once.
Slide moves to innermost track and AUTO Preliminary Adjustment is
[
∗∗∗
: _ _ _ _ _ _ ]
engaged.
During AUTO Adjustment,
∗∗∗
will change as follows.
HAo
=
RFg
=
SAg
=
SBg
=
PTG
=
PCH
=
GTG
=
GCH
=
RCG
=
SEG
=
RFG
=
SAG
=
HAO
=
HEO
=
TCO
=
LAO
End of Adjustment
If adjustment is OK, go to step 4.
If adjustment is NG, go to step 5.
Step 4
Grating adjustment,
[ _COMPLETE_ ]
adjusted value output
Press the STOP button.
Step 2
Step 5
Adjusted value output
[ Can't_ADJ. ]
Press the STOP button.
Step 2 AUTO Preliminary Adjustment Menu
∗∗∗
: Adjustment name,
&&&&
: Address
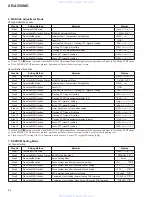
1. AUTO Preliminary Adjustment Mode (Low-Reflectance Disc Only)
Step No.
Setting Method
Remarks
Display
Step 1
Test mode STOP state
[ tsm
????
e
??
]
Step 2
Press the MENU button 2 times. AUTO Adjustment Menu
[ AUTO_AJST_ ]
Step 3
Press the
`
button once.
Slide moves to innermost track and AUTO Adjustment is engaged.
[
∗∗∗
: _ _ _ _ _ _ ]
In the case of a high-reflectance disc,
∗∗∗
will change as follows.
PEG
=
HAG
In the case of a low-reflectance disc,
∗∗∗
will change as follows.
PEG
=
LAG
=
GCG
=
GEG
=
LAG
End of Adjustment
If adjustment is OK, go to step 4.
If adjustment is NG, go to step 7.
Step 4
Adjusted value output
[ _COMPLETE_ ]
Press the
`
button.
Step 5
Press the STOP button.
Step 2
Step 5
Continuous playback (pit)
[ s
&&&&
c
????
]
Continuous playback (groove)
[ a
&&&&
c
????
]
Step 6
Press the DELETE button.
Continuous playback (groove)
[ a
&&&&
a
????
]
Press the STOP button.
Step 2 AUTO Adjustment Menu
[ Can't_ADJ. ]
Step 2 AUTO Adjustment Menu
: Measured value,
&&&&
: Address
2. AUTO Adjustment Mode
www. xiaoyu163. com
QQ 376315150
9
9
2
8
9
4
2
9
8
TEL 13942296513
9
9
2
8
9
4
2
9
8
0
5
1
5
1
3
6
7
3
Q
Q
TEL 13942296513 QQ 376315150 892498299
TEL 13942296513 QQ 376315150 892498299


