background image


Advanced setup

11


87


En


• If the 


YES


 or 


PLUS


 setting on the subwoofer is 

selected (in 


Speaker Setting


 on page 51), the test tone 

will only play back from the subwoofer. If not, the test 
tone will play back from the front and surround 
speakers set to 


LARGE


.


4

When you're finished, select ‘Exit’.


You will return to the Expert setup menu.


Dynamic Range Control


• Default setting: 


OFF


This setting specifies the amount of dynamic range 
adjustment to Dolby Digital and DTS movie soundtracks. 
You may want to use this when listening to surround 
sound at low volumes.


1

Select ‘D-Range Control’ from the Expert setup 

menu.

2

Choose the setting that you want.


OFF


 – No dynamic range adjustment (use when 

listening at higher volume).


MID


 – Mid setting.


MAX


 – Dynamic range is reduced (loud sounds are 

reduced in volume while quieter sounds are 
increased)


3

When you're finished, select ‘Exit’.


You will return to the Expert setup menu.


 Tip


• For general dynamic range control, you can use the 

Midnight listening mode (see 


Using Midnight and 

Loudness listening


 on page 45) on a variety of 

sources that are not Dolby Digital or DTS encoded.
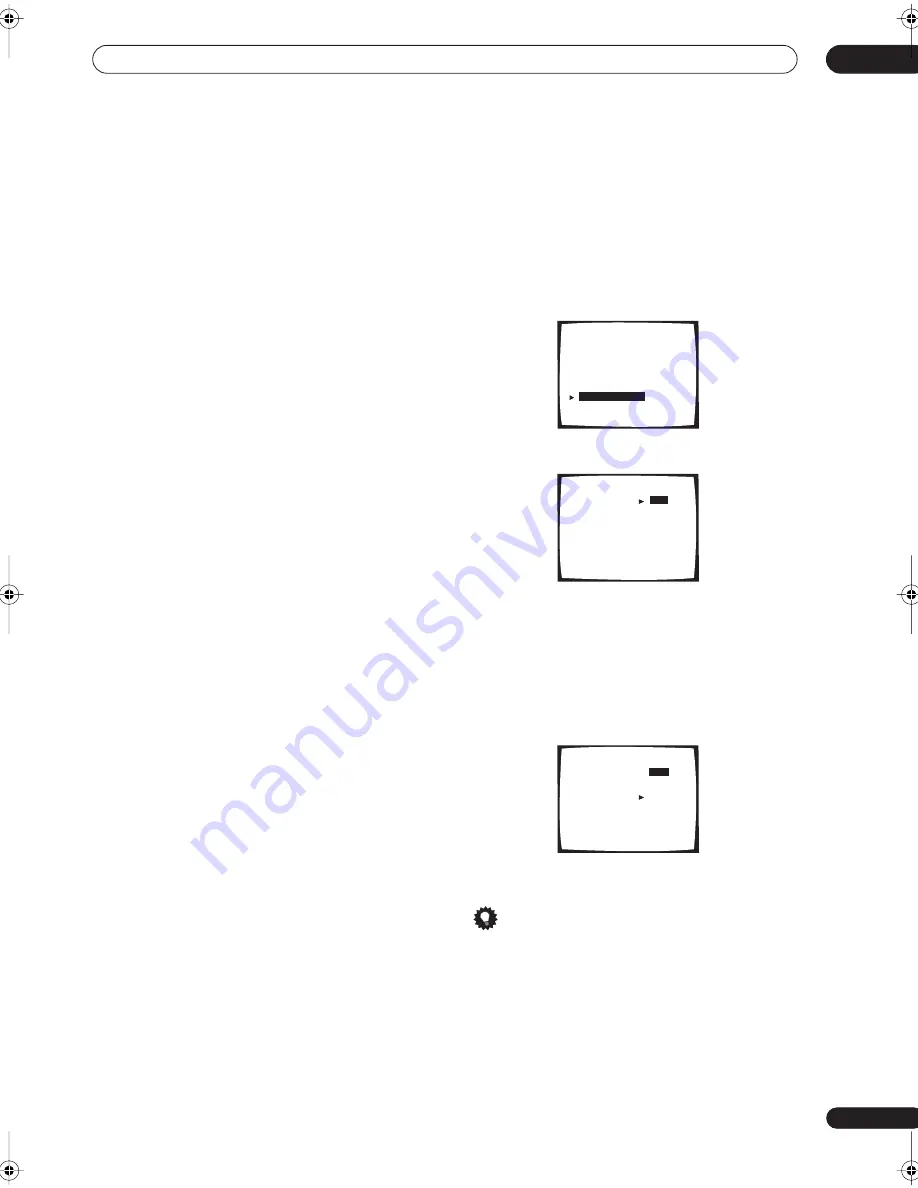
Expert

[ Crossover Network


]

[ Fine Channel Level  ]
[ Fine Channel Delay ]
[ Acoustic Cal EQ 

 ]

[ Bass Peak Level 

]

D-Range Control


]

[ Exit 

]

Dynamic  Range  Control

   Select  Mode 

OFF 

]


dts  

[ MID ]


[ MAX  ]


[ Exit ]


Dynamic  Range  Control

   Select  Mode 

OFF

  ]


dts  

[ MID  ]


[ MAX  ]


[ Exit ]


VSX-9300.book 87 ページ 2004年5月21日 金曜日 午前11時28分

Содержание VSX-9300TX

Страница 1: ... your purchase will be on file for reference in the event of an insurance claim such as loss or theft Improve product development Your input helps us continue to design products that meet your needs Receive a free Pioneer newsletter Registered customers can opt in to receive a monthly newsletter Receive free tips updates and service bulletins on your new product ...

Страница 2: ... uses and can radiate radio frequency energy and if not installed and used in accordance with the instructions may cause harmful interference to radio communications However there is no guarantee that interference will not occur in a particular installation If this equipment does cause harmful interference to radio or television reception which can be determined by turning the equipment off and on...

Страница 3: ... as to provide some protection against voltage surges and built up static charges Article 810 of the National Electrical Code ANSI NFPA 70 provides information with regard to proper grounding of the mast and supporting structure grounding of the lead in wire to an antenna discharge unit size of grounding conductors location of antenna discharge unit connection to grounding electrodes and requireme...

Страница 4: ...he speakers 29 Connecting antennas 30 AM loop antenna 30 FM wire antenna 30 Connecting external antennas 30 Plugging in the receiver 31 About the AC outlet 31 04 Controls and displays Front panel 32 Display 34 Remote control 35 05 Listening to your system Auto playback 37 Listening in surround sound 37 The MOVIE listening modes 38 The MUSIC listening modes 39 Dolby Pro Logic IIx Music settings 39 ...

Страница 5: ...ns Second Zone speaker B setup 67 Switching the speaker system 67 Bi amping your front speakers 68 Bi wiring your speakers 68 Multi room listening 69 Making multi room connections 69 Using the multi room controls 70 Connecting an IR receiver 71 Connecting additional amplifiers 71 Using the USB interface 72 Connecting a PC for Advanced MCACC output 73 Advanced MCACC output using your PC 73 11 Advan...

Страница 6: ...realistic sound effects The built in Dolby Pro Logic IIx and DTS Neo 6 decoders not only provide full surround sound decoding for Dolby Surround sources but will also generate convincing surround sound for any stereo source Also with the addition of a surround back speaker you can take advantage of the built in Dolby Digital EX and DTS ES decoders for six channel surround sound Seamless video conv...

Страница 7: ...mp or wet areas in extremely hot or cold areas in places where there is vibration or other movement in places that are very dusty in places that have hot fumes or oils such as a kitchen Opening the front panel To open the front panel push gently on the lower third of the panel with your finger Using the remote control Loading the batteries Load the batteries into the remote control as shown below ...

Страница 8: ...e remote control The operating range is quite large but please keep in mind the following when using the remote control Make sure that there are no obstacles between the remote and the remote sensor on the unit The remote has a range of about 23 feet 7 meters Remote operation may become unreliable if strong sunlight or fluorescent light is shining on the unit s remote sensor Remote controllers for...

Страница 9: ...hanges for realistic surround sound but other possibilities like listening to a CD with multichannel surround sound are explained in Listening to your system on page 37 Setting up for Surround Sound This receiver was designed with the easiest possible setup in mind so with the following quick setup guide you should have your system hooked up for surround sound in no time at all In most cases you c...

Страница 10: ...kers only are necessary Note that your main surround speakers should always be connected as a pair but you can connect just one surround back speaker if you like it must be connected to the left surround back terminal You can use speakers with a nominal impedance between 6 16Ω please see Switching the speaker impedance on page 64 if you plan to use speakers with an impedance of less than 8Ω AC IN ...

Страница 11: ... the sound Place your speakers as shown below for the best surround sound effect For more tips on speaker placement see Placing the speakers on page 29 4 Plug in the receiver and switch it on followed by your DVD player your subwoofer and the TV Make sure you ve set the video input on your TV to this receiver Check the manual that came with the TV if you don t know how to do this Also make sure th...

Страница 12: ...tch on the receiver and your TV Use the RECEIVER button to switch on 2 Connect the microphone to the MCACC SETUP MIC jack on the front panel Make sure there are no obstacles between the speakers and the microphone Place the microphone on the supplied microphone stand shown above for the best results with the Auto Surround Setup Important If you have a tripod use it to place the microphone so that ...

Страница 13: ...ed go to the next step If you see an ERR message in the right side column there may be a problem with the speaker connection If selecting Retry above doesn t fix the problem turn off the power and check the speaker connections 11 Make sure OK is selected then press ENTER A progress report is displayed on screen while the receiver outputs more test tones to determine the optimum receiver settings f...

Страница 14: ... set to output multichannel analog audio Note Depending on your DVD player or source discs you may only get digital 2 channel stereo and analog sound In this case select one of the surround listening modes see Listening in surround sound on page 37 if you need to do this if you want multichannel surround sound Playing a source Here are the basic instructions for playing a source such as a DVD disc...

Страница 15: ...ayback source for audio See Using the USB interface on page 72 for connection details 3 IR input output An IR connection allows you to connect an external remote control sensor when your component system is in a closed cabinet or shelving unit for example See Connecting an IR receiver on page 71 for connection details 4 Control input output Mini plug terminals for connection to other Pioneer compo...

Страница 16: ...12V trigger jack This terminal outputs DC 12V according to the input functions 100 mA max See Switching components on and off using the 12 volt trigger on page 61 for connection details 16 RS 232C connector This port is provided for connecting a personal computer for graphical output when using Advanced MCACC 17 Speaker terminals These are the main speaker terminals for front center surround and s...

Страница 17: ... the most common type of video connection and should be used to connect to the composite video terminals They have yellow plugs to distinguish them from cables for audio S video cables S video cables give you clearer picture reproduction than regular video cables by sending separate signals for the luminance and color Component video cables Use component video cables to get the best possible color...

Страница 18: ...o use the component video outputs to connect this receiver to your TV See About the video converter on page 16 if you plan on connecting your other video components using different types of video cables than for your TV 2 Connect the analog audio outputs from your TV to the TV SAT inputs on this receiver Use a stereo RCA phono cable for the connection 3 Connect an optical digital audio output from...

Страница 19: ... the player to see Assigning the digital inputs on page 75 2 If your DVD player only has stereo analog audio outputs connect these to the DVD LD AUDIO inputs on this receiver Use a stereo RCA phono cable for the connection If your DVD player has multichannel analog outputs see Connecting the multichannel analog outputs below for how to connect it 3 Connect a composite or S video output on your DVD...

Страница 20: ...t to its corresponding input on the receiver 2 If your DVD player also has outputs for surround back channels connect these to the corresponding MULTI CH IN jacks on this receiver Use standard RCA phono cables for the connections If there is only a single surround back output be sure to connect it to the SURROUND BACK L jack on this receiver Note To listen to multichannel analog audio you ll need ...

Страница 21: ...mponent to the DIGITAL 1 TV SAT input on this receiver Use an optical cable for the connection If your set top box only has a coaxial digital output you can connect it to one of the coaxial inputs on this receiver using a coaxial digital audio cable When you set up the receiver you ll need to tell the receiver which input you connected the set top box to see Assigning the digital inputs on page 75...

Страница 22: ...tandard RCA video or S video cable for the video connection For a second recorder use the VCR2 outputs 3 Connect an optical digital audio output from the recorder to a digital input on this receiver The example illustration below shows a recorder connected to the optical DIGITAL 2 CD R TAPE1 input When you set up the receiver you ll need to tell the receiver which input you connected the recorder ...

Страница 23: ...eo cable for the video connection See About the video converter on page 16 if you plan to use a different type of video cable than you used to connect your TV 2 If the source component has a digital audio output connect it to a spare digital audio input on this receiver Use a coaxial digital audio cable or an optical cable for the connection depending on the type of input you used You may need to ...

Страница 24: ...receiver s component video MONITOR output 1 Connect the component video outputs of your source to a set of component video inputs on this receiver Use a three way component video cable for the connection 2 Assign the component video inputs to the input source you ve connected This must be done so that they can be used in conjunction with the audio video input s to which you have connected the comp...

Страница 25: ...inputs on this receiver using an optical cable When you set up the receiver you ll need to tell the receiver which input you connected the player to see Assigning the digital inputs on page 75 The digital outputs from other components can be connected to any spare digital audio inputs on this receiver You can assign them when setting up the receiver see Assigning the digital inputs on page 75 2 Co...

Страница 26: ...e audio inputs on this receiver If you re connecting a tape deck MD recorder etc connect the analog audio outputs REC to the analog audio inputs on the recorder Use a stereo RCA phono cable for the connections 2 Connect the stereo audio outputs of your turntable to the PHONO inputs on this receiver If your turntable has a grounding wire secure it to the ground terminal on this receiver If your tur...

Страница 27: ...are especially convenient for portable equipment such as camcorders video games and portable audio video equipment The input signals can be accessed by selecting VIDEO as the input source Pull down the front cover where indicated to access the front panel inputs The illustration below shows example connections to a portable DVD player Note that you may need a specialized optical cable for this con...

Страница 28: ...ight speakers only are necessary Note that your main surround speakers should always be connected as a pair but you can connect just one surround back speaker if you like it must be connected to the left surround back terminal You can use speakers with a nominal impedance between 6 16Ω please see Switching the speaker impedance on page 64 if you plan to use speakers with an impedance of less than ...

Страница 29: ...a number of ways depending on your setup See Surround back speaker setting on page 51 for an overview of the possible configurations Other connections on page 67 provides greater detail on alternate speaker setups such as using speaker system B page 67 bi amping page 68 and bi wiring page 68 Placing the speakers Where you put your speakers in the room has a big effect on the quality of the sound T...

Страница 30: ...re into each terminal 4 Release the tabs to secure the AM antenna wires 5 Place the AM antenna on a flat surface and point in the direction giving the best reception Avoid placing near computers television sets or other electrical appliances and do not let it come into contact with metal objects Note The signal ground is designed to reduce noise that occurs when an antenna is connected It is not a...

Страница 31: ...nearest Pioneer authorized independent service company for a replacement Do not use any power cord other than the one supplied with this unit Do not use the supplied power cord for any purpose other than that described below The receiver should be disconnected by removing the mains plug from the wall socket when not in regular use for example when on vacation 1 Plug the supplied power cord into th...

Страница 32: ...IC surround listening modes 4 ENTER Use to confirm your selection with the MULTI JOG dial 5 STANDBY indicator Lights when the receiver is in standby 6 Remote sensor Receives the signals from the remote control 7 Display See Display on page 34 8 Advanced MCACC indicator page 41 Lights when Acoustic Calibration EQ is on Acoustic Calibration EQ is automatically set to ALL CH ADJUST after the Auto Sur...

Страница 33: ...TI JOG dial 18 MULTI ROOM SOURCE controls If you ve made multi room connections see Multi room listening on page 69 use these controls to control the sub room from the main room see Using the multi room controls on page 70 CONTROL Use together with the MULTI JOG dial to select the function or use with the MASTER VOLUME to select the volume of the sub room ON OFF Use to switch the multi room featur...

Страница 34: ...ast in auto stereo mode MONO page 48 Lights when the tuner MPX mode is set to mono TUNED Lights when tuned to a broadcast 8 SB CH page 43 Indicates the surround back channel or Virtual Surround Back setting AUTO ON or OFF 9 Program format indicators These change according to which channels are active in Dolby DTS DVD A and SACD sources LS S and RS will light at the same time to indicate 6 1 channe...

Страница 35: ...e 53 Also selects the EFFECT mode Dolby Pro Logic II Dolby Pro Logic IIx Music parameters see page 39 and the sound delay setting see page 62 You can then use the and buttons to make these adjustments SIGNAL SEL page 42 Press repeatedly to select one of the following AUTO If there are analog and digital signals input the receiver automatically selects the digital signal DIGITAL Selects an optical ...

Страница 36: ... 12 SYSTEM OFF page 59 Press to switch off all Pioneer components in your system or any other component you have also programmed to switch off using the System Off function 13 RECEIVER STANDBY ON Press to switch the receiver on or into standby 14 MULTI OPERATION page 59 Use this button to perform multi operations 15 RECEIVER Press this button to access receiver functions or when setting up the rec...

Страница 37: ...options and the current active mode may change depending on your speaker setup the SB CH mode setting and the type of source you re listening to If you connected surround back speakers see also Using the surround back channel on page 43 for more on the SB CH mode setting While listening to a source press MOVIE or MUSIC and cursor left right to select a listening mode then press ENTER You can also ...

Страница 38: ...ected SB CH MODE ON you can select according to format THX SURROUND EX Allows you to hear 6 1 or 7 1 channel playback with Dolby 5 1 channel sources 2 Pro Logic IIx MOVIE THX Up to 7 1 channel sound especially suited to Dolby multichannel movie sources Dolby Digital EX Creates surround back channel sound for 5 1 channel sources and provides pure decoding for 6 1 channel sources like Dolby Digital ...

Страница 39: ...s the sound of a small jazz club ROCK Creates a live concert sound for rock music DANCE Designed for music with lots of bass 5 7CH STEREO Allows you to hear stereo sources from all the speakers in your setup Dolby Pro Logic IIx Music settings When listening to 2 channel sources in Dolby Pro Logic IIx Music mode there are three further parameters you can adjust Center Width Dimension and Panorama 1...

Страница 40: ...tichannel sources are downmixed to stereo While listening to a source press STEREO DIRECT for stereo playback Press repeatedly to switch between STEREO The audio is heard with your surround settings such as channel level and you can still use digital processing such as the Midnight Loudness and Tone control functions DIRECT Bypass all effects and surround settings so that the audio remains as clos...

Страница 41: ...es or the tone controls with the multichannel analog inputs Any speakers set to NO in the Speaker Setting on page 51 do not output the audio for the corresponding channel You can t use the Second Zone speaker B setup page 67 with the multichannel analog inputs Listening with Acoustic Calibration EQ You can listen to sources using the Acoustic Calibration Equalization set in Automatically setting u...

Страница 42: ...e between AUTO The receiver selects the first available signal in the following order DIGITAL ANALOG ANALOG Selects an analog signal DIGITAL Selects an optical or coaxial digital signal Note If no digital inputs are assigned for the current source the input signal type is fixed to ANALOG When using DIGITAL IN terminals the following digital signal formats are supported Dolby Digital DTS and PCM 32...

Страница 43: ... CH AUTO Automatically switches to 6 1 or 7 1 decoding for 6 1 encoded sources for example Dolby Digital EX or DTS ES SB CH OFF Surround back channel is switched off Note You will only hear the surround back channel when you ve selected Normal Surround in the Surround back speaker setting on page 51 Changing the speaker system may automatically change this setting see notes below If the surround b...

Страница 44: ...annel options Each press cycles through the options as follows VIRTL SB ON Virtual Surround Back is used for all sources VIRTL SB AUTO Automatically applied to 6 1 encoded sources for example Dolby Digital EX or DTS ES VIRTL SB OFF Virtual Surround back is switched off Note You can t use the Virtual Surround Back setting with THX CINEMA PRO LOGIC II PRO LOGIC IIx MULTI CH IN or STEREO DIRECT You c...

Страница 45: ...itch on either of these modes when DIRECT is selected the receiver automatically switches to STEREO Using the tone control You can use the tone control to make customized settings for the bass and treble Switching the tone control on or off Default setting Off You ll need to switch the tone control on to adjust the bass and treble below 1 If you re using the remote press RECEIVER 2 Press TONE to s...

Страница 46: ... You can t use digital noise reduction with sources over 48kHz when using one of the digital inputs If you switch on digital noise reduction when DIRECT is selected the receiver automatically switches to STEREO Listening to dual mono soundtracks Default setting DUAL ch1 You can specify how dual mono encoded Dolby Digital soundtracks should be played Dual mono is not widely used but is sometimes ne...

Страница 47: ...er of the TUNING buttons for about a second The receiver will start searching for the next station stopping when it has found one Repeat this step to search for other stations Manual tuning To change the frequency one step at a time press the TUNING buttons repeatedly High speed tuning Press and hold the TUNING buttons for high speed tuning releasing the button once you reach the frequency you wan...

Страница 48: ...ations each When memorizing FM frequencies the receiver also stores the MPX setting see MPX mode above 1 Tune to a station you want to memorize See Finding a station above and Tuning directly to a station above for more details on how to do this 2 Press TUNER EDIT The display shows MEMORY INPUT then a blinking memory class A B or C 3 Press CLASS to select one of the three classes Press repeatedly ...

Страница 49: ... the class Press repeatedly to cycle through the three memory classes A B and C 2 Use the STATION buttons to select an FM or AM preset station On the front panel press SELECT first to switch to the station select mode for STATION TUNING 3 Press TUNER EDIT to select the station name mode 4 Edit the name as necessary and press ENTER Use the cursor left right buttons or the front panel MULTI JOG dial...

Страница 50: ...to the middle position After three minutes of inactivity during the Auto setup options the OSD will go to sleep until a button is pressed With other screens the receiver automatically exits and no settings will be made Caution The test tones used in the Surround Setup are output at high volume the volume increases to 0dB automatically 1 Switch on the receiver and your TV Use the RECEIVER button to...

Страница 51: ...ee Second Zone speaker B setup on page 67 Front Bi Amp Select this setting if you re bi amping your front speakers see Bi amping your front speakers on page 68 MR S Select to use the surround back B speaker terminals for an independent system in another room see Multi room listening on page 69 3 When you re finished select Exit You will return to the Surround Setup menu Normal surround setting If ...

Страница 52: ...ront speakers the subwoofer will automatically be fixed to YES Also the center and surround speakers can t be set to LARGE if the front speakers are set to SMALL In this case all bass frequencies are sent to the subwoofer If the surround speakers are set to NO the surround back speakers will automatically be set to NO If you select one surround back speaker only make sure that speaker is hooked up...

Страница 53: ...kers For good sound depth and separation from your system you need to specify the distance of your speakers from the listening position The receiver can then add the proper delay needed for effective surround sound 1 Select Speaker Distance from the Normal setup menu 2 Specify the distance of each speaker from the listening position Adjust the distance of each speaker within the range of 0 5 45 fe...

Страница 54: ...ONTROL button that matches the connection for the component you want to control For example press DVD LD if you want to control the DVD player that you connected to the DVD LD terminals Choosing a button that s already assigned will over write the old preset and any other operations you may have programmed You can t assign the RECEIVER or TUNER buttons 5 Use cursor up down to choose the type of co...

Страница 55: ...the operation hasn t been learned the display will show NG Continue shows in the display if Select Key is flashing go back to step 4 Go to step 6 If the remote display shows FULL it means the memory is full See Clearing remote control settings on page 65 to erase a programmed button you re not using to free up more memory If NG keeps showing in the display or the remote control keeps on returning ...

Страница 56: ...nels Cable TV Satellite TV TV TVVOL Adjusts the TV volume TV MENU Takes you to the TV menu of that system Cable TV Satellite TV TV Digital TV GUIDE Takes you to the guide menu of that system Cable TV Satellite TV TV Digital TV RETURN Exits the current menu Cable TV Satellite TV Digital TV A BLUE Satellite TV Digital TV TV B Press to switch the DTV ON Satellite TV Digital TV TV C GREEN Satellite TV...

Страница 57: ... recorder Cassette deck Hold down for fast reverse playback CD MD CD R VCR DVD LD DVD recorder Cassette deck Start playback CD MD CD R VCR DVD LD DVD recorder Cassette deck Stop playback on some models pressing this when the disc is already stopped will cause the disc tray to open CD MD CD R VCR DVD LD DVD recorder Cassette deck Starts recording MD CD R VCR DVD recorder Cas sette deck SUBTITLE DIS...

Страница 58: ... player AUDIO Changes the audio track of discs with more than one audio track DVD LD DVD recorder Changes between the tuner in the TV and the tuner in the VCR VCR Play the reverse side of the tape on a reversible cassette deck Double cassette 2nd deck TOP MENU GUIDE Displays the top menu of the current DVD LD or DVR you are using DVD LD DVD recorder Takes you to the guide menu of the system VCR Pr...

Страница 59: ...CONT functions Multi Operation and System Off The Multi Operation feature allows you to program a series of commands for the components in your system For example you could turn on your TV turn on your DVD player and start playing the loaded DVD using only two buttons on the remote control Similar to multi operations System Off allows you to use one button to stop and switch off a series of compon...

Страница 60: ...on if it s the source component selected in step 3 program a Pioneer TV or monitor to switch on if the input function selected in step 2 has video input terminals These take priority in multi operations not shutdown 9 When you re finished use cursor up down to select Exit from the menu and press ENTER You will return to the REMOTE SETUP menu Select Exit again to exit Using multi operations You can...

Страница 61: ...ts have SR CONTROL jacks which can be used to link components together so that you can use just the remote sensor of one component When you use a remote control the control signal is passed along the chain to the appropriate component Important Note that if you use this feature make sure that you also have at least one set of analog audio or video jacks connected to another component for grounding...

Страница 62: ...4 Prepare the recorder Insert a blank tape MD video etc into the recording device and set the recording levels Refer to the instructions that came with the recorder if you are unsure how to do this Most video recorders set the audio recording level automatically check the component s instruction manual if you re unsure 5 Start recording then start playback of the source component Note The receiver...

Страница 63: ...put besides those listed above is the same as selecting OFF Note If you change the source using the MULTI CONTROL buttons or the MULTI JOG dial on the front panel or switch the power off the system returns to normal playback Dimming the display You can choose between four brightness for the front panel display Note that when selecting sources the display automatically brightens for a few seconds 1...

Страница 64: ...t appears in the display on the remote control for the MULTI CONTROL buttons such as DVD LD or TV SAT or for individual buttons for each input source You may want to do this if the component connected to the inputs doesn t correspond to the MULTI CONTROL button name or individual commands don t correspond to their respective buttons 1 Press and hold REMOTE SETUP for three seconds The REMOTE SETUP ...

Страница 65: ...nd press ENTER Clearing remote control settings This feature allows you to clear a learned command or key label for a particular button or all of the settings from the remote 1 Press and hold REMOTE SETUP for three seconds The REMOTE SETUP menu appears in the remote control display 2 Use cursor up down to select Clear from the menu and press ENTER CLEAR appears in the display 3 Use cursor up down ...

Страница 66: ... button press and hold STANDBY ON for about three seconds The display shows RESET 3 Press the front panel TONE button The display shows OK 4 Within 5 seconds press TONE The display shows OK and the receiver should now be reset Note Make sure the multi room feature is switched off when doing this If the receiver is unplugged from the AC outlet for a month or more it resets to the default settings ...

Страница 67: ...ck speaker setting on page 51 three speaker system settings are possible using the SPEAKERS button If you selected Normal Surround the button will simply switch your main speaker system on or off The options below are for the Second Zone setting only Use the SPEAKERS button on the front panel to select a speaker system setting As mentioned above if you have selected Normal Surround the button will...

Страница 68: ... speaker terminals Caution Most speakers with both Hi and Low terminals have two metal plates that connect the Hi to the Low terminals These must be removed when you are bi amping the speakers or you could severely damage the amplifier See your speaker manual for more information If your speakers have a removable crossover network make sure you do not remove it for bi amping Doing so may damage yo...

Страница 69: ...OURCE MONITOR OUT jacks both on the rear of this receiver You should have a pair of speakers attached to the sub room amplifier as shown in the illustration below SurrBack System multi room setup You must select MR S in Surround back speaker setting on page 51 to use this setup Note that the sound in the sub room will be temporarily interrupted when controlling the main room for example changing t...

Страница 70: ...MASTER VOLUME dial to adjust the volume This is only possible if you selected the VARIABLE volume control in Multi Room and IR receiver setup on page 78 5 When you re finished press CONTROL again to return to the main room controls You can also press the MULTI ROOM SOURCE ON OFF button on the front panel to switch off all output to the sub room Note Multi room can t be used when you re setting up ...

Страница 71: ...ther manufacturers may not use the IR terminology Refer to the manual that came with your component to check for IR compatibility If using two remote controls at the same time the IR receiver s remote sensor takes priority over the remote sensor on the front panel Cnnecting additional amplifiers This receiver has more than enough power for any home use but it s possible to add additional amplifier...

Страница 72: ...l and using the volume control on this receiver You may want to start with a fairly low volume on this receiver and turn it up as necessary after you ve checked your levels 7 Start playback of a source on your computer Note Windows XP Windows 2000 Windows Millennium Edition and Windows 98 operating systems have been tested for compatibility with this interface but depending on your computer setup ...

Страница 73: ... System must have internet access Connect your computer to the RS 232C jack on the rear panel of the receiver Make sure that the receiver and all connected components are switched off and disconnected from the power outlet when you do this Use a commercially available cable to connect the RS 232C jack on your computer to the 9 pin RS 232C jack on this receiver See the documentation provided with t...

Страница 74: ...rround Setup menu on page 50 for more on this THX CINEMA Setup Select the decoding method used with the THX CINEMA mode see THX CINEMA Setup below Input Assign Specify what you ve connected to the digital and component video inputs see The Input Assign menu below Function Rename Change the names that appear on the receiver display and on screen display see Function Rename on page 76 PHONO LINE Set...

Страница 75: ...l 3 coaxial DVD LD Digital 4 coaxial CD You only need to do this if you didn t hook up your digital equipment according to the default settings for the digital inputs see above This setting tells the receiver what digital equipment is hooked up to which terminal so the buttons on the remote correspond to what you have hooked up 1 Select Digital In Select from the Input Assign menu 2 Select the num...

Страница 76: ...omponent to the receiver using a component video input you should also have your TV connected to this receiver s component video MONITOR output 4 When you re finished select Exit You will return to the Input Assign menu Function Rename You can customize the names that appears on the display when you select an input source for example you could change the name of VCR1 DVR to DVR 310 Tip It s conven...

Страница 77: ...INE Setup Default setting PHONO You can choose whether you want to use the PHONO jack on the rear of the receiver to connect a turntable or a line level component such as a CD or DVD player 1 Select PHONO LINE Setup from the System Setup menu The current setting is highlighted in the display 2 Select either PHONO or LINE PHONO High level setting for turntables without a built in equalizer or pre a...

Страница 78: ...on t be able to change the volume level 12 Volt Trigger Default setting OFF all components After connecting a component the 12 volt trigger see Switching components on and off using the 12 volt trigger on page 61 it switches on automatically when you select an input function set to switch the trigger on Specify which input functions switch on the trigger below 1 Select 12V Trigger from the System ...

Страница 79: ...ee Crossover Network below Fine Channel Level Make fine adjustments to the overall balance of your speaker system see Fine Channel Level below Fine Channel Delay Make precise delay settings for your speaker system see Fine Channel Delay on page 81 Acoustic Cal EQ Measure the acoustic characteristics of your room and make detailed adjustments to the frequency balance of your speaker system see Acou...

Страница 80: ...r pressing ENTER loud test tones will be output 2 Adjust the level of the left channel This will be the reference speaker level so you may want to keep the level around 0dB so that you ll have plenty of room to adjust the other speaker levels 3 Select each channel in turn and adjust the levels 10dB as necessary Use cursor up down to adjust the volume of the speaker you selected to match the front ...

Страница 81: ...nt characteristics that can color the original source material You can also make these settings manually to get a frequency balance that suits your tastes A more advanced setup is also available where you can make detailed settings according to your room s reverb characteristics see Professional Acoustic Calibration on page 84 You should have the mic connected when using any of the setup options S...

Страница 82: ...al channel FRONT ALIGN Speakers are set in accordance with the front speaker settings The sound of the test tone will alternate between the left front reference speaker and the target speaker 4 Select the channel s you want and adjust to your liking Use the cursor up down buttons to select the channel and ENTER to select it Use the cursor up down buttons to select the frequency and cursor up down ...

Страница 83: ...anually adjust the Acoustic Calibration EQ see Setting the Acoustic Calibration EQ manually above we recommend copying the ALL CH ADJUST or the FRONT ALIGN settings from the Auto setup above or from Automatically setting up for surround sound on page 12 to one of the custom settings Instead of just a flat EQ curve this will give you a reference point from which to start 1 Select Acoustic Cal EQ fr...

Страница 84: ...n comparing the frequencies at 0ms This initial slope is not a problem i e excessive reverb with your listening room Setting Professional Acoustic Calibration according to your room characteristics Using the manual setup you can set the time period at which the frequency response is analyzed for calibration You can pinpoint the time that is best for calibration of the system for your particular ro...

Страница 85: ... page 12 or Auto Pro above your previous settings will be altered with this setup 4 If you selected Auto Pro select Start and press ENTER Complete is displayed on screen after the Acoustic Calibration Equalization is set Select Exit to return to the Professional Acoustic Calibration menu 5 If you selected Reverb Measurement select Start and press ENTER Complete is displayed on screen when the reve...

Страница 86: ...finish Complete is displayed on screen after the Acoustic Calibration Equalization is set If you want to check the settings select Check and press ENTER If you want to finish select Exit to exit each screen Bass Peak Level Some audio sources for example Dolby Digital and DTS include ultra low bass tones Set the bass limiter as needed to prevent the bass from distorting the sound from the subwoofer...

Страница 87: ... Range Control from the Expert setup menu 2 Choose the setting that you want OFF No dynamic range adjustment use when listening at higher volume MID Mid setting MAX Dynamic range is reduced loud sounds are reduced in volume while quieter sounds are increased 3 When you re finished select Exit You will return to the Expert setup menu Tip For general dynamic range control you can use the Midnight li...

Страница 88: ...on page 81 and lower the 63 Hz and 125 Hz equalizer levels using the manual setting Turning the digital safety feature on may allow you to turn up the volume a little more To switch between SAFETY ON and SAFETY OFF put the receiver into standby then press the STANDBY ON button while holding down the MULTI JOG CONTROL SET UP button on the front panel The unit does not respond when the buttons are p...

Страница 89: ...peaker Setting on page 51 The SB CH mode is switched off Set the surround back channel to SB CH ON see page 43 The source is not a 6 1 channel playback source Choose an advanced effect listening mode see Listening in surround sound on page 37 The surround back speakers aren t connected properly Check Installing your speaker system on page 28 to make sure the speakers are connected correctly The su...

Страница 90: ...t and or the DTS signal output is turned off Make sure the player s settings are correct and or the DTS signal out is on Refer to the instruction manual supplied with the DVD player The digital output level is turned down on a CD player or other component equipped with digital output level adjustment capability The DTS signal has been altered by the player and cannot be read Set the digital volume...

Страница 91: ...e using component video connections for your source but not for your TV Using the video converter video signals can be converted from a composite or S video input to a component video output but not vice versa See About the video converter on page 16 for more on this You are using component video connections and the component video inputs are assigned incorrectly Check Assigning the component vide...

Страница 92: ...ital connections or the digital input is assigned incorrectly Check your digital connections and or assign the digital inputs correctly see Assigning the digital inputs on page 75 The multichannel analog inputs are selected Press MULTI CH INPUT again see Using the multichannel analog inputs on page 41 The Dolby DTS indicator doesn t light when playing Dolby DTS software The player is paused Press ...

Страница 93: ...OL IN jack Unplug the cable from the CONTROL IN jack and use remote normally see Operating other Pioneer components with this unit s sensor on page 61 The IR receiver type is mismatched with the setting Disconnect the IR receiver from the rear panel or set to the other IR receiver type see Multi Room and IR receiver setup on page 78 Other components can t be operated with the system remote The pre...

Страница 94: ...nformation 12 94 En Note If the unit does not operate normally due to external effects such as static electricity disconnect the power plug from the outlet and insert again to return to normal operating conditions ...

Страница 95: ...d by bass management in the receiver Dolby Surround is an encoding system which embeds surround sound information within a stereo soundtrack which a Dolby Pro Logic decoder can then use for enhanced surround listening with greater sound detail Manufactured under license from Dolby Laboratories Dolby Pro Logic Surround EX and the double D symbol are trademarks of Dolby Laboratories DTS The DTS tech...

Страница 96: ...the closest speaker as you move away from the middle seating position Adaptive Decorrelation slightly changes one surround channel s time and phase relationship with respect to the other surround channel This expands the listening position and creates with only two speakers the same spacious surround experience as in a movie theatre THX Select Before any home theatre component can be THX Select ce...

Страница 97: ...ndig Hitachi Instant Replay ITT Nokia JC Penny JVC Kendo Kenwood Loewe Luxor LXI Magnavox Marantz Marta Matsui Memorex Minolta Mitsubishi Multitech NEC Nokia Oceanic Nokia Nordmende Okano Olympic Orion Panasonic Pentax Philco Philips Phonola Quasar RCA Proscan Realistic Saba Samsung Sansui Sanyo Schneider Scott SEG Seleco Sharp Siemens Signature Sony Sylvania Symphonic Tandberg Tashiro Tatung TEAC...

Страница 98: ... dB Frequency Response 5 Hz to 100 MHz dB FM Tuner Section Frequency Range 87 5 MHz to 108 MHz Usable Sensitivity Mono 13 2 dBf IHF 1 3 µV 75 Ω 50 dB Quieting Sensitivity Mono 20 2 dBf Stereo 38 6 dBf Signal to Noise Ratio Mono 73 dB at 85 dBf Stereo 70 dB at 85 dBf Distortion Stereo 0 5 1 kHz Alternate Channel Selectivity 60 dB 400 kHz Stereo Separation 40 dB 1 kHz Frequency Response 30 Hz to 15 ...

Страница 99: ...able sound level Set the dial and leave it there Taking a minute to do this now will help to prevent hearing damage or loss in the future After all we want you listening for a lifetime We Want You Listening For A Lifetime Used wisely your new sound equipment will provide a lifetime of fun and enjoyment Since hearing damage from loud noise is often undetectable until it is too late this manufacture...

Страница 100: ...ease do not ship your product to Pioneer without first calling the Customer Support Division at the above listed number for assistance Pioneer Electronics USA Inc Customer Support Division P O BOX 1760 Long Beach CA 90801 1760 U S A For warranty information please see the Limited Warranty sheet included with your product Should this product require service in Canada please contact a Pioneer Canadi...

Отзывы: