Other Settings
10
51
En
1
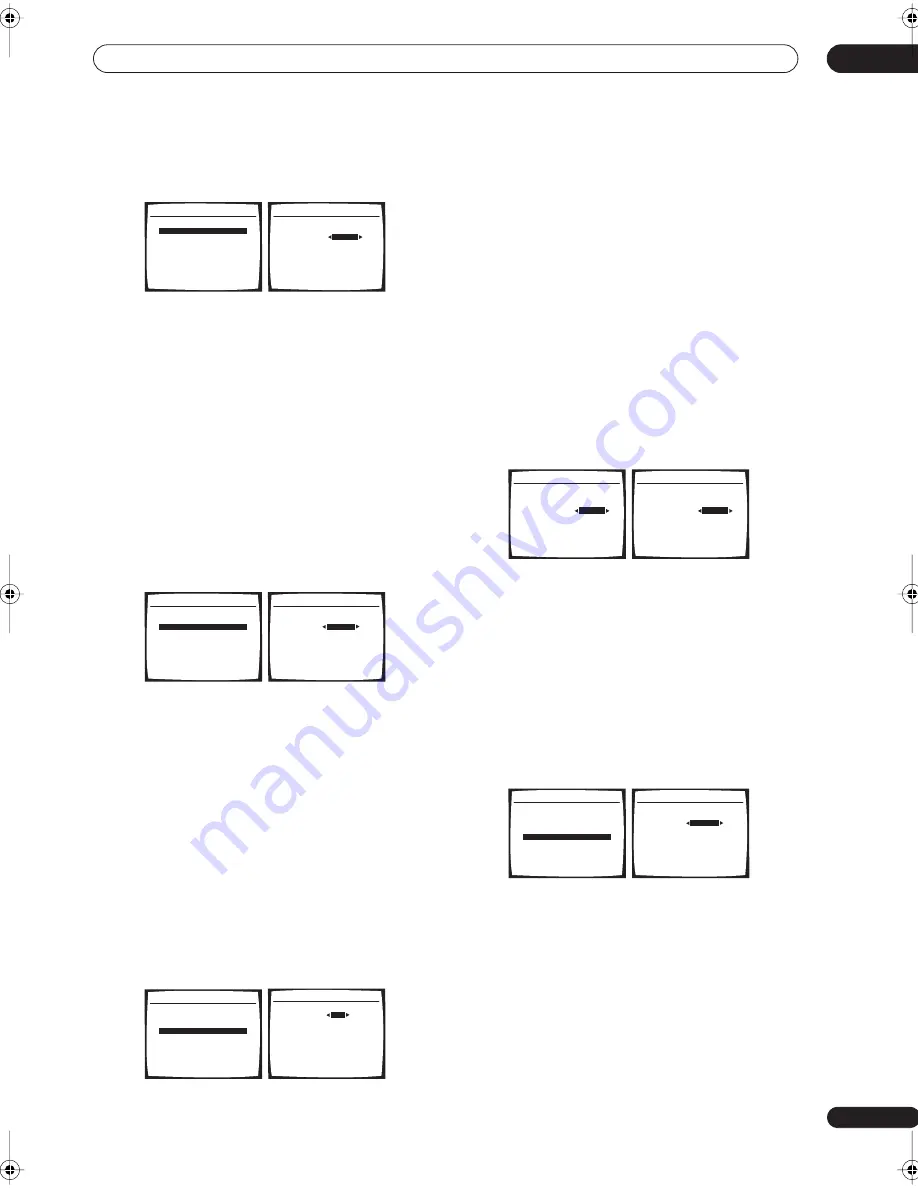
Select ‘Dual Mono Setup’ from the Other Setup
menu.
2
Choose the setting that you want.
•
CH1
– Only channel 1 is played
•
CH2
– Only channel 2 is played
•
CH1 CH2
– Both channels are played through the
front speakers
3
When you're finished, press
RETURN
.
You return to the Other Setup menu.
LFE Attenuator Setup
• Default setting:
ATT 0dB
Some Dolby Digital and DTS audio sources include ultra-
low bass tones. Set the LFE attenuator as necessary to
prevent the ultra-low bass tones from distorting the
sound from the speakers.
1
Select ‘LFE ATT Setup’ from the Other Setup menu.
2
Choose the setting that you want.
•
ATT 0dB
– No limiting (recommended)
•
ATT 10dB
– 10 dB of limiting
•
LFE OFF
– No sound from LFE channel
3
When you're finished, press
RETURN
.
You return to the Other Setup menu.
SR+ Setup for Pioneer plasma displays
• Default setting:
OFF
(all settings)
Make the following settings if you have connected a
Pioneer plasma display to this receiver using an SR+
cable. Note that the number of settings available will
depend on the plasma display you’ve connected.
See also
Using this receiver with a Pioneer plasma display
on page 47.
1
Select ‘SR+ Setup’ from the Other Setup menu.
2
Select the ‘PDP Volume Control’ setting you want.
•
OFF
– The receiver does not control the volume of the
plasma display.
•
ON
– When the receiver is switched to one of the
inputs that use the plasma display (
DVD/LD
, or
another function below), the volume on the plasma
display is muted so only sound from the receiver is
heard.
3
Assign any input source connected to the plasma
display to the corresponding input number.
This matches the receiver’s input source with a
numbered video input on the plasma display. For
example, assign
DVD/LD
to
input-2
if you have
connected your DVD video output to video input 2 on the
plasma display.
• The
Monitor Out
should be set to the input that
you’ve used to connect this receiver to your plasma
display.
4
When you're finished, press
RETURN
.
You return to the Other Setup menu.
Video Converter Setup
• Default setting:
ON
The video converter allows you to see analog video
sources through all of this receiver’s
MONITOR VIDEO
OUT
jacks. Note that the converter gives priority to
component, S-video, then composite (in that order). See
About the video converter
on page 12 for more on this.
1
Select ‘Video Conv. Setup’ from the Other Setup
menu.
2
Choose the setting that you want.
•
ON
– All analog video signals are output from the
MONITOR VIDEO OUT
jacks.
•
OFF
– No conversion between video formats.
3
When you're finished, press
RETURN
.
You return to the Other Setup menu.
6.Other Setup
:Return
a.DRC Setup
b.Dual Mono Setup
c.LFE ATT Setup
d.SR+ Setup
e.Video Conv. Setup
Dual Mono
[
CH1
6b.Dual Mono Setup
:Finish
6.Other Setup
:Return
a.DRC Setup
b.Dual Mono Setup
c.LFE ATT Setup
d.SR+ Setup
e.Video Conv. Setup
LFE ATT
ATT 0dB
6c. LFE ATT Setup
:Finish
6.Other Setup
:Return
a.DRC Setup
b.Dual Mono Setup
c.LFE ATT Setup
d.SR+ Setup
e.Video Conv. Setup
PDP Volume Control
OFF
PDP Input Select
DVD/LD
[ OFF ]
TV/SAT
[ OFF ]
DVR 1
[ OFF ]
DVR 2
[ OFF ]
VIDEO
[ OFF ]
Monitor Out
[ OFF ]
6d.SR+ Setup
:Finish
PDP Volume Control
[ ON ]
PDP Input Select
DVD/LD
OFF
TV/SAT
[ OFF ]
DVR 1
[ OFF ]
DVR 2
[ OFF ]
VIDEO
[ OFF ]
Monitor Out
[ OFF ]
6d.SR+ Setup
:Finish
PDP Volume Control
[ ON ]
PDP Input Select
DVD/LD
input-2
TV/SAT
[ OFF ]
DVR 1
[ OFF ]
DVR 2
[ OFF ]
VIDEO
[ OFF ]
Monitor Out
[ OFF ]
6d.SR+ Setup
:Finish
6.Other Setup
:Return
a.DRC Setup
b.Dual Mono Setup
c.LFE ATT Setup
d.SR+ Setup
e.Video Conv. Setup
Video Conv.
ON
6e. Video Converter Setup
:Finish
VSX-1016_HY.book.fm 51 ページ 2006年2月24日 金曜日 午前11時53分
Содержание VSX-1016V-K
Страница 70: ...Additional information 13 70 En ...
Страница 71: ...Additional information 13 71 En ...


