


14
ENG/MASTER 96 INST
<CRD4197-A> 15
English
Español
Deutsch
Français
Italiano
Nederlands
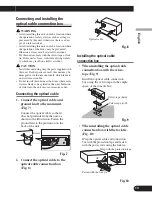
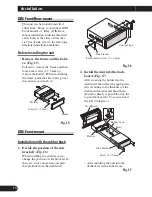
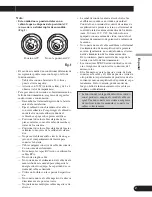
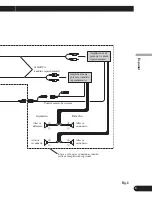
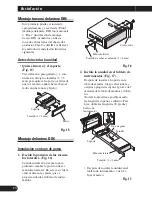
DIN Rear-mount
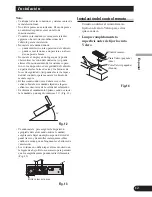
Installation using the screw holes on
the side of the unit
• Fastening the unit to the factory
radio mounting bracket. (Fig. 18)
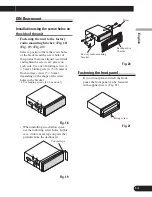
(Fig. 19) (Fig. 20)
Select a position where the screw holes
of the bracket and the screw holes of
this product become aligned (are fitted),
and tighten the screws at 2 places on
each side. Use any of binding screws (4
×
3 mm), binding screws (5
×
6 mm) or
flush surface screws (5
×
6 mm),
depending on the shape of the screw
holes in the bracket.
*1 Use binding screws (4
×
3 mm) only.
Fig. 18
• When installing in a shallow space,
use the following screw holes. In this
case, stick conceal tape on parts that
protrude from the dashboard.
Fig. 19
Fig. 20
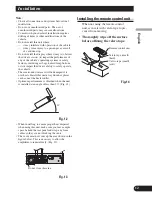
Fastening the front panel
If you do not plan to detach the front
panel, the front panel can be fastened
with supplied screw. (Fig. 21)
Fig. 21
Fixing screw
Screw
Dashboard or
Console
Factory radio mounting
bracket
*1
*1
Conceal tape
*1
*1


