background image

> Before Start

> Part Names

> Install

> Initial Setup

> Playback

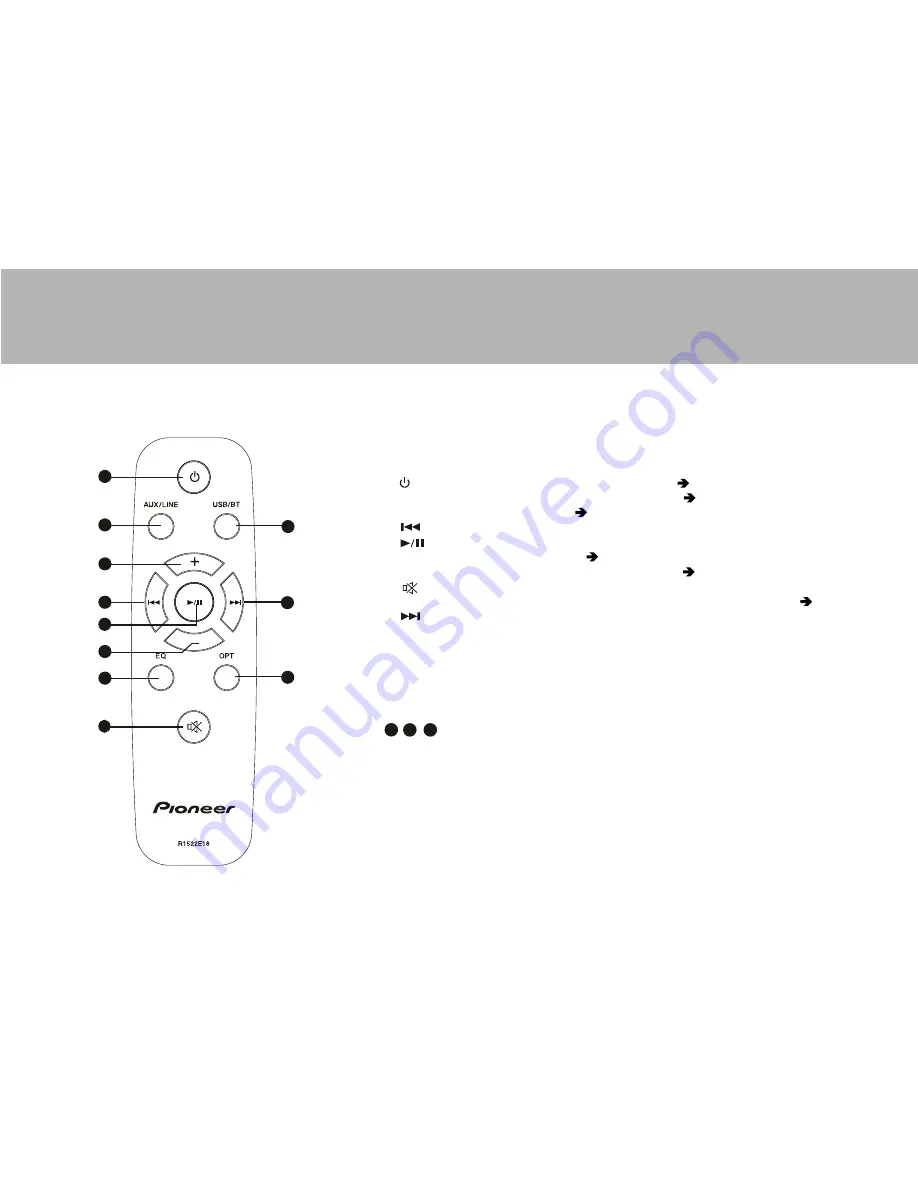
Remote Controller

1       button: Turns the unit on or into standby mode. (    P14)

2   AUX/LINE button: Switches the input to be played. (    P14)

3   button: Volume up. (    P14)

4           button: Play the previous track.

5           button: Play / Pause.

6   VOLUME- button: Volume down. (    P14)

7   EQ button: Allows you to select the listening mode.(    P16)

8         button: Temporarily mutes audio. Press again to cancel muting.

9   USB/BT button: Switches input mode between USB and BLUETOOTH. (     P16)

10        button: Play the next track.

11 OPT button: Switches the OPTICAL input.

NOTE:

/    /    / Only can be used on  BLUETOOTH and USB mode.

4 5 10

EQ

9

10

11

1

6

8

7

2

3

4
5

9

Содержание SBX-101

Страница 1: ...Instruction Manual before use Also it is recommended to have the manual nearby for frequent access Be sure to read Important Safety Instructions on Pages 4 to 5 before starting to use SBX 101 Before Start Part Names Install Initial Setup Playback Instruction Manual SBX 101 Speaker Bar System ...

Страница 2: ... device s documentation and dealer In some countries there may be restrictions on using Bluetooth devices Check with your local authorities License and Trademarks What You Can Do with SBX 101 SBX 101 is a sound system that allows you to enjoy powerful sound through simple installation and connection You can choose the sound quality according to the genre SBX 101 reproduces music files that are sto...

Страница 3: ...UETOOTH Playback Pairing Connect the Audio Components 11 Connect Components with digtal optical cable 11 Connect Other Cables 12 Speaker Bar Rear Panel 7 Speaker Bar Side Panel 8 Wireless Subwoofer 8 Remote Controller 9 Prepare Remote Controller 13 Basic Operations 14 Playing Back USB Storage Device Listening Modes Troubleshooting Specifications Before Start Before Start Part Names Install Initial...

Страница 4: ...posed to rain or moisture does not operate normally or has been dropped 15 Damage Requiring Service Unplug the apparatus from the wall outlet and refer servicing to qualified service personnel under the following conditions A When the power supply cord or plug is damaged B If liquid has been spilled or objects have fallen into the apparatus C If the apparatus has been exposed to rain or water D If...

Страница 5: ... Heat Exposure Warning Batteries battery pack or batteries installed shall not be exposed to excessive heat as sunshine fire or the like 19 WARNING DO NOT INGEST BATTERY CHEMICAL BURN HAZARD A Keep new and used batteries away from children If the battery compartment does not close securely stop using the product and keep it away from children B If you think batteries might have been swallowed or p...

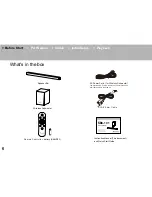
Страница 6: ...ller battery AAA R03 Thank you for choosing SBX 101 To ensure its safe use you are advised to read through this Instruction Manual before use Also it is recommended to have the manual nearby for frequent access Be sure to read Important Safety Instructions on Pages 4 to 5 before starting to use SBX 101 Before Start Part Names Install Initial Setup Playback Instruction Manual SBX 101 Speaker Bar In...

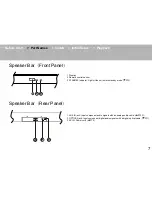
Страница 7: ...nel 1 Display 2 Remote control sensor 3 STANDBY indicator Lights if the unit enters standby mode P12 1 AUX IN jack Input component audio signals with an analog audio cable P10 11 2 OPTICAL jack Input component digital audio signals with a digital optical cable P11 3 AC IN Power cord P12 1 2 3 1 2 3 7 ...

Страница 8: ...H P15 16 3 USB port A USB storage device is connected so that music files stored in it can be played P16 4 VOLUME Volume down 5 VOLUME Volume up 6 LINE IN jack Input component audio signals with a mini plug Φ3 5mm cable P10 11 Wireless Subwoofer Rear Panel 1 AC IN The supplied power cord is connected P12 2 PAIR button Used to pair the subwoofer and the main unit P13 3 PAIR LED Lights when paired w...

Страница 9: ...on Play the previous track 5 button Play Pause 6 VOLUME button Volume down P14 7 EQ button Allows you to select the listening mode P16 8 button Temporarily mutes audio Press again to cancel muting 9 USB BT button Switches input mode between USB and BLUETOOTH P16 10 button Play the next track 11 OPT button Switches the OPTICAL input NOTE Only can be used on BLUETOOTH and USB mode 4 5 10 EQ 9 10 11 ...

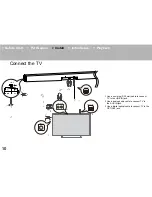
Страница 10: ...PTICAL OPTICAL OUT 1 Use a mini plug Φ3 5mm cable to connect TV to the LINE IN jack 2 Use a analog audio cable to connect TV to the AUX IN jack 3 Use a digital optical cable to connect TV to the OPTICAL jack Connect the TV 1 2 3 LINE OUT LINE IN AUDIO OUT 10 ...

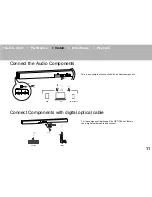
Страница 11: ...xample of connection with an Audio component Connect the Audio Components PAD PC Smart phone For the component that support the OPTICAL out feature use a digital optical cable and connect Connect Components with digital optical cable BD DVD GAME BD DVD GAME a OPTICAL 11 ...

Страница 12: ...C Power Cord may have different shape from that shown in the drawing AC Power cord wireless for subwoofer The provided AC Power Cord may have different shape from that shown in the drawing a b a b Connect the power cord of this unit only after all other connections are completed The STANDBY indicator will light up 12 ...

Страница 13: ... to turns the unit on the STANDBY indicator will light off Press the PAIR button on Subwoofer the PAIR LED start flashing means the Wireless Subwoofer is PAIRING with Speak Bar The PAIR indicator keep light means PAIRING succeeded Prepare Remote Controller Put one AAA 1 5V battery into the Remote Controller of this unit 13 ...

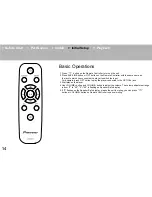
Страница 14: ...u connected the player to switch the input For example press OPT button to play the player connected to the OPTICAL jack 3 Start play on the player 4 Use VOLUME button and VOLUME button to adjust the volume The volume adjustment range is from 0 to 45 0 45 is flashing on Speaker Bar s display 5 If 0 flashes on the Speaker Bar s display means the unit is muting you can press button or VOLUME button ...

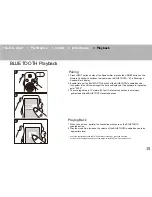
Страница 15: ...ces displayed If a password is requested enter 0000 3 The coverage area is 10 meters 32 feet Note that connection is not always guaranteed with all BLUETOOTH enabled devices PioneerSBX 101 1 2 2 1 1 When the unit is on perform the connection procedure on the BLUETOOTH enabled device 2 Play the music files Increase the volume of the BLUETOOTH enabled device to an appropriate level Due to the charac...

Страница 16: ...layback Pressed while paused and it restarts play d Press button to play the previous track USB Storage Device Requirements 1 Note that operation is not guaranteed with all USB storage devices 2 We accept no responsibility whatsoever for the loss or damage to data stored on a USB storage device when that device is used with this unit We recommend that you back up your important music files beforeh...

Страница 17: ...also can press VOLUME button on Remote Controller or on the side of Speaker Bar to cancel muting 6 Try setting the TV output to PCM or connect directly to your other source No sound from Wireless Subwoofer 1 Make sure that the power cord is properly plugged into the wall outlet 2 Unplug the power cord from the wall outlet wait 5 seconds or more then plug it in again 3 Make sure the Wireless Subwoo...

Страница 18: ...AC100 240V 50 60Hz Maximum output level Speaker Bar 30 W 30 W Input LINE IN USB 2 0 OPTICAL OPTICAL USB RCA L R AUX IN 3 5 mm stereo socket Compatible formats Dolby Digital Linear PCM MP3 AAC WMA FLAC Bluetooth Version Version 2 1 EDR Transmission output power Class 2 Maximum transmission distance Prospect target distance Approx 10 m depending on the environment A2DP Frequency band Supported profi...

Отзывы: