Getting started
03
18
En
3
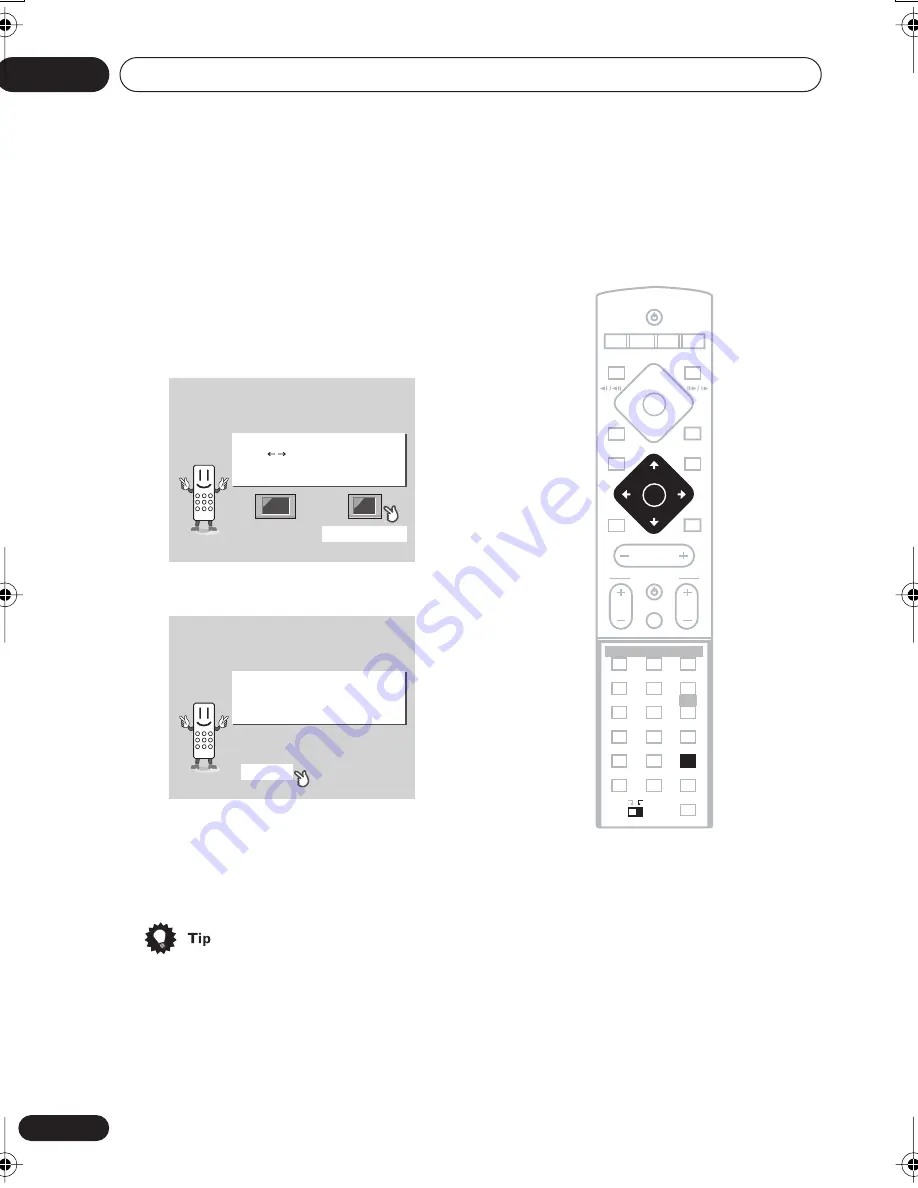
Use the
/
(cursor left/right)
buttons to select either ‘Wide screen
(16:9)’ or ‘Standard size screen (4:3)’
according to the kind of TV you have, then
press ENTER.
See also
Screen sizes and disc formats
on
page 82 if you’re not sure which one to
choose.
4
Press ENTER again to finish setting up.
• Use the
(cursor right) button to select
BACK
then press
ENTER
if you want to go
back and change the setting you just
made.
• You can also use the function buttons
(
DVD/CD
,
TUNER
, etc.) or the
OPEN/
CLOSE
button to switch the system on
from standby.
Setting the clock
Setting the clock allows you to use the timer
features.
1
Press TIMER/CLOCK.
• If you are adjusting the clock, rather then
setting it for the first time, press
TIMER/
CLOCK
again.
2
If ‘Clock ADJ?’ isn’t already showing in
the display, press
or
(cursor left or
right) until you see it.
3
Press ENTER.
4
Use the
/
(cursor up/down)
buttons to set the hour.
5
Press ENTER.
Let's Get Started Menu
What kind of TV do you have?
Use the / cursor buttons
to choose, then press [ENTER]
Wide screen (16:9)
Standard size screen (4:3)
Let's Get Started Menu
What kind of TV do you have?
Use the / cursor buttons
to choose, then press [ENTER]
Wide screen (16:9)
Standard size screen (4:3)
Let's Get Started Menu
Setup complete
If you're finished setting up,
choose [Complete],
to start again choose [Back]
Complete
Back
MASTER
VOLUME
STANDBY/ON
CD
FM/AM
OPEN CLOSE
DISPLAY
DVD
TUNER
TV
LINE
L1/L2
4
4
0
DVD MENU
RETURN
SOUND
TV CONTROL
CH
VOL
INPUT
MUTE
TEST TONE
1
2
3
ZOOM
TOP MENU
CH LEVEL
DIMMER
REPEAT
AUDIO
ANGLE
RANDOM
SUBTITLE
PROGRAM
4
5
6
7
8
9
0
MAIN
SUB
FOLDER–
ROOM SETUP
CLR
ENTER
MENU
HOME
SETUP
SYSTEM
MIDNIGHT
QUIET/
CLOCK
TIMER/
BASS MODE
DIALOGUE
VIRTUAL SB
AUTO
SURROUND
ADVANCED
1
¡
8
7
3
ST+
TUNE+
TUNE–
ST–
ENTER
SUB
CLOCK
TIMER/
9
ENTER
HTS.book 18 ページ 2003年2月25日 火曜日 午後1時45分


