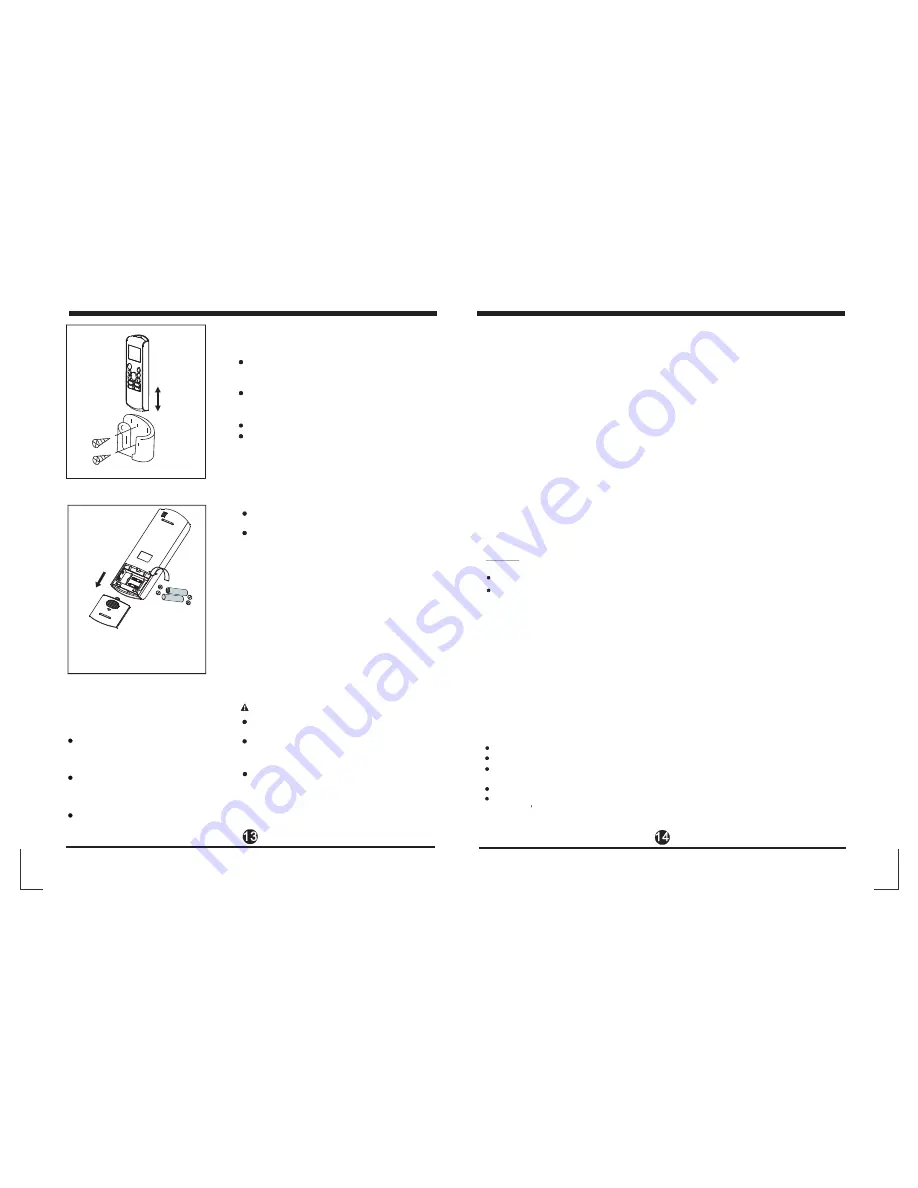
The remote controller can be attached to a wall
or column using a remote controller holder(not
supplied, purchased separately).
Before installing the remote controller, check
that the air conditioner receives the signals
properly.
Install the remote controller with two screws.
For placing or removing the remote controller,
move it up or down in the holder.
The following cases signify exhausted batteries.
Replace old batteries with new ones.
Receiving beep is not emitted when a signal
is transmitted.
Indicator fades away.
Using the remote controller holder
(optional)
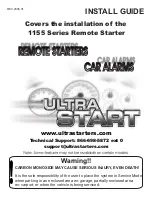
The remote controller is powered by two dry
batteries (R03/LR03X2) housed in the back rear
part and protected by a cover (AAA size).
(1) Remove the cover in the rear part of the
remote controller.
(2) Remove the old batteries and insert the new
batteries, placing the(+) and (-) ends correctly.
(3) Install the cover back on.
When the batteries are removed, the
remote controller erases all programming. After
inserting new batteries, the remote controller
must be reprogrammed.
NOTE:
Replacing batteries
CAUTIONS
Do not mix old and new batteries or batteries
of different types.
Do not leave the batteries in the remote
controller if they are not going to be used for
2 or 3 months.
Do not dispose batteries as unsorted
municipal waste. Collection of such waste
separately for special treatment is necessary.
The device complies with the local national regulations.
In Canada, it complies with CAN ICES-3(B)/NMB-3(B).
In USA, this device complies with part 15 of the FCC Rules. Operation is subject to the
following two conditions:
(1) This device may not cause harmful interference, and
(2) this device must accept any interference received, including interference that may
cause undesired operation.
This equipment has been tested and found to comply with the limits for a Class B digital
device, pursuant to part 15 of the FCC Rules. These limits are designed to provide
reasonable protection against harmful interference in a residential installation. This
equipment generates, uses and can radiate radio frequency energy and, if not installed
and used in accordance with the instructions, may cause harmful interference to radio
communications. However, there is no guarantee that interference will not occur in a
particular installation. If this equipment does cause harmful interference to radio or
television reception, which can be determined by turning the equipment off and on, the
user is encouraged to try to correct the interference by one or more of the following
measures:
Reorient or relocate the receiving antenna.
Increase the separation between the equipment and receiver.
Connect the equipment into an outlet on a circuit different from that to which the
receiver is connected.
Consult the dealer or an experienced radio/TV technician for help.
Changes or modifications not approved by the party responsible for compliance could
void user s authority to operate the equipment.
NOTE:
Installer / Programming Functions:
This remote controller is capable of other
complex functions for altering the programs
built in your system as well as diagnostic
tools for reading certain operational data.
Changing any setting by using the
programmer module without training, can
cause significant operational deficiencies.
A specific manual outlining the the details
of this module can be ontained from the
manufacturer for use by trained installers.
Ask your installer or the technical support
team, if any specific changes to the system
software is deemed necessary.
Same models of remote controllers use the same infrared signal frequencies. Therefore
if more than one system is located within the transmission direction of the signal from
one remote, it is possible to command another system simultaneously. Use the remote
controller nearer to the intended system to overcome this issue.
Remember, your system has an emergency start button under the front panel. Should
your remote controller become defective or lost or the batteries run out, you can press
the emergency start button to temporarily use the air conditioner until a new remote
controller or the batteries can be obtained. See your USER MANUAL for the use of
the emergency start button location and usage.
Refer to the system’s user manual for any additional information that may be covered.
Spare remote controllers can be easily obtained at very reasonable cost. Contact the
agency where you purchased your system.


