background image

18 

© 2006 Pioneer Supply International

18 

© 2006 Pioneer Supply International

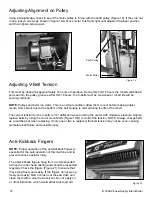
Adjusting V-Belt Tension

This must be done after approximately 16 hours of operation. During this first 16 hours the V-belts will stretch 
and seat into the pulley grooves. After this 16 hours, the V-belts must be tensioned or V-belt life will be 
severely reduced. 

NOTE:

 Pulleys and belts run warm. This is a normal condition. Allow them to cool before making adjust-

ments. Some black dust at the bottom of the belt housing is normal during the life of the V-belt.

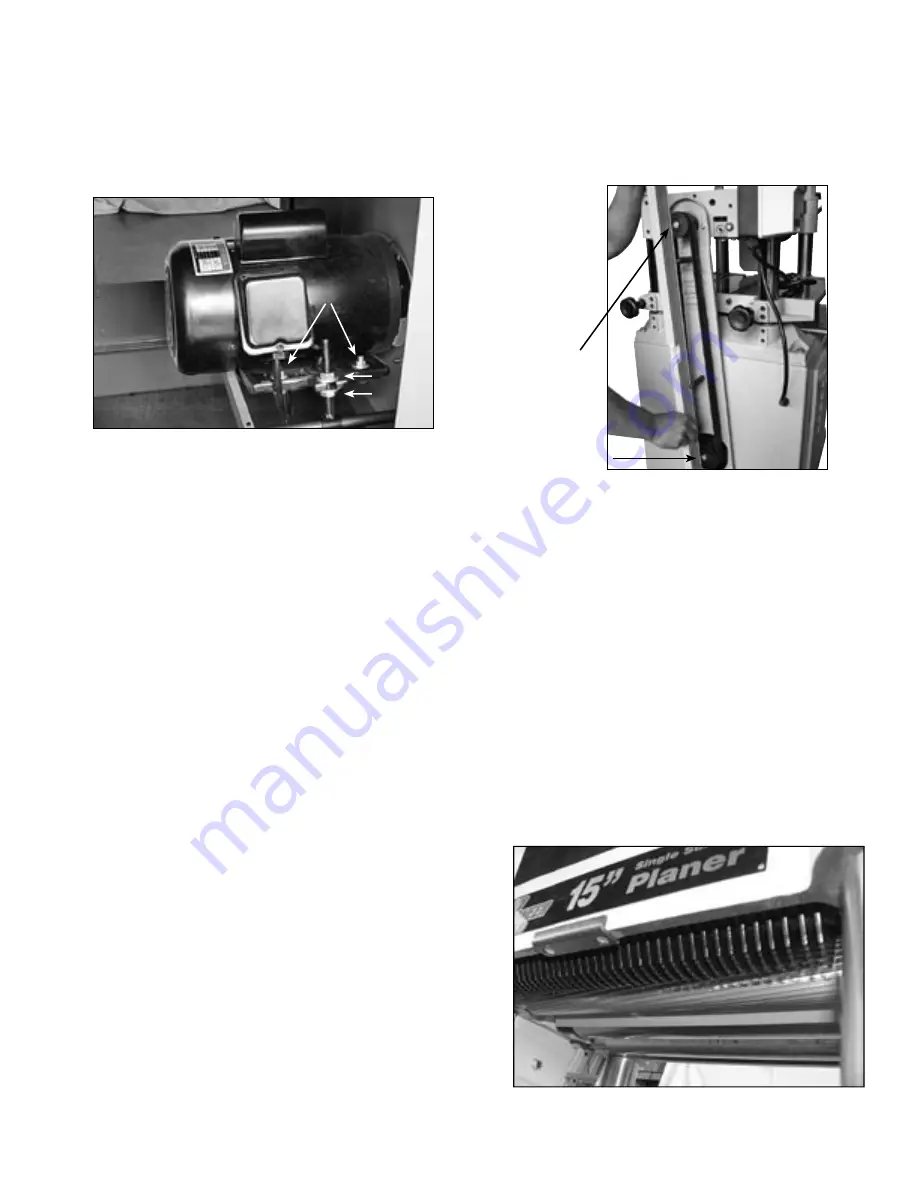
The correct tension for the V-belts is 1/4" deflection when pushing the center with moderate pressure. Adjust/
replace belts by using the motor mount bolts (Figure 19-B) to control the tension. NOTE: Always change belts 
as a matched set when replacing. If only one or two is replaced, the belt tension may not be even, causing 
premature belt failure and possible injury.

Adjusting Alignment on Pulley

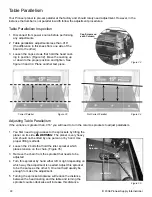
Using a straightedge, check to see if the motor pulley is in line with the shaft pulley (Figure 18). If they are not 
in line, loosen screws as shown in figure 19-A. Move motor to left and right until adjusted to proper position 
and then tighten screw again.

Motor Pulley

Shaft Pulley

Figure 18

Anti-Kickback Fingers

NOTE:

 Proper operation of the anti-kickback fingers is 

essential for the safe operation of this machine and to 
prevent serious operator injury.

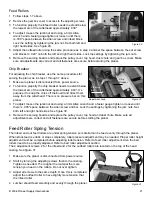
The anti-kickback fingers hang from a rod suspended 
across the cutter head casting and should be inspected 
regularly. Check the fingers (Figure 21) to ensure that 
they swing freely and easily. If the fingers do not swing 
freely and easily, blow or brush out the saw dust, and 
clean them with a wood resin solvent. Do not apply oil 
or other lubricants, which would attract dust and dirt. 

Figure 21

Figure 19

A

B

Содержание PNR 14-150

Страница 1: ... 2006 Pioneer Supply International Inc PNR 14 150 OPERATION MANUAL 15 Single Surface Thickness Planer ...

Страница 2: ...rations 12 Moving Placing Base Unit 12 Extension Wings 12 Hand Wheel 13 Dust Hood 13 Safety Switch 14 Gearbox Oil Level 14 SECTION 4 OPERATIONS ADJUSTMENTS Before You Begin 15 Basic Operation 15 Operation Tips 16 Operating Feed Speed 16 Adjusting Height Depth of Cut 17 Adjusting Bed Rollers 17 Adjusting Alignment on Pulley 18 Adjusting V Belt Tension 18 Anti Kickback Fingers 18 Inspecting Knives 1...

Страница 3: ... 2006 Pioneer Supply International 3 SECTION 5 MAINTENANCE Maintenance Schedule 23 Cleaning 23 Lubrication 23 PARTS BREAKDOWN LISTING 24 27 WARRANTY AND RETURNS 28 30 Notes 31 ...

Страница 4: ...4 2006 Pioneer Supply International 4 2006 Pioneer Supply International ...

Страница 5: ... 2006 Pioneer Supply International 5 ...

Страница 6: ...6 2006 Pioneer Supply International 6 2006 Pioneer Supply International ...

Страница 7: ...e operator and will damage your knives when they contact the cutter head CUTTING CAPACITIES Do not push the planer beyond its listed capacities Material kick back may result and injury to operator or damage to machine may result Maximum Depth of Cut 1 8 Minimum Board Length 12 Minimum Board Thickness 1 4 Maximum of Boards at One Time 1 PLANER COVERS Never remove guards or covers while operating pl...

Страница 8: ...ght 560lbs FEATURES INCLUDES Extra large hand wheel Knife setting gauge Spring loaded cutter head for easy knife setting Infeed outfeed extensions Two chromed return rollers Top return rollers Three roller extension wing 4 dust port Two positive table locks Magnetic switch w thermal overload One piece cabinet style stand Infeed rollers Spiral serrated Outfeed rollers Machined Power transfer Triple...

Страница 9: ...B Return Rollers C Table Height Hand wheel D Gearbox E Extension Wing F Table Height Scale G Speed Control Knob H Table Locks Figure 2 I Lifting Bars J Motor Access Cover K V Belt Cover A B C D E F G H I J K Parts Identification PNR 14 150 Figure 1 Figure 2 ...

Страница 10: ...ne must be grounded properly to prevent electrocution or fire Ensure your electrical configuration complies with local and state codes Contact qualified electrician to ensure compliance DO NOT connect the machine to the power source until instructed to do so as serious personal injury could occur 220V Single Phase Grounding All electrical connections must be made in accordance with local codes Gro...

Страница 11: ...D Dust Hood Hardware E Hand Wheel F Hand Wheel Hardware G Knife Setting Guide Shaft H Open End Wrenches 8 10 12 14 17 19mm I Allen Wrenches 3 4 5 6mm J Set Screws for Extension Wings 6 K Bolts for Extension Wings 6 M Washers 6 H E B C F G I J K L D Figure 3 Contents PNR 14 150 A ...

Страница 12: ...sion wings to the planer table with the hex bolts lock washers and flat washers as shown in Figure 6 but do not fully tighten the Figure 4 Figure 5 Cleaning The unpainted surfaces are coated with a waxy oil to protect them from corrosion during shipment Remove this protective coating with a solvent cleaner or citrus based degreaser to clean thoroughly some parts may need to be removed For optimum ...

Страница 13: ...wheel 4 Place the Hand wheel on the shaft and secure it with the hex nut and flat washer as shown in Figure 7 Dust Hood IMPORTANT If you are not using a dust collection system do not use plastic dust hood to direct chips We reccomend to always use a dust collector when operating this planer You will need Dust Hood 3 x Hex Bolts 3 x Cap Screws 6 x Flat Washers 3 x Hex Nuts 6 x Flange Bolts To insta...

Страница 14: ...the gearbox oil level is okay 3 Replace the fill plug and skip to the next section If the end of the hex wrench is not coated with oil then you need to add more oil Refer to main tenance section of this manual for instructions on how add or drain oil NOTE Replace the gearbox oil after the first 20 hours of operation This is a normal break in procedure Figure 9 Figure 10 Figure 11 Fill Plug Drain S...

Страница 15: ... to your eyes lungs and ears could result from using this machine without proper protective gear Always wear safety glasses a respirator and hearing protection when operating this machine NOTE The table moves approximately 1 16 1 59mm with one turn of the Hand wheel The basic steps of operating the planer are as follows 1 Always wear safety glasses hearing protectors and respirator 2 Unless your w...

Страница 16: ...ned lumber into your planer Avoid boards with loose knots splits cross grain or other obvious blemishes or defects They can damage the blades and pose the possibility of operator injury Keep your work area clear and clean Use the stock return rollers to move material from the outfeed area back to the infeed area when working on long stock Operating Feed Speed The infeed and outfeed rollers move th...

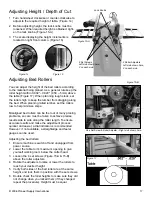
Страница 17: ...en to achieve precise results side to side along the roller length To ensure accurate results and make the adjustment process quicker and easier a dial indicator is recommended However if not available a straightedge and feeler gauges can be used Adjusting the bed rollers 1 Ensure machine is switch off and unplugged from power source 2 Lower the table to it s maximum opening to give yourself worki...

Страница 18: ... or two is replaced the belt tension may not be even causing premature belt failure and possible injury Adjusting Alignment on Pulley Using a straightedge check to see if the motor pulley is in line with the shaft pulley Figure 18 If they are not in line loosen screws as shown in figure 19 A Move motor to left and right until adjusted to proper position and then tighten screw again Motor Pulley Sh...

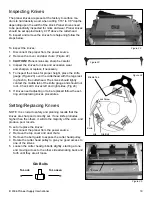
Страница 19: ...pect the knives for proper height place the knife gauge Figure 23 over the cutterhead with the legs rest ing flush to the cutterhead The knives should lightly contact the middle tab of the knife gauge and should not rock Check all 3 knives left and right sides Fig 24 6 If knives need adjusting or to be replaced follow the set ting and replacing knives procedures Setting Replacing Knives NOTE It is ...

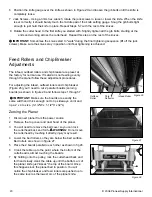
Страница 20: ...oint where the bottom of the cutterhead is almost touching the boards 7 By holding onto the pulley rock the cutterhead back and forth and slowly crank the table up until the bottom arc of the planer knife just kisses the top of the board Once this happens lock the planer bed in position You will notice the chip breaker and feed rollers are pushed up to the same level as the lowest arc of the plane...

Страница 21: ...ch and a feeler gauge tighten or loosen until there is 030 space between the Allen screw and infeed block Lock the setting by tightening the jam nut Set both left and right hand sides See figure 29 5 Adjust the outfeed roller using the same procedure as in step 4 and set the space between the set screw and blocks to 020 on both the left and right hand sides Lock the settings by tightening the jam ...

Страница 22: ...han 016 you will need to turn the column sprockets to adjust parallelism 1 You first need to gain access to the sprockets by tilting the planer on its side WARNING The planer is very heavy and should not be tilted by one person or by hand Use proper lifting methods 2 Loosen the 2 bolts that hold the idler sprocket which places tension on the chain Figure 35 3 Remove the chain from the sprocket tha...

Страница 23: ...time Should a bearing fail your planer will probably develop a noticeable rumble and or vibration which will increase when the machine is put under load Do not continue use of your planer until you have replaced the worn bearing as you may damage your planer Bearings are standard sizes and can be replaced through local suppliers COLUMNS LEAD SCREWS The outside of the four columns should be lubrica...

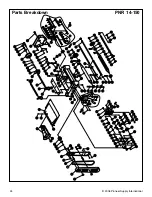
Страница 24: ...24 2006 Pioneer Supply International 24 2006 Pioneer Supply International Parts Breakdown PNR 14 150 ...

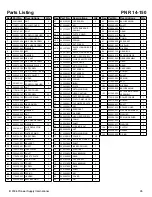
Страница 25: ... 902 CLUB OF KNIFE GAGE 1 49 7 130042 903 KNIFE GAGE 2 49 8 010206 000 RETAINING RING 4 50 000205 101 SET SCREW 16 51 000204 103 SET SCREW 6 51 000204 103 SET SCREW 1 52 280051 000 SPRING 4 53 130039 000 BUSH 4 54 170408 902 PLATE 4 56 010003 000 RETAINING RING 1 57 050282 133 HEAD CASTING 1 58 360383 000 OUTFEED ROLLER 1 59 000402 202 FLAT HD MACH SCR 2 60 170409 901 CUT LIMITER PLATE 1 61 012202...

Страница 26: ...26 2006 Pioneer Supply International 26 2006 Pioneer Supply International Parts Breakdown PNR 14 150 ...

Страница 27: ... 1 1 601017 000 MOTOR 1 2 012202 002 KEY 1 3 048201 201 HEX NUT 1 4 050271 901 MOTOR PULLEY 1 5 006001 043 WASHER 1 133 008006 100 NUT 8 134 006001 091 WASHER 2 Key Part No Descriptions Qty 135 050287 008 MOTOR PLATE 1 136 360374 902 SUPPORT SHAFT 2 137 380148 901 ADJUSTING ROD ASSEMBLY 1 138 048201 104 HEX SCREW 1 139 380049 901 COLLER 1 140 000003 106 HEX HEAD SCREW 4 141 006305 100 SPRING WASHE...

Страница 28: ...28 2006 Pioneer Supply International 28 2006 Pioneer Supply International ...

Страница 29: ... 2006 Pioneer Supply International 29 ...

Страница 30: ...30 2006 Pioneer Supply International 30 2006 Pioneer Supply International ...

Страница 31: ... 2006 Pioneer Supply International 31 ...

Отзывы: