42
HTP-071
1
2
3
4
A
B
C
D
E
F
1
2
3
4
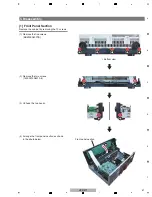
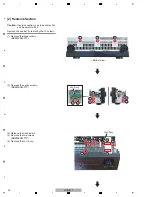
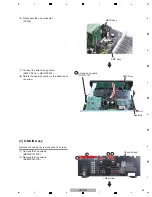
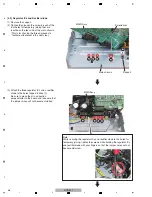
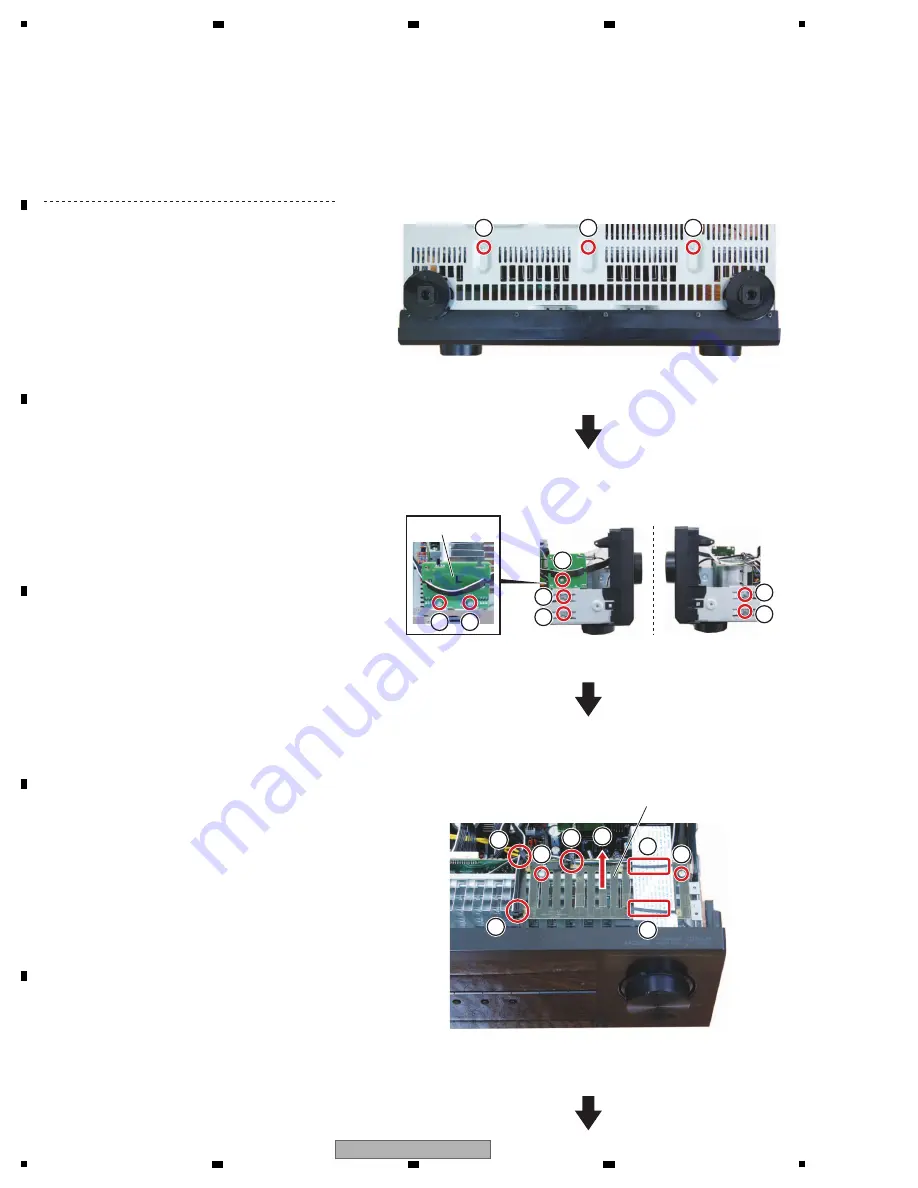
[2] Heatsink Section
Remove the cabinet by removing the 10 screws.
Caution:
Heatsink section in work becomes hot,
and be careful with it.
(1) Remove the three screws.
(BBZ30P080FTC)
(2) Remove the seven screws.
(BBZ30P080FTC)
(3) Release the five binders.
(4) Remove the two screws.
(BBZ30P080FTC)
(5) Remove the G-H Assy.
1
1
1
2
2
2
4
4
2
2
2
2
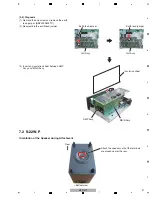
• Bottom view
G-H Assy
G-L Assy
5
3
3
3
3
3
Содержание HTP-071
Страница 9: ...9 HTP 071 5 6 7 8 5 6 7 8 A B C D E F ...
Страница 12: ...12 HTP 071 1 2 3 4 A B C D E F 1 2 3 4 4 2 OVERALL BLOCK DIAGRAM H FRONT ASSY A INPUT ASSY ...
Страница 13: ...13 HTP 071 5 6 7 8 5 6 7 8 A B C D E F ONT ASSY C MAIN ASSY C MAIN ASSY PUT ASSY B AMP ASSY F HP ASSY ...
Страница 56: ...56 HTP 071 1 2 3 4 A B C D E F 1 2 3 4 9 2 VSX 321 K P SECTION L N F G H DLPWXE only Cushion EVA Nut Nut ...
Страница 60: ...60 HTP 071 1 2 3 4 A B C D E F 1 2 3 4 9 4 S 11 P SECTION Center speaker Front L R Surround L R speaker ...
Страница 89: ...89 HTP 071 5 6 7 8 5 6 7 8 A B C D E F C SIDE B CP1 CP3 CP5 CN1 CN3 ...
Страница 90: ...90 HTP 071 1 2 3 4 A B C D E F 1 2 3 4 11 4 D MAIN ASSY D D D MAIN ASSY SIDE A E CN209 CN600 C CN5 CP104 ...
Страница 92: ...92 HTP 071 1 2 3 4 A B C D E F 1 2 3 4 D D D MAIN ASSY SIDE B CN601 CN603 IC104 IC603 IC604 IC605 IC606 ...
Страница 93: ...93 HTP 071 5 6 7 8 5 6 7 8 A B C D E F D SIDE B CN600 CP104 ...


