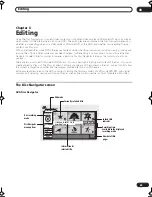
background image


Editing

08


74


En


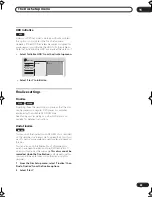
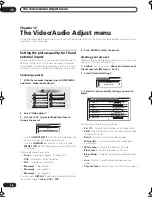
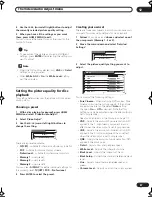
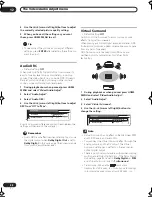
Chapter Edit (Chpt Edit)


When editing VR mode DVDs or video on the HDD you 
can edit individual chapters within a title, with 
commands for erasing, combining and dividing. You can 
also play individual chapters to check their content.


1

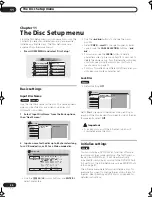
Select ‘Chpt Edit’ from the Disc Navigator menu 

options.

2

Use the 


///


 (cursor buttons) to select the 

title that contains the chapters you want to edit, 
then press ENTER.


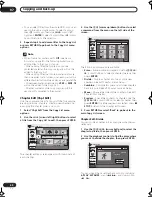
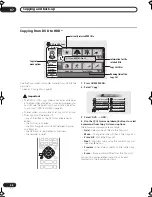
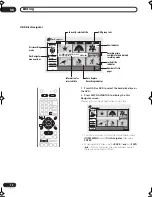
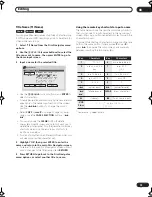
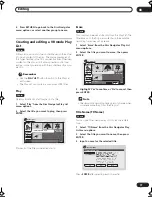
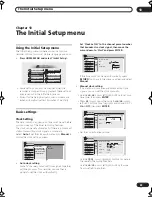
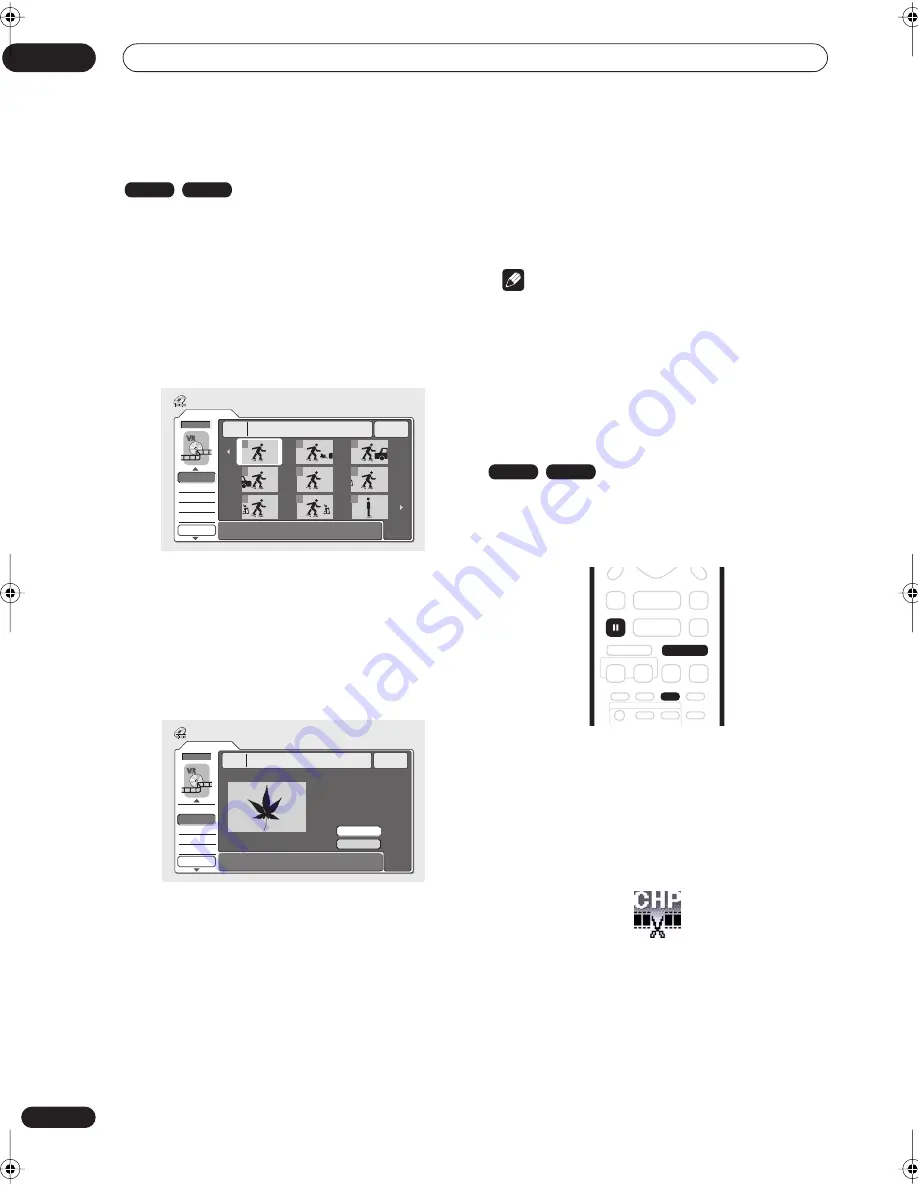
After selecting a title, thumbnails of each chapter appear 
and you’ll see that the Disc Navigator menu items 
change to the chapter editing commands:


Erase


 – Erase chapters: Select the chapter you want 

to erase and press 


ENTER


 (see also notes below).


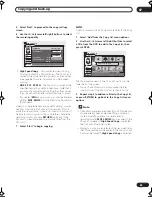
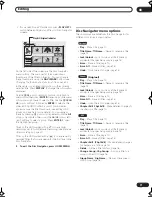
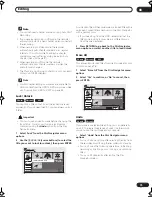
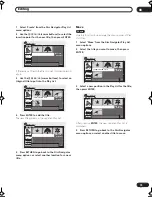
Divide


 – Split a chapter into two: Select the chapter 

you want to divide and press 


ENTER


 (up to a limit of 

999 chapters per disc).


Combine


 – Combine two adjacent chapters into one: 

Highlight the bar divider between two adjacent 
chapters and press 


ENTER


 (see also note below)


Preview


 – Preview chapters: Select the chapter you 

want to play; press 


 STOP


 to return to the chapter 

edit screen.


Undo


 – Undo the last command (only works with VR 

mode disc edits).


3

Press RETURN to get back to the menu options on 

the left side of the screen.

4

To return to the Disc Navigator screen, press 

RETURN again, or select ‘Back’ from the menu 
options on the left.


 Note


• It may not be possible to erase chapters less than 5 

seconds long.

• It may not always be possible to combine two 

chapters, even though they are adjacent. If a chapter 
has been divided into three, then the middle chapter 
erased, it is not possible to combine the two 
remaining chapters into one.


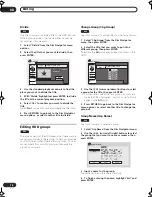
Inserting chapter markers into a title


You can create new chapters within a title using the 


CHP 

MARK


 button while playing the title or during recording. 

This is useful not just for navigation of the disc content 
but also for editing purposes.


1

Start playback of the title you want to create 

new chapter markers in.


You can use the 


Play


 command from the Disc Navigator 

menu to do this.


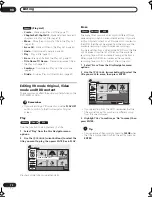
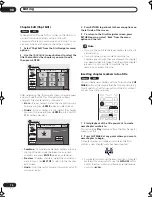
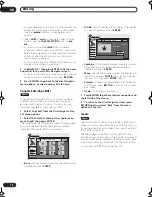
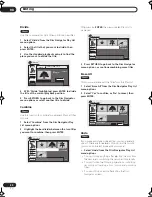
2

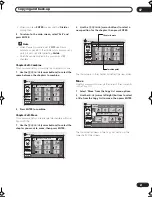
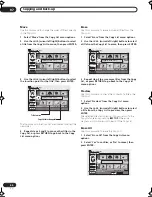
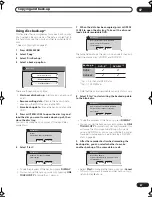
Press CHP MARK at any point where you want a 

new chapter to begin.


A chapter marker icon appears on-screen briefly to 
confirm a new chapter mark has been inserted:

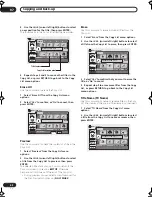
• For greater control over the exact position of chapter 

markers it can be useful to use the 


 PAUSE


 button 

and/or the slow-motion and frame advance/reverse 
controls (


/


).

VR mode

HDD

Original

DVD

1/1

Chapter Edit

Back

Erase

Divide
Combine
Preview
Undo

1

3

4

5

6

7

8

9

11/04Wed 12:30PM   2ch LP

Title

1

Chapter

   0h03m

2

Original

Chapter    1

Back

DVD

Divide Chapter

Erase

Divide

Combine
Preview
Undo

12/13Wed  3:00PM   2ch LP

Title

1

Chapter

   0h03m

1-1                     0.02.12.00

 Play Pause

Divide

Exit

VR mode

HDD

CHP

MARK

PAUSE

DVR-03_HDD_KU.book 74 ページ 2003年8月7日 木曜日 午前10時40分

Содержание DVR-510H

Страница 1: ...DVD Recorder DVR 510H Operating Instructions 4 7 4 7 RegisterYour Product on www pioneerelectronics com ...

Страница 2: ...ed reading the instructions put them away in a safe place for future reference DANGER VISIBLE AND INVISIBLE LASER RADIATION WHEN OPEN AVOID DIRECT EXPOSURE TO BEAM This product includes FontAvenue fonts licenced by NEC Corporation FontAvenue is a registered trademark of NEC Corporation WARNING Handling the cord on this product or cords associated with accessories sold with the product will expose ...

Страница 3: ......

Страница 4: ...iscs 35 Playing in slow motion 36 Frame advance frame reverse 37 The Play Mode menu 38 Displaying and switching subtitles 41 Switching DVD soundtracks 41 Switching the audio channel 42 Switching camera angles 42 06 Recording About DVD recording 43 About HDD recording 43 Recording time and picture quality 43 Restrictions on video recording 44 Setting the picture quality recording time 44 Basic reco...

Страница 5: ...103 Frequently asked questions 105 About DV 106 Manual recording modes 107 Language code list 108 Country code list 108 On screen displays and recorder displays 109 Handling discs 110 Storing discs 110 Damaged discs 110 Cleaning the pickup lens 110 Condensation 110 Hints on installation 110 Moving the recorder 111 Glossary 111 Specifications 113 Specifications 114 Note on copying You may use this ...

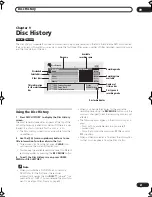
Страница 6: ...the title or chapter is Disc History The Disc History screen shows disc information including how much free space remains for recording for the last 30 recordable discs loaded in the recorder Every time you load a recordable disc the Disc History is automatically updated with the latest information Home Menu The Home Menu gives you on screen access to all the recorder s features in one convenient ...

Страница 7: ...arts of the Original content Chapter marking You can easily add chapter markers anywhere in your recordings for easy editing Play Video mode recordings on a regular DVD player Discs recorded using the Video mode can be played back on regular DVD players including computer DVD drives compatible with DVD Video playback 2 2 DVD Video format recording The use of the DVD Video format for recording on D...

Страница 8: ...oing to be used for a month or more When disposing of used batteries please comply with governmental regulations or environmental public instruction s rules that apply in your country or area Using the remote control Keep in mind the following when using the remote control Make sure that there are no obstacles between the remote and the remote sensor on the unit Remote operation may become unrelia...

Страница 9: ...e distortion in the output This recorder cannot record CD R or CD RW discs PC created disc compatibility If you record a disc using a personal computer even if it is recorded in a compatible format as listed above there will be cases in which the disc may not be playable in this recorder due to the setting of the application software used to create the disc In these particular instances check with...

Страница 10: ...lity This recorder will play lower bit rate files but please note that the sound quality becomes noticeably worse at lower bit rates JPEG file compatibility This recorder is compatible with Fujicolor CD and Kodak Picture CD formats as well as CD R RW ROM discs containing JPEG files Baseline JPEG and EXIF 2 2 1 still image files are supported horizontal resolution from 160 5120 pixels vertical reso...

Страница 11: ...ecordings onto DVD R RW discs in order to protect against accidental loss Do not move the recorder while it is on Install and use the recorder on a stable level surface Do not block the rear vent cooling fan Do not use the recorder in excessively hot or humid places or in places that may be subject to sudden changes in temperature Sudden changes in temperature can cause condensation to form inside...

Страница 12: ...eceiver Dolby Digital DTS decoder or other equipment with optical digital input 6 CONTROL IN Use to control this recorder from the remote sensor of another Pioneer component with a CONTROL OUT terminal and bearing the Pioneer mark Connect the CONTROL OUT of the other component to the CONTROL IN of this recorder using a mini plug cord 7 AC IN Connect to a power outlet using the supplied power cable...

Страница 13: ...n your VCR If you are not connecting a VCR in the chain connect this recorder directly to your TV and skip the next step 3 Use an RF antenna cable to connect the antenna output on your VCR to the antenna input on your TV 4 Connect the AUDIO and VIDEO OUTPUT jacks 1 or 2 to a set of audio video inputs on your TV Use the supplied three pin audio video cable It is color coded to help you match them u...

Страница 14: ...n to TVs monitors VCRs or other equipment Use an S video cable not supplied to connect an S VIDEO OUTPUT 1 or 2 to an S video input on your TV monitor or other equipment 2 Connecting using the component video output Component video carries the picture as two separate color signals plus a luminance brightness signal See also Component Video Out on page 92 for how to set up the component video outpu...

Страница 15: ...our TV or AV receiver 1 Connect RF antenna cables as shown This enables you to watch and record TV channels 2 Connect the AUDIO and VIDEO OUTPUT jacks 1 or 2 on this recorder to a set of audio video inputs on your TV using a set of A V cables as supplied This enables you to watch the output from this recorder 3 Connect the audio video output of your cable box satellite tuner to the INPUT 1 AUTO RE...

Страница 16: ...O OUTPUT jacks 1 or 2 on this recorder to a set of audio video inputs on your TV using a set of A V cables as supplied This enables you to watch discs 3 Connect the audio video output of your cable box satellite tuner to the INPUT 1 AUTO REC jacks on this recorder using a set of A V cables This enables you to record scrambled TV channels Note The setup on this page does not allow you to watch one ...

Страница 17: ...ables you to watch and record TV channels 2 Connect the AUDIO and VIDEO OUTPUT jacks 1 or 2 on this recorder to a set of audio video inputs on your AV receiver 3 Use an optical digital audio cable not supplied to connect the DIGITAL OUT OPTICAL jack on this recorder to an optical digital input on your AV receiver This enables you to listen to multichannel surround sound 4 Connect the AV receiver s...

Страница 18: ...deo cables for the video connection Connecting a DV camcorder Using the front panel DV IN OUT jack it is possible to connect a DV camcorder or video deck or DVD R RW recorder and digitally transfer DV tapes or DVD R RW discs to DVD R RW Important This jack is for connection to DV equipment only It is not compatible with digital satellite tuners or D VHS video decks 1 Use a DV cable not supplied to...

Страница 19: ...nction is shown in the display 9 SMART JOG dial 10 STOP REC Press to stop recording 11 REC Press to start recording 12 Front panel inputs page 12 Pull the cover down where indicated to access the front panel input jacks Especially convenient for connecting camcorders and other portable equipment 13 HDD indicator Lights when the HDD is selected for playback recording 14 Front panel display See Disp...

Страница 20: ...W 11 CH page 26 Channel indicator for the built in TV tuner 12 page 46 Lights when a timer recording has been set Indicator blinks if the timer has been set to DVD but there isn t a recordable disc loaded or the timer has been set to HDD but the HDD is not recordable AUTO page 52 Lights when Auto Start Recording has been set and during Auto Start Recording 13 Recording quality indicators page 43 F...

Страница 21: ... change the input to use for recording 11 CHANNEL page 26 Press to change the channel of the built in TV tuner 12 VCR Plus page 49 Press then use the number buttons to enter a PlusCode programming number for timer recording 13 DISC NAVIGATOR page 33 TOP MENU page 28 Press to display the Disc Navigator screen or the top menu if a DVD Video disc is loaded 14 PLAY LIST page 77 MENU page 28 Press to s...

Страница 22: ... to set a timer recording from the Easy Timer screen 20 DISC HISTORY page 81 Press to display summary information disc name recording time left etc from the last 30 recordable discs loaded NAVI MARK page 34 Press to select a thumbnail picture for the current title for use in the Disc Navigator screen CHP MARK page 74 Press to insert a chapter marker when playing recording a VR mode DVD RW disc or ...

Страница 23: ... use the Setup Navigator press cursor down to select Cancel then press ENTER to exit the Setup Navigator 5 Use the cursor up down buttons to select Antenna or Cable depending on how you receive your terrestrial TV channels then press ENTER You can also select Do not set if you don t need the recorder to retune all the channels if you re using the Setup Navigator for a second time for example DVD R...

Страница 24: ...r Video Out Audio In Audio Out Language Recording Playback Clock Set On Screen Display Front Panel Display Remote Control Set Setup Mavigator Setup Mavigator Clock Setting Auto Manual Initial Setup Basic Tuner Video Out Audio In Audio Out Language Recording Playback Clock Set On Screen Display Front Panel Display Remote Control Set Setup Mavigator Setup Mavigator Initial Setup Auto Clock Setting D...

Страница 25: ...anually tune to stations See Manual CH Setting on page 91 VCR Plus channel setting This setting lets you assign guide channels to ensure that the VCR Plus programming system works correctly See VCR Plus CH Setting on page 91 That completes basic setup using the Setup Navigator Setting up the remote to control your TV You can set up the supplied remote control to control many brands of TV See Setti...

Страница 26: ...OG on the front panel to select the TV channel you want to record from Antenna channels are numbered 2 through 69 Cable channels are numbered 1 through 125 6 Press REC to start recording By default the recording will be in SP standard play mode which will give you around 2 hours of recording from a blank DVD disc You can pause recording by pressing PAUSE Press REC or PAUSE again to restart recordi...

Страница 27: ...cs don t allow certain playback controls to operate at certain points in the disc This is not a malfunction 1 Press STANDBY ON to switch on Also turn on your TV and make sure that it is set to the correct video input 2 Select HDD or DVD for playback Use the HDD and DVD buttons on the remote or the HDD DVD button on the front panel If playing video from the HDD skip to step 5 below 3 Press OPEN CLO...

Страница 28: ... During playback press to start slow motion playback Press repeatedly to change the playback speed While paused press to advance a single frame in either direction Press to display the top menu or menu of a DVD Video disc these are often the same Use the cursor buttons to navigate DVD Video disc menus press ENTER to select items Press to return to the previous level of a DVD Video disc menu PLAY S...

Страница 29: ...n speed is shown on screen Press to skip to previous next track or folder for WMA MP3 disc During playback enter a track number then press ENTER to skip directly to that track PLAY STOP PAUSE REV SCAN FWD SCAN PREV NEXT CLEAR Press to start playback If RESUME is displayed on screen play back starts from the place last stopped Press to stop playback You can resume playback from the same point by pr...

Страница 30: ... To hide the information display press DISPLAY repeatedly until it disappears The example displays below are a guide only actual displays vary according to the disc loaded etc HDD and removable disc activity display Press DISPLAY once to see the HDD and removable disc DVD etc activity The example displays below show high speed copying from HDD to DVD and HDD chase playback Home menu options Timer ...

Страница 31: ...format WMA MP3 10 Finalized Shows Finalized if a recordable DVD is finalized Stop display 2 1 Broadcast program name 2 Date and time 3 Number of titles tracks on disc For a VR mode DVD RW the number of Original and Play List titles are shown separately Play display 1 1 Number of chapters in title 2 Current title and chapter number For CD Video CD shows current track for WMA MP3 shows current folde...

Страница 32: ...r playback only During real time copy the copy source playback information is displayed If Frame Search is On see Frame Search on page 98 the frame number is shown next to the elapsed time display when the disc is paused Transfer rate shows the amount of video and audio information recorded on the disc It is not an indication of picture audio quality The Video mode disc displays become the same as...

Страница 33: ...ints in the disc This is not a malfunction When playing Video CDs some functions such as making a program list are not available in PBC mode Stop the disc first then start playback by pressing For discs that contain JPEG picture files see The PhotoViewer on page 82 Using the Disc Navigator to browse the contents of a disc Use the Disc Navigator to browse the contents of a disc and start playback Y...

Страница 34: ...C NAVIGATOR to go straight to the Disc Navigator screen 3 Select Play from the menu options 4 Use the cursor buttons to select a title to play 5 Press ENTER to start playback Note It s not possible to use the Disc Navigator when playing a Video CD in PBC mode Another way to find a particular place on a disc is to use the time search mode See Search Mode on page 38 Changing the thumbnail picture fo...

Страница 35: ...rack number For example for track 6 press 6 for track 24 press 2 then 4 To clear and start again press CLEAR 2 Optionally Press ENTER Alternatively just wait a few seconds and playback will jump to the new track Using the front panel controls 1 Use the FUNCTION button to select one of the following TITLE Enter a title number CHP Enter a chapter number within the current title TRACK Enter a track n...

Страница 36: ...r PCM below 96kHz No sound is output when scanning from the HDD except on forward SCAN 1 1 for which audio is output through the analog outputs and digital output if the sound is Linear PCM below 96kHz 1 Except during chase playback and simultaneous recording playback Depending on the disc normal playback may automatically resume when a new chapter is reached on a DVD disc Playing in slow motion Y...

Страница 37: ...is reached on a DVD disc No sound is output during slow motion playback Frame advance frame reverse You can advance or back up a DVD disc frame by frame With Video CDs you can only use frame advance 1 During playback press PAUSE 2 Press or to back up or advance one frame You can only use frame advance when playing a Video CD Hold down or for continuous frame reverse frame advance 3 To resume norma...

Страница 38: ...up down buttons Time Search DVD and Video CD only For example for 45 minutes into the disc press 4 5 0 0 For 1 hour and 15 minutes and 20 seconds into the disc press 1 1 5 2 0 If Frame Search is On see Frame Search on page 98 then you need to add a frame number to the end of the time search For example 22 minutes 10 seconds and 5 frames press 2 2 1 0 0 5 NTSC video contains 30 frames per second nu...

Страница 39: ...u re using the HDD for playback It s also possible to use repeat play together with program play to repeat the tracks chapters in the program list see Program play below 1 Select Repeat from the Play Mode menu 2 Select a repeat play mode For VR mode DVD discs select Repeat Disc Repeat Title or Repeat Chapter or Repeat Off For HDD DVD Video and Video mode DVD discs select Repeat Title or Repeat Cha...

Страница 40: ...rs folders tracks 5 To play the program list press PLAY Program play remains active until you turn off program play see below erase the program list see below eject the disc or switch off the recorder Tip To save your program list and exit the program edit screen without starting playback press HOME MENU or PLAY MODE You can change the program list by selecting Input Edit Program from the Play Mod...

Страница 41: ...hen CLEAR Note Some discs only allow you to change subtitle language from the disc menu Press TOP MENU to access To set subtitle preferences see Subtitle Language on page 94 Switching DVD soundtracks When playing a DVD disc recorded with two or more soundtracks often in different languages you can switch the soundtrack during playback Check the disc packaging for details of the soundtrack options ...

Страница 42: ... the audio channel Set Dolby Digital Out to Dolby Digital PCM see Dolby Digital Out on page 93 or listen via the analog outputs if you need to switch the audio channel Switching camera angles Some DVD Video discs feature scenes shot from two or more angles check the disc box for details it should be marked with a icon if it contains multi angle scenes When a multi angle scene is playing the same i...

Страница 43: ...on a DVD R RW disc is 99 About HDD recording Recording to the internal hard disk drive HDD is basically similar to recording to a VR mode DVD RW disc You have the full choice of recording quality options including the manual mode and of course you can record erase and re record as many times as you like The capacity of the hard disk drive means that you can store many hours of video on it even in ...

Страница 44: ...m the copyright owner or otherwise have a legal right to reproduce or copy you may be violating the law including copyright law and may be subject to payment of damages and other remedies This product incorporates copyright protection technology that is protected by method claims of certain U S patents and other intellectual property rights owned by Macrovision Corporation and other rights owners ...

Страница 45: ...ss repeatedly to switch between Mono Stereo and SAP audio channels When recording in VR mode both mono and SAP audio channels are recorded allowing you to switch the audio channel on playback The only exception to this is when the picture quality is set to FINE MN32 in which case you do need to select the audio channel before recording 5 Press REC to start recording If you want to set a recording ...

Страница 46: ...art when the operation preventing timer recording has finished The timer indicator lights in the front panel display when the timer is active If the indicator is blinking it means that for a DVD timer recording there is no disc loaded or the disc loaded is not recordable for an HDD timer recording it means that the HDD is not recordable Timer recordings have higher priority than the Auto Start Rec...

Страница 47: ...er recording on page 47 Standard timer recording The timer recording screen you can see all the timer programs already set clear programs and set up new ones 1 Press TIMER REC to display the Timer Recording screen You can also access the Timer Recording screen from the Home Menu press HOME MENU select Timer Recording then Timer Recording View This screen shows all the timer programs currently set ...

Страница 48: ...n this case unless you load a suitable disc before the recording actually starts the recorder will use the HDD for recording The message Can t Rec will appear if there are already 99 titles on the HDD or if there is not enough free space on the HDD for recording If Optimized Rec see Optimized Rec on page 96 is set to On the recorder will adjust the recording quality to try and fit the recording on...

Страница 49: ...ord to the hard disk drive or DVD to record to a DVD 2 After making the settings press ENTER The program details are shown at the bottom of the screen for a few seconds then the screen is automatically exited If you haven t set up the guide channels or at least the guide channel for the PlusCode number that you entered the recorder will prompt you to enter the channel number that the TV program is...

Страница 50: ...tons are pressed on the remote or front panel LOCK is briefly displayed again To unlock the recorder press and hold STOP on the front panel for 3 seconds until the display shows UNLOCK To cancel a timer recording when the recorder is locked first unlock the recorder see above then press and hold REC for 3 seconds Timer recording FAQ Frequently Asked Questions Even though the timer is set the recor...

Страница 51: ... continue To stop recording press STOP REC playback will continue Note You can t start playback immediately after recording starts When scanning a DVD no sound is output if the recorder is also recording the DVD see Scanning discs on page 35 You can t use this feature during Auto Start Recording or in Auto Start Recording standby You can t use simultaneous playback and recording while copying or b...

Страница 52: ...for the satellite receiver or other component then switch it into standby if necessary Check the manual that came with the receiver if you re not sure how to do this 2 Check that the Audio In settings for External Audio and Dual Mono Recording are as you want them See Audio In settings on page 92 for more on these settings 3 Set up the recorder Use REC MODE to set the recording quality See Setting...

Страница 53: ...er to VTR mode 2 Set up the recorder Use REC MODE to set the recording quality See Setting the picture quality recording time on page 44 for detailed information Make sure a recordable disc is loaded if you want to record to DVD 3 From the Initial Settings menu check that the DV audio input is setup as you require See DV Input on page 93 for more on this Check also that the Audio In settings for E...

Страница 54: ...DV Input on page 93 between Stereo 1 and Stereo 2 Recording from the DV output You can record non copy protected material from the hard disk drive or from a DVD to a camcorder connected to the DV IN OUT jack 1 Connect the camcorder to the DV IN OUT jack of this recorder 2 Select the HDD or DVD for playback 3 Find the place you want to start recording from 4 Start recording on the camcorder 5 Play ...

Страница 55: ...rtially or fully on the Pioneer DVR 7000 DVD recorder do not support this feature These discs will have only a text title menu when finalized on this recorder Initializing a DVD RW disc When you first load a blank disc the recorder will initialize it automatically for recording You can also manually initialize DVD RW discs You can initialize a disc for either Video mode recording or VR mode record...

Страница 56: ...h high speed copying Check with the disc manufacturer for compatibility There may be cases where even 2x 4x compatible discs do not copy at full speed Discs initialized on another recorder are not compatible with high speed copying Real time copying Real time copying is also possible with the advantage that you can use a different recording mode from the original For example you can record a title...

Страница 57: ...D R RW disc is loaded See also Copyright above During HDD playback press ONE TOUCH COPY to copy the current title to DVD The front panel display indicates that the title is being copied Playback continues while copying Note Title name chapter markers as well as thumbnail picture markers Navimark for the Disc Navigator are also copied However if you copy to a Video mode DVD R RW only the first 32 c...

Страница 58: ...also Copyright on page 57 Important The recorder can only store one Copy List at a time The Copy List is erased if the Frame Accurate setting is changed in the Initial Settings menu see Frame Accurate on page 97 The Copy List is also erased if any Original titles are erased or edited this includes titles that are changed through Auto Replace Recording and copy once protected titles Resetting the r...

Страница 59: ...ng Quality box that appears Optimized The recording quality is automatically adjusted so that the Copy List fits on to the space available on the disc When you change the recording quality setting you can see how much disc space it will require If this is more than is available it shows up in red and you won t be able to start copying In this case either change the recording quality or press RETUR...

Страница 60: ...ach chapter 3 Use the cursor up down buttons to select a command from the menu on the left side of the screen The following commands are available Erase Erase individual chapters Use the cursor buttons to select a chapter to erase then press ENTER Divide Divide a chapter into two or more new chapters See Edit Chapter Divide below Combine Combine two previously divided chapters back into one See Ed...

Страница 61: ...for the chapter then press ENTER The thumbnails in the chapter list reflect the new order Move Use this command to change the order of titles currently in the Copy List 1 Select Move from the Copy List menu options 2 Use the cursor left right buttons to select a title from the Copy List to move then press ENTER The thumbnail appears in the Copy List section in the lower half of the screen 1 1 HDD ...

Страница 62: ...List menu options 2 Use the cursor left right buttons to select a title from the Copy List to erase then press ENTER 3 Select Yes to confirm that you want to erase the title or No to cancel 4 Repeat step 2 to erase more titles from the Copy List or press RETURN to go back to the Copy List menu options Title Name Ttl Name Use this command to name or rename titles in the Copy List the names of the o...

Страница 63: ...w motion Note When Frame Accurate is set to Off see Frame Accurate on page 97 the divide points may move by up to 0 5 seconds after selecting Divide Combine Use this command to make a single title from two adjacent titles already in the Copy List 1 Select Combine from the Copy List menu options 2 Use the cursor left right buttons to select two adjacent titles from the Copy List to combine then pre...

Страница 64: ...up down buttons to select a command from Copy List menu options The following commands are available Add Select and add titles to the Copy List Move Change the order of titles in the Copy List Erase All Erase the Copy List Next Start recording using the current Copy List see step 5 below Preview Check the content of a title in the Copy List Erase Erase individual titles from the Copy List You can ...

Страница 65: ... Use this command to add one or more titles to the Copy List 1 Select Add from the Copy List menu options 2 Use the cursor left right buttons to select a title from the DVD to add to the Copy List then press ENTER The thumbnail appears in the Copy List section in the lower half of the screen You can t add titles which would make the total running time of the Copy List more than 6 hours 3 Repeat st...

Страница 66: ...he Copy List 1 Select Preview from the Copy List menu options 2 Use the cursor left right buttons to select a title from the Copy List to preview then press ENTER The selected title starts playing You can return to the Copy List screen by pressing STOP otherwise playback will continue until the end of the Copy List Erase All Use this command to erase the Copy List 1 Select Erase All from the Copy ...

Страница 67: ...l DVD R disc 2 Ver 1 1 DVD RW disc Note that the actual recordable capacity of discs vary 8 Select Start to start writing the backed up data to the blank disc To see the progress of the back up press DISPLAY You can cancel the back up process by pressing ONE TOUCH COPY for more than 1 second However this will make the disc unusable although if you are using a DVD RW disc you can re initialize it i...

Страница 68: ...ata from the HDD select No to keep it you can delete it later if you want to If you decide to leave the back up data on the HDD you can make back up copies to recordable DVD discs anytime from the Disc Back up menu The backed up data is still on the HDD Erasing it will increase the free space available OK to Erase Disc Back up Yes No ...

Страница 69: ...wo ways to edit VR mode DVD RW discs You can directly edit the Original content of the disc or you can create and edit a Play List The Play List doesn t actually change any of the content on the disc but just controls how the content is played back rather like the program play feature found on CD players Editing material recorded on the HDD is similar to editing the Original content of a VR mode D...

Страница 70: ...1 1 11 04Wed 12 30PM 2ch LP Recording Time 0h30m40s 1 2 3 4 5 6 Disc Navigator Play Erase Ttl Name Chpt Edit Chg Group HDD Remain 6h12m FINE All Group 1 Group 2 Group 3 Group 4 NEW Auto Replace Recording indicator Disc Navigator menu options Disc recording mode Number of title pages Locked title indicator Information for selected title Recording time available in the displayed recording mode New i...

Страница 71: ...are seeing for the first time in the Disc Navigator 3 To exit the Disc Navigator press HOME MENU Disc Navigator menu options The commands available from the Disc Navigator for different disc types is shown below Play Play a title page 72 Title Name Ttl Name Name or rename a title page 73 Lock Unlock Lock or unlock a title to prevent accidental changes being made page 75 Erase Erase a title page 72...

Страница 72: ...rent things depending on what you are currently editing If you are editing Original content on a VR mode disc or content on the HDD the title will be erased from the disc and the available recording time will increase accordingly If you erase titles from a Video mode DVD R disc the title will disappear from the list of titles but the available recording time will not increase Erasing a title from ...

Страница 73: ...me and return to the main Disc Navigator screen To return to the main Disc Navigator screen without saving changes to the title name press RETURN 5 Press RETURN to go back to the Disc Navigator menu options or select another title to name Using the remote key shortcuts to input a name The table below shows the remote control key shortcuts that you can use to input characters in the name input scre...

Страница 74: ...n press RETURN again or select Back from the menu options on the left Note It may not be possible to erase chapters less than 5 seconds long It may not always be possible to combine two chapters even though they are adjacent If a chapter has been divided into three then the middle chapter erased it is not possible to combine the two remaining chapters into one Inserting chapter markers into a titl...

Страница 75: ...lock or unlock then press ENTER An unlocked title will become locked a locked title will be unlocked Locked titles are shown in the Disc Navigator with a padlock icon If you re editing from the HDD remember that the title you re looking for may be in a different group from the one displayed 3 Press RETURN to go back to the Disc Navigator menu options or select another title to lock unlock Erase Al...

Страница 76: ...le that you want to put into a different group then press ENTER Titles from the All group are displayed all titles on the HDD 3 Use the cursor up down buttons to select a group for the title then press ENTER You can select one of the four groups or choose to make the title ungrouped in which case it will only appear in the All group 4 Press RETURN to go back to the Disc Navigator menu options or s...

Страница 77: ...ording time does not increase 1 Select Erase from the Disc Navigator Play List menu options 2 Select the title you want to erase then press ENTER 3 Highlight Yes to confirm or No to cancel then press ENTER Note The remaining recording time doesn t change when you erase something from the Play List Title Name Ttl Name You can give titles new names of up to 64 characters long 1 Select Ttl Name from ...

Страница 78: ...pter editing commands Erase Erase chapters Select the chapter you want to erase and press ENTER Divide Split a chapter into two Select the chapter you want to divide and press ENTER Combine Combine two adjacent chapters into one Select the dividing line between two adjacent chapters and press ENTER Move Rearrange chapters Select the chapter you want to move press ENTER then highlight the new locat...

Страница 79: ...title you want to move then press ENTER 3 Select a new position in the Play List for the title then press ENTER After pressing ENTER the new updated Play List is displayed 4 Press RETURN to go back to the Disc Navigator menu options or select another title to move Play List 1 1 Undo DVD Disc Navigator Create Move Divide Combine Erase All DVD Remain 0h37m FINE 1 2 Play List 1 1 Undo DVD ORG1 ORG4 O...

Страница 80: ...elect Erase All from the Disc Navigator Play List menu options 2 Select Yes to confirm or No to cancel then press ENTER Undo If you make a mistake while editing you can generally undo it There are three levels of undo in other words you can undo the last three edits you made Select Undo from the Disc Navigator Play List menu options You can t undo anything after ejecting the disc from the recorder...

Страница 81: ... HOME MENU or DISC HISTORY Note When you initialize a DVD RW disc or record a DVD R disc for the first time the recorder automatically names the disc DISC where is a number from 1 to 99 You can rename the disc if you want to see Input Disc Name on page 84 When you change the display for the available recording time using the REC MODE button only the display is changed the actual recording mode is ...

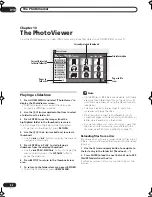
Страница 82: ... 99 folders are viewable but if there are more files folders than this on the disc it is still possible to view them all using the Reload function see below The time it takes for the recorder to load a file increases with large file sizes Pictures with an aspect ratio different to your TV screen will appear with black bars top and bottom or either side depending on the picture If you encounter a d...

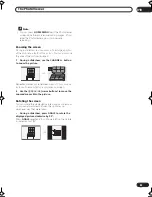
Страница 83: ...ed 1 During a slideshow use the CHANNEL button to zoom the picture Repeated presses cycle between zoom off 2x zoom and 4x zoom The zoom factor is displayed on screen 2 Use the cursor buttons to move the zoomed area within the picture Rotating the screen You can rotate the displayed picture during a slideshow so you can always view pictures the right way up whichever way they were taken During a sl...

Страница 84: ... a limited character set Lock Disc Default setting Off Set to On to prevent accidental recording editing or erasing of the disc loaded If you need to unlock the disc to make edits select Off Important A locked disc can still be initialized which will completely erase the disc Initialize settings You can initialize a DVD RW disc for either VR mode recording or Video mode recording The first time yo...

Страница 85: ...OM drive See Playing your recordings on other DVD players on page 54 for detailed instructions Undo Finalize You can undo the finalization on DVD RW discs recorded on this recorder in Video mode You need to do this if you want to record more material or edit material already on the disc You can also undo the finalization of VR mode discs which have been finalized on other DVD recorders If when you...

Страница 86: ... preset 2 Memory3 user preset 3 You can press DISPLAY to see the individual settings for the current preset Tuner VCR or LDP 4 Press ENTER to select the preset Creating your own set There are three user presets in which you can save your own set of picture quality settings 1 Follow Choosing a preset above and select one of the user presets Memory 1 2 or 3 2 Select Detailed Settings 3 Select the pi...

Страница 87: ...ree user presets in which you can save your own set of picture quality settings for disc playback 1 Follow Choosing a preset above and select one of the user presets Memory 1 2 or 3 2 Move the cursor down and select Detailed Settings 3 Select the picture quality setting you want to adjust You can adjust the following settings Pure Cinema When watching DVD movies Pure Cinema optimizes the picture q...

Страница 88: ... amplifier receiver Virtual Surround Default setting Off Switch on Virtual Surround to enjoy surround sound effects from just two speakers When playing any Dolby Digital encoded material SRS TruSurround produces a deep cinema like sound space from any pair of speakers SRS TruSurround is licenced from SRS Labs and certified by Dolby Laboratories for Virtual Dolby technology 1 During playback or whe...

Страница 89: ... time signals you can set the clock manually Use the cursor left right buttons to set your time zone then press ENTER Press cursor down then use the cursor left right buttons to set daylight saving time D S T On or Off then press ENTER Set the current date and time Use the cursor up down buttons to change the value in the highlighted field Use the cursor left right buttons to move from one field t...

Страница 90: ...ppears automatically when you switch on the recorder for the first time or after resetting the recorder It is also available from the Initial Settings menu should you need it at any other time See also Switching on and setting up on page 23 Tuner settings Auto Channel Setting Default setting Antenna Auto Channel Setting automatically tunes the built in TV tuner to terrestrial broadcast TV channels...

Страница 91: ...e VCR Plus programming numbers can be guaranteed to correspond to the correct station 1 Select VCR Plus CH Setting then Next Screen 2 Assign channel numbers to the guide channels as necessary Look in your TV guide to see which channel numbers should be assigned to which guide channels Use the cursor up down buttons to change the guide channel for setting Use the cursor left right buttons to change...

Страница 92: ... either the L left or the R right audio channel Note If you re recording in VR mode except when set to FINE MN 32 both channels will be recorded and you can switch them as you like on playback Compatibility of this unit with progressive scan TVs Consumers should note that not all high definition television sets are fully compatible with this product and may cause artifacts to be displayed in the p...

Страница 93: ...ble DTS Out You only need to make this setting if you connected this recorder to an AV amplifier or other component using the digital output Default setting On If your AV receiver or other connected component has a built in DTS decoder set to On otherwise set to Off Check the manual that came with the connected component if you re unsure whether it is DTS compatible Important If you set to On with...

Страница 94: ...language you specify here is recorded on a disc the recorder automatically plays the disc in that language although this depends on the Auto Language setting see Auto Language on page 95 Choose Other if you want to specify a language other than English or French see Selecting Other languages on page 95 Tip You can switch between the languages recorded on a DVD disc any time during playback using t...

Страница 95: ...ting specifies in which language the disc menus should appear Leave on the default setting for menus to appear in the same language as your Subtitle Language see Subtitle Language on page 94 Choose Other if you want to specify a language other than English or French see Selecting Other languages on page 95 Subtitle Display Default setting On When set to On the recorder displays subtitles according...

Страница 96: ...t it will be cut off when the disc is full Set Optimized Rec to On to have the recorder automatically adjust the recording quality to fit the available disc space Note You may notice a reduction in picture quality if the recorder has to fit a lot of extra material into the remaining time available on the disc If even on recording level MN 1 there is insufficient space available on the disc the rec...

Страница 97: ...etter Box or 4 3 Pan Scan In Letter Box mode widescreen software is shown with black bars at the top and bottom of the screen Pan Scan chops the sides off widescreen material to make it fit the 4 3 screen so even though the picture looks larger on the screen you re actually seeing less of the movie See Screen sizes and disc formats on page 102 for more information Still Picture Default setting Aut...

Страница 98: ...the password first If you forget the password you can reset the recorder to its factory settings see Resetting the recorder on page 101 then set a new password Parental Lock Set Password The password you set will enable you to change the Parental Lock level and Country code setting It is also the password that you will need to enter if you want to play a disc with a parental lock level higher than...

Страница 99: ...cording Playback TV Screen Size Still Picture Frame Search Seamless Playback Parental Lock Angle Indicator Change Password Change Level Country Code Initial Setup TV Screen Size Still Picture Frame Search Seamless Playback Parental Lock Angle Indicator Parental Lock Basic Tuner Video Out Audio In Audio Out Language Recording Playback Parental Lock Change Level Password Off 1 2 3 4 Initial Setup TV...

Страница 100: ...fault setting when playing a DVD Video disc that features multi angle scenes an icon appears on screen during the parts of the disc where angle switching is available Change to Off to hide the on screen indicator Basic Tuner Video Out Audio In Audio Out Language Recording Playback TV Screen Size Still Picture Frame Search Seamless Playback Parental Lock Angle Indicator On Off Initial Setup ...

Страница 101: ...st one in the list If the maker s name of your TV doesn t appear in the table below you will not be able to use this remote to control your TV 2 Press TV to check that the remote works with your TV If the remote is set up correctly the TV should switch on off If it doesn t and there is another code given for your maker repeat step 1 with a new code Using the TV remote control buttons The table bel...

Страница 102: ...f the program are cropped so that the picture fills the whole screen 4 3 16 9 The program appears squashed Set to either 4 3 Letter Box or 4 3 Pan Scan 4 3 Letter Box 4 3 Pan Scan The program is presented correctly on either setting When viewing on a widescreen TV or monitor Screen format of disc Setting Appearance 16 9 16 9 The program is presented in widescreen 4 3 16 9 Your TV will determine ho...

Страница 103: ...is unplugged or there is a power failure while the recorder is on all the settings will be lost Make sure that you switch the recorder into standby before unplugging the power cord Screen goes blank and controls are inoperative Press STOP then restart playback Remote control does not work If you connected this recorder to another Pioneer product using the CONTROL IN jack point the remote control a...

Страница 104: ...and 999 chapters Check that these limits have not been reached Check that the source you are trying to record is not copy protected For a VR formatted disc check that the disc isn t locked page 84 Timer program doesn t record suc cessfully When setting the recording channel make sure you set the recorder s built in TV tuner not the TV s built in tuner When recording to a Video mode disc programs t...

Страница 105: ...re quality if you do this See also Copying and back up on page 56 Can I record a dual mono broadcast to the HDD keeping both audio channels and switch them on playback No Only the audio channel set in the Dual Mono Recording setting in the Initial Settings menu will be recorded If you need to record both channels of audio please record using a VR mode DVD RW disc See also Dual Mono Recording on pa...

Страница 106: ...uired see DV Input on page 93 Audio output from the DV IN OUT jack is 16 bit only Audio input to the DV IN OUT jack should be 32 or 48kHz not 44 1kHz Picture disturbance in the recording may occur if the source component pauses playback or plays an unrecorded section of tape or if the power fails in the source component or the DV cable becomes disconnected DV related messages You may see the follo...

Страница 107: ...N 4 315 mins MN 5 300 mins MN 5 300 mins MN 6 285 mins MN 6 285 mins MN 7 270 mins MN 7 270 mins MN 8 255 mins MN 8 255 mins MN 9 240 mins LP MN 9 240 mins MN 10 230 mins MN 10 230 mins MN 11 220 mins MN 11 220 mins MN 12 210 mins MN 12 210 mins MN 13 200 mins MN 13 200 mins MN 14 190 mins MN 14 190 mins MN 15 180 mins MN 15 180 mins MN 16 170 mins MN 16 170 mins MN 17 160 mins MN 17 160 mins MN 1...

Страница 108: ...ongolian mn 1314 Moldavian mo 1315 Marathi mr 1318 Malay ms 1319 Maltese mt 1320 Burmese my 1325 Nauru na 1401 Nepali ne 1405 Norwegian no 1415 Occitan oc 1503 Oromo om 1513 Oriya or 1518 Panjabi pa 1601 Polish pl 1612 Pashto Pushto ps 1619 Quechua qu 1721 Rhaeto Romance rm 1813 Kirundi rn 1814 Romanian ro 1815 Kinyarwanda rw 1823 Sanskrit sa 1901 Sindhi sd 1904 Sangho sg 1907 Serbo Croatian sh 19...

Страница 109: ...nd retry If the error persists use a new disc If the error appears even with a new disc please consult a Pioneer Service Center Cannot record to a disc that is not CPRM com patible Cannot record this content using Video mode recording The video source is copy once protected Use a VR mode DVD RW disc with CPRM for recording This content is copy protected The video source is copy protected and canno...

Страница 110: ...speed inside the player If you can see that a disc is cracked chipped warped or otherwise damaged don t risk using it in your player you could end up damaging the unit This unit is designed for use with conventional fully circular discs only Use of shaped discs is not recommended for this product Pioneer disclaims all liability arising in connection with the use of shaped discs Cleaning the pickup...

Страница 111: ...red at discrete intervals 44 100 times a second for CD audio by an analog to digital converter generating a stream of numbers On playback a digital to analog converter generates an analog signal based on these numbers See also Sampling frequency and Analog audio Dolby Digital 1 With multichannel audio this high quality surround system is used in many movie theaters around the world Manufactured un...

Страница 112: ...lly shot on film Video material has a frame rate of 30 frames second compared to 24 frames second for film This recorder converts film material to 60 frames second in progressive scan mode PureCinema adjusts the picture so that it matches more closely the picture quality of a cinema screen You can see whether video on a DVD disc is film or video material by displaying the transfer rate If a appear...

Страница 113: ... C1 C125ch Timer Programs 1 month 32 programs Clock Quartz lock 12 hour digital display Power off memory Approx 5 years after manufacture Input Output VHF UHF antenna input output terminal VHF UHF set 75 Ω F shape connector Video input Input 1 3 rear 2 front Input level 1 Vp p 75 Ω Jacks RCA jack Video output Output 1 2 Output level 1 Vp p 75 Ω Jacks RCA jack S Video input Input 1 3 rear 2 front Y...

Страница 114: ...creen display OSD 23 30 94 Optimized recording 6 48 59 96 105 Original content 7 11 21 31 69 71 72 76 78 OSD see On screen display OSD P PBC PlayBack Control for Video CD 29 33 112 PhotoViewer 82 83 Picture quality see Adjusting the picture quality and Re cording quality Play List 7 11 20 21 31 69 72 77 80 Play Mode menu 21 38 41 Program play 39 40 41 Progressive scan video 6 20 24 32 87 92 112 R ...

Страница 115: ...115 En ...
Страница 116: ...B 9120 Melsele Belgium TEL 03 570 05 11 PIONEER ELECTRONICS ASIACENTRE PTE LTD 253 Alexandra Road 04 01 Singapore 159936 TEL 656 472 1111 PIONEER ELECTRONICS AUSTRALIA PTY LTD 178 184 Boundary Road Braeside Victoria 3195 Australia TEL 03 9586 6300 PIONEER ELECTRONICS DE MEXICO S A DE C V Blvd Manuel Avila Camacho 138 10 piso Col Lomas de Chapultepec Mexico D F 11000 TEL 55 9178 4270 K002E Publishe...

Отзывы: