35
DDJ-T1
5
6
7
8
5
6
7
8
A
B
C
D
E
F
[Checking Track Playback]
1. While holding the TREE button pressed, turn the rotary selector to select a folder.
2. Turn the rotary selector without holding the TREE or FA
V
ORITES button pressed to select a track.
3. Press the LOAD button of the deck into which you wish to load the selected track, to load it.
4. Press the PLAY/PAUSE button to start playback of the track.
[Checking Analog Audio Output]
• Via MASTER OUT
1. Adjust the audio input level, by turning the GAI
N
control of each deck.
2. Adjust the audio output level with the channel fader of each deck.
3. Select the decks whose audio signals are to be output with the crossfader, as indicated below.
Leftmost position: Audio from Deck A or C is to be output.
Center position: Mixed audio of all decks is to be output.
Rightmost position: Audio from Deck B or D is to be output.
4. Turn the MAI
N
V
OL control. Audio will be output from the MASTER 1 and 2 connectors.
• Via the headphone
1. Connect the headphones to the PHO
N
ES connector.
2. Press the headphones CUE button of the deck you wish to monitor.
3. Turn the HEADPHO
N
ES MIX control, as indicated below.
Turning counterclockwise: The volume from the deck whose headphones CUE button is pressed will be relatively increased.
Center position: The volume from the deck whose headphones CUE button is pressed and that via the MASTER OUT 1
and 2 connectors will become the same.
Turning clockwise: The volume via the MASTER OUT 1 and 2 connectors will be relatively increased.
4. Turn the HEADPHO
N
ES
V
OL control to output audio from the deck whose headphones CUE button is pressed.
[Checking Analog Audio Input]
1. Connect an external device or a microphone to the AUX I
N
or MIC connector, respectively.
2. With TRAKTOR, assign the audio of the external device to a desired deck.
3. Click on the
b
symbol beneath the assigned deck to display the pulldown menu then select "Audio Through."
4. On the TRAKTOR screen and via the audio output, check if the connected audio signal is input.
Note:
With the initial setting of TRAKTOR Pioneer DDJ-T1 EDITIO
N
, the audio signal from an external device connected via the
AUX I
N
or MIC connector is input to Deck D.
However, with the initial setting of Demo mode, which is used for servicing, it is assigned to Deck A.
4. Import tracks to TRAKTOR
Drag and drop music files or folders containing music files into “Track Collection” of the “TREE” area of TRAKTOR, using
Explorer or Finder.
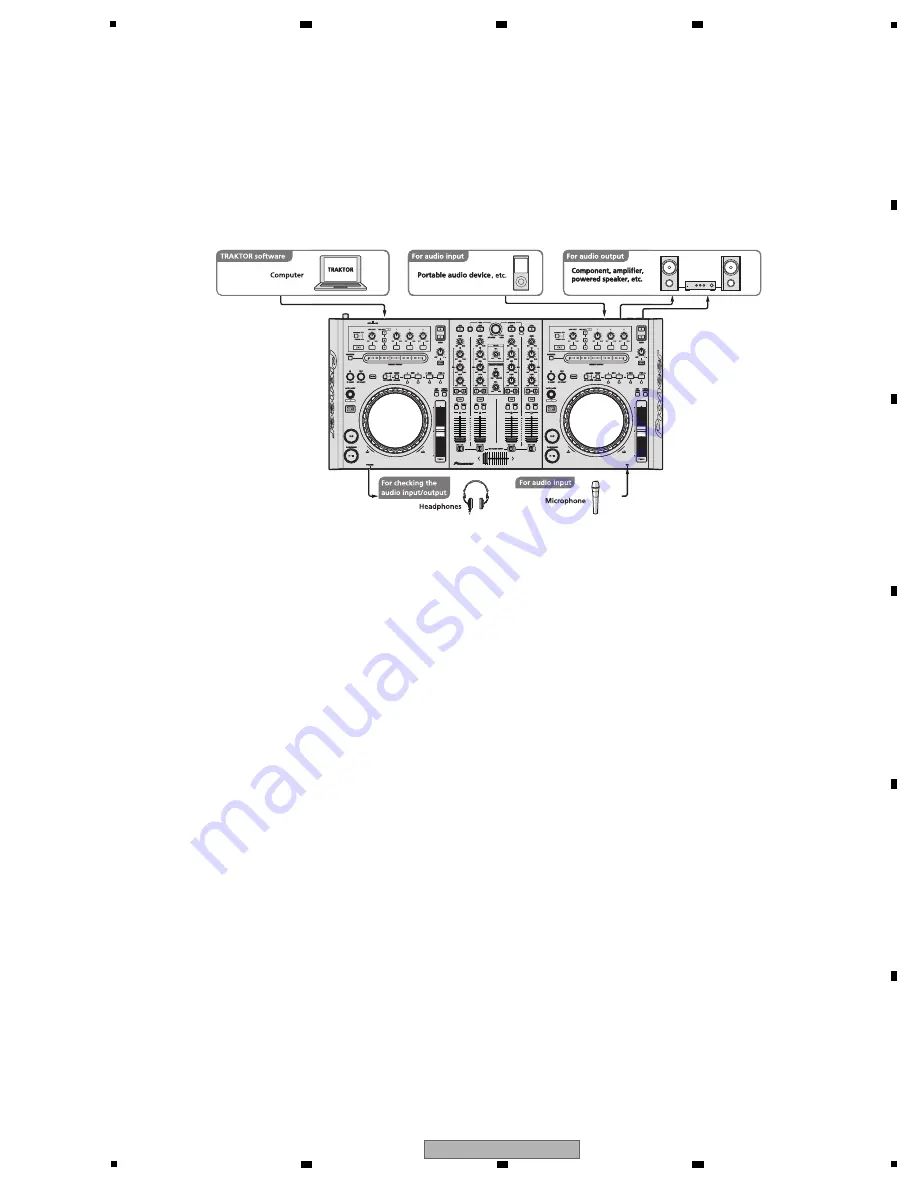
[Connection Examples]
Содержание DDJ-T1
Страница 7: ...7 DDJ T1 5 6 7 8 5 6 7 8 A B C D E F 2 2 PANEL FACILITIES Rear panel Front panel ...
Страница 8: ...8 DDJ T1 1 2 3 4 A B C D E F 1 2 3 4 Control panel ...
Страница 9: ...9 DDJ T1 5 6 7 8 5 6 7 8 A B C D E F 1 Browser ...
Страница 10: ...10 DDJ T1 1 2 3 4 A B C D E F 1 2 3 4 2 Deck ...
Страница 11: ...11 DDJ T1 5 6 7 8 5 6 7 8 A B C D E F 3 Mixer ...
Страница 12: ...12 DDJ T1 1 2 3 4 A B C D E F 1 2 3 4 4 Effect ...
Страница 15: ...15 DDJ T1 5 6 7 8 5 6 7 8 A B C D E F ...
Страница 53: ...53 DDJ T1 5 6 7 8 5 6 7 8 A B C D E F ...
Страница 56: ...56 DDJ T1 1 2 3 4 A B C D E F 1 2 3 4 9 2 EXTERIOR SECION Refer to 9 3 PCB LAYER SECTION ...
Страница 104: ...104 DDJ T1 1 2 3 4 A B C D E F 1 2 3 4 B B UCOM ASSY SIDE B CN1003 CN CN905 CN906 CN CN1004 CN902 DNP2628 C ...
Страница 105: ...105 DDJ T1 5 6 7 8 5 6 7 8 A B C D E F B SIDE B CN1002 CN303 CN302 CN904 CN903 CN901 CN301 CN501 CN1001 JP501 ...


