05
38
En
Chapter 5
Adjusting audio and video
Adjusting the video
The quality of the playback picture can be adjusted according to the
TV you are using.
1
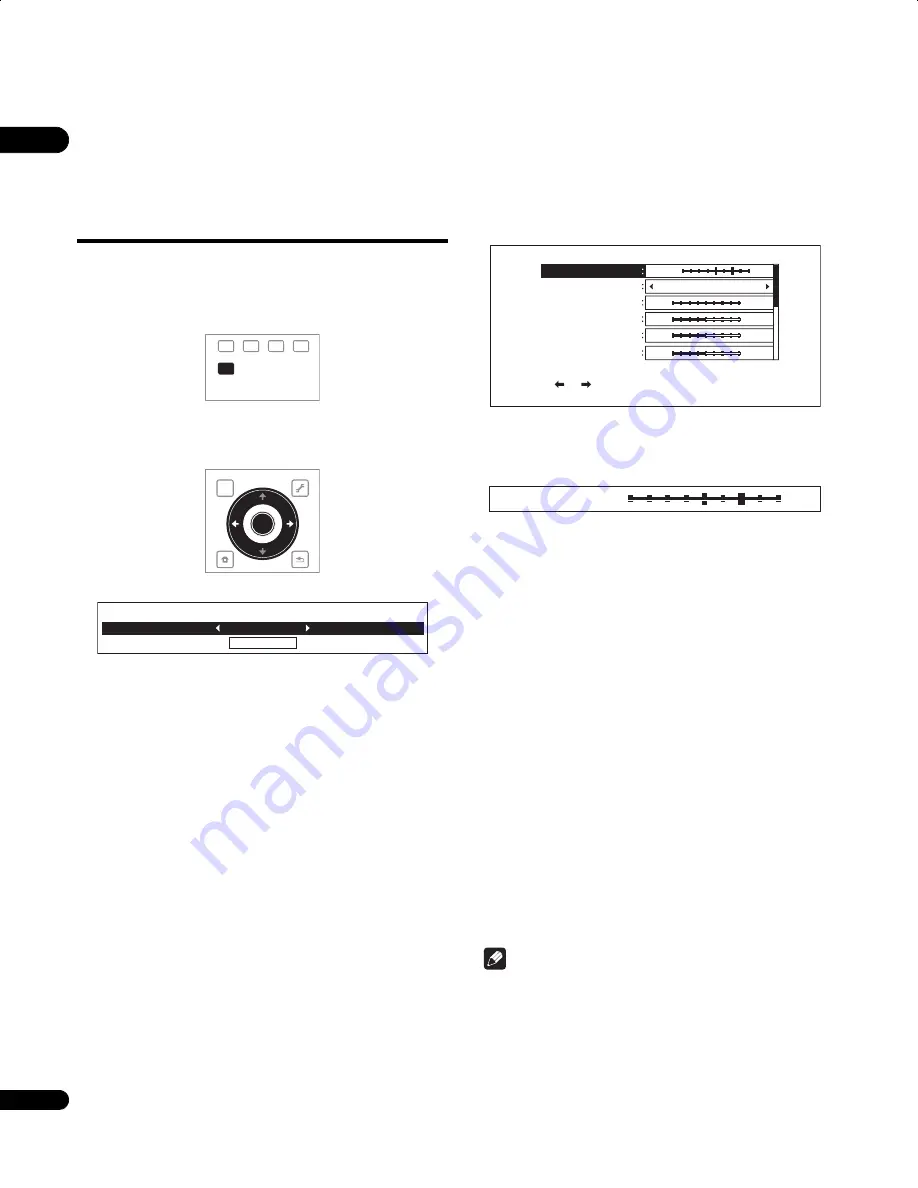
During playback, press VIDEO ADJUST to display the Video
Adjust screen.
The Video Adjust screen can also be displayed by selecting
Video
Adjust
from the
TOOLS
menu.
2
Select a preset.
Select using
/
according to the TV being used.
•
LCD
– Select this when connected to a liquid crystal display TV.
•
PDP
– Select this when connected to a plasma TV of another
brand.
•
Pioneer PDP
– Select this when connected to a Pioneer plasma
TV.
•
Projector
– Select this when connected to a front projector.
•
Professional
– With this setting, video signal processing is
restrained. Select this when connected to a professional
monitor.
•
Memory1 to 3
– Picture quality settings with adjusted
parameters can be stored in the memory. For a description of
the parameters, see
When Memory1, 2 or 3 is selected
below.
When Memory1, 2 or 3 is selected
1
Select Adjustments.
Use
to select
Adjustments
, then press
ENTER
.
A detailed settings screen appears.
2
Select the item to be adjusted.
Use
/
to select.
3
Adjust the picture quality.
When
/
are pressed, the adjustments can be made watching
the picture. The detailed settings screen reappears when
ENTER
is
pressed.
•
Prog.Motion
– Adjust according to the type of image (movie or
still image). This is effective when outputting video materials as
progressive images.
•
Pure Cinema
– This setting optimizes the operation of the
progressive scanning circuit for playing film materials. Normally
set it to
Auto1
. If the picture seems unnatural, switch this to
Auto 2
,
On
or
Off
(page 39).
•
YNR
– Reduces noise in the luminance (Y) signal.
•
CNR
– Reduces noise in the chroma (C) signal.
•
BNR
– Reduces the block noise (block-shaped distortion
generated upon MPEG compression).
•
MNR
– Reduces the mosquito noise (distortion along the
contours of the picture generated upon MPEG compression).
•
Detail
– Emphasizes the picture’s contours.
•
White Level
– Adjusts the level of the white portions.
•
Black Level
– Adjusts the level of the black portions.
•
Black Setup
– Select the black level as the setup level. Normally
select
0 IRE
. If the black is too dense and all the dark colors are
displayed in a uniform black due to the combination with the
connected monitor, select
7.5 IRE
.
•
Gamma Correction
– Adjusts how the dark portions of the
picture look.
•
Hue
– Adjusts the balance between green and red.
•
Chroma Level
– Adjusts the density of the colors.
Note
•
Prog.Motion
and
Pure Cinema
have the effect only for pictures
recorded in the interlaced scan format (576i/480i or 1080i
signals).
•
Prog.Motion
is disabled when
Pure Cinema
is set to
On
.
•
Black Setup
have the effect only for pictures output from the
VIDEO
and
S-VIDEO
output terminals, and for NTSC signals
output.
•
YNR
,
CNR
,
BNR
and
MNR
are disabled when 1080/24p signals
are output from the
HDMI OUT
terminal.
RED
GREEN
YELLOW
BLUE
VIDEO ADJUST
TOP MENU
TOOLS
HOME
MENU
RETURN
ENTER
Adjustments
Vi
d
eo A
d
just
PDP
Prog. Motion
Pure Cinema
YNR
CNR
BNR
MNR
Video Adju
s
t [ Memory
1
]
Use [ ][ ] to adjust the picture to progressive scan.
Motion
Still
Auto1
Off
Max
Off
Max
Off
Max
Off
Max
1/2 Page
Motion
Still
Prog. Motion
LX08_WV_EN.book 38 ページ 2008年7月15日 火曜日 午後2時51分


