9
Adjusting the LCD panel angle
Important
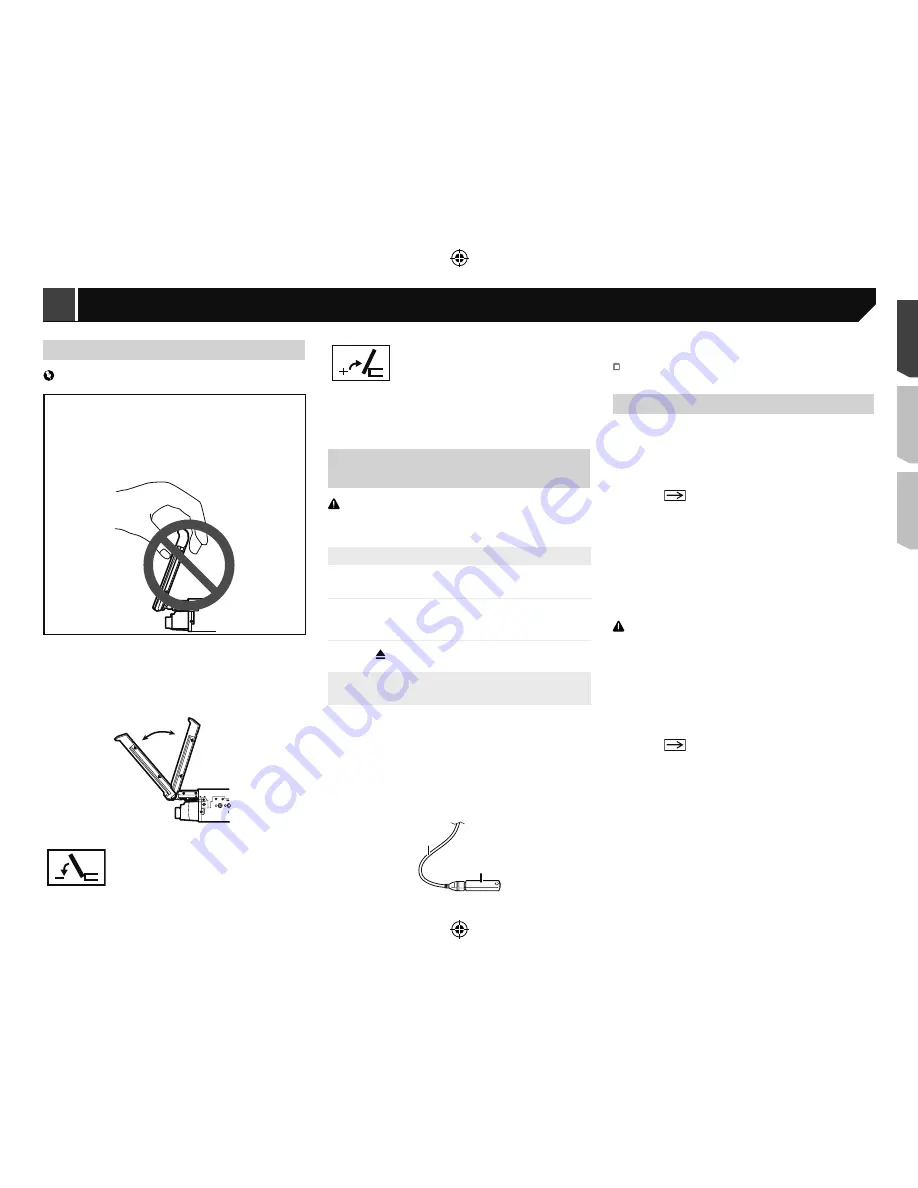
If you can hear the LCD panel knocking against your
vehicle’s console or dashboard, touch the flip down
temporarily key from the flap menu to temporarily level
the LCD panel.
When adjusting the LCD panel angle, be sure to adjust
from the flap menu. Forcibly adjusting the LCD panel by
hand may damage it.
1 Press and hold
OPEN
/
CLOSE
to display the flap
menu.
2 Touch the tilt down key or tilt up key to adjust
the LCD panel to an easily viewable angle.
Laying the panel down.
Returning the panel to the upright position.
As the set angle is saved, the LCD panel will
automatically be adjusted to the same position
the next time the LCD panel is opened.
Inserting/ejecting/connecting
media
CAUTION
Do not insert anything other than a disc into the disc-loading
slot.
Inserting and ejecting a disc
Inserting a disc
1 Insert a disc into the disc-loading slot.
Ejecting a disc
1 Press button to eject a disc.
Plugging and unplugging a USB stor-
age device
p
This product may not achieve optimum performance with
some USB storage devices.
p
Connection via a USB hub is not possible.
p
A USB cable is required for connection.
1 Pull out the plug from the USB port of the USB
cable.
2 Plug a USB storage device into the USB cable.
2
1
1
USB cable
2
USB storage device
Check that no data is being accessed before pulling out the
USB storage device.
On first-time startup
1 Start the engine to boot up the system.
The “
Select Program Language
” screen appears.
p
From the second time on, the screen shown will differ
depending on the previous conditions.
2 Touch the language.
3 Touch
.
The “
Speaker Mode Settings
” screen appears.
4 Touch the speaker modes.
Standard Mode
4-speaker system with front and rear speakers, or a
6-speaker system with front and rear speakers and
subwoofers.
Network Mode
3-way system with a high range speaker, middle range
speaker and subwoofer (low range speaker) for reproduction
of high, middle and low frequencies (bands).
WARNING
Do not use the unit in standard mode when a speaker system
for 3-way network mode is connected to this unit. This may
cause damage to the speakers.
5 Touch [
OK
].
The “
Smartphone Setup
” screen appears.
6 Touch the item.
Refer to
Information on the connections and functions for
each device
on page 19
7 Touch
.
The top menu screen appears.
p
Once the speaker mode is set, the setting cannot be
changed unless this product is restored to the default
settings. Restore the default settings to change the speaker
mode setting.
Refer to
Restoring the default settings
on page 45
Turning the LCD panel
horizontally
When the LCD panel is upright and hinders the operation of the
air conditioner, the panel can be turned horizontally temporarily.
1 Press and hold
OPEN
/
CLOSE
to display the flap
menu.
2 Touch the flip down temporarily key to flip the
LCD panel down to the horizontal position.
Flips the LCD panel down to the horizontal
position temporarily.
To return to the original position, press and hold
OPEN
/
CLOSE
.
The LCD panel returns to the original position
automatically, indicated with a beeping sound 10
seconds after operation.
Adjusting the LCD panel slide
position
You can adjust the LCD panel slide position so that the panel is
set back or forwards.
1 Press and hold
OPEN
/
CLOSE
to display the flap
menu.
2 Touch the slide back key or slide front key to
move the LCD panel back and forth.
The LCD panel slides to the back.
The LCD panel slides to the front.
< CRD4921-A >
Basic operation
Basic operation
9
Содержание AVH-X6850DVD
Страница 167: ... CRD4921 A 167 ...


