background image

9

B: PC Client Remote Monitoring

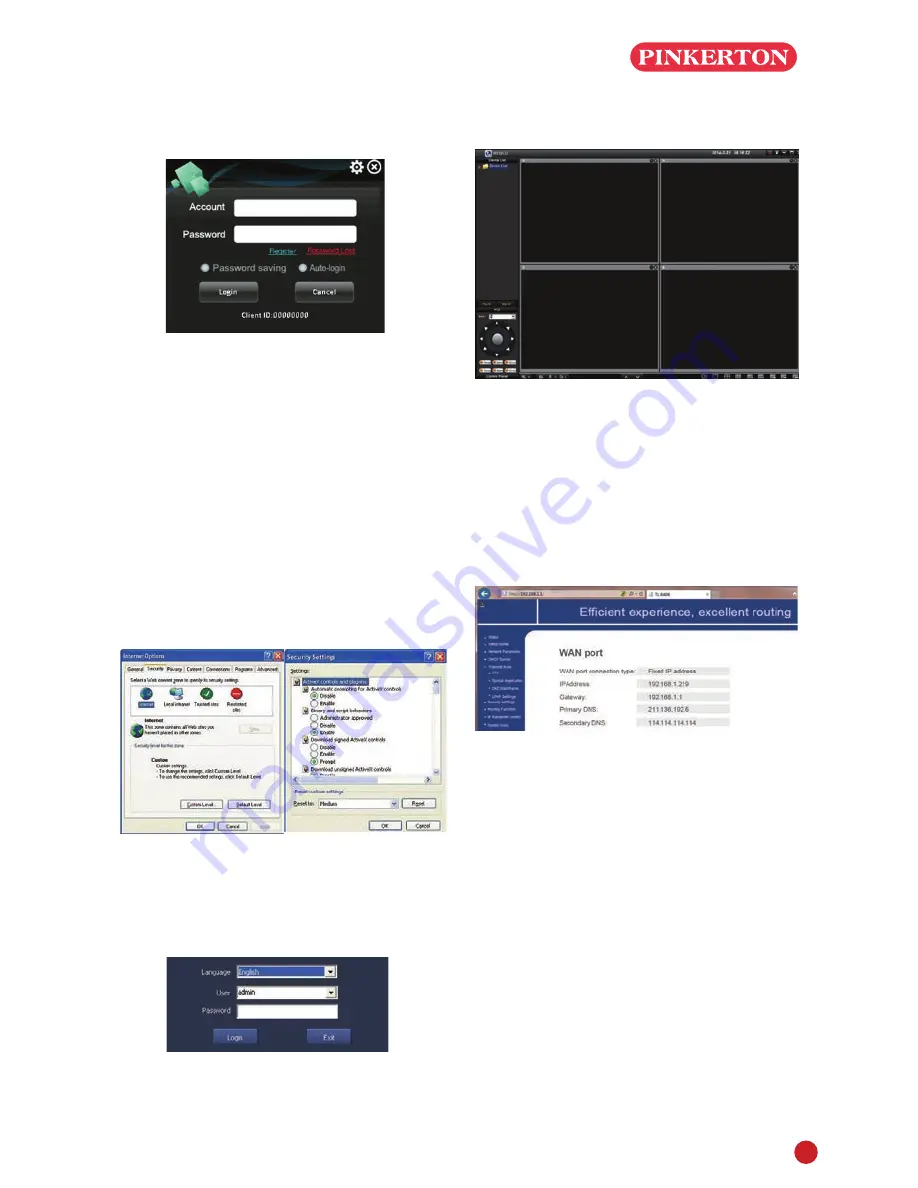
Download 365SECU from CD, install and start it as 

below picture

Account: same as the 365SECU account in 

smartphone
Password: same as the 365SECU account in 

smartphone

Enter main interface, and show it as following

Remark: The PC operation has the same 'create' 

& 'Delete' function as the Smartphone 

365SECU

C: IE browser Remote Monitoring

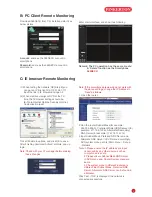
(1) When testing the network 'OK'(Step 2),you 

can get an IP link like http://192.168.1.111, 

input the link in IE browser and open it

(2) When visit(live view)your DVR at the 1st 

time, the IE browser settings should be, 

IE-Tools-Internet Options-Security-Internet- 

Customization level

Tick all Enable in options, and click OK to save.
After finishing download ActiveX controls, pop up 

login.

Note: If the surveillance preview does not work with 

the above settings, change the IP Address to 

'Fixed' as follows

Note: Check with your I.T manager before making 

these changes

1. Open the router

2.Find the router Subnet Mask(for example: 

255.255.255.0), Preferred(Primary)DNS server (for 

example: 211.136.192.6), Altermate(Secondary)

DNS Server(for example: 114.114.114.114)

3.Input Subnet Mask, Preferred DNS Server and 

Altermate DNS Server in DVR menu accordingly, 

DVR system menu path is : Main menu – Set up 

- Network

Note:1.Please ensure the IP address you input 

is not used by any other device, such as, 

computer, server, etc.

        2.Please ensure Subnet Mask,DNS Server 

in DVR menu and  Router System menu are 

same.

        3.The system menu in different routers are 

different. But Subnet Mask, Preferred DNS 

Server, Altermate DNS Server can be found in 

all Router.

Click Test, if ‘OK’ is displayed, the network is 

connected successfully.

Содержание PINCCTVK811

Страница 1: ... TV can not be less than 19 2 One VGA Cable one HDMI Cable use any one that monitor supports 3 One surge protector advisable 4 Power supplies for the DVR and cameras Only use approved PSU s from your supplier 5 Appropriate tools for installation Note This instruction is used to guide you install the system and remote surveillance more instructions and details can be downloaded from the CD which co...

Страница 2: ...P 2 Connect monitor plug on surge protector STEP 3 Switch signal mode to VGA Input in monitor menu 1 2 3 Monitor with HDMI Port STEP 1 Connect DVR and monitor using HDMI Cable STEP 2 Connect monitor plug on surge protector STEP 3 Switch signal mode to HDMI Input in monitor menu 1 2 3 TV with BNC Port VIDEO IN STEP 1 Connect DVR and monitor using BNC RCA Cable STEP 2 Connect monitor plug on surge p...

Страница 3: ...l sent from the camera to the DVR is reduced over distance If you use a cable longer than 30M then a CAT5 or RG59 cable should be used with suitable connectors The maximum distance allowed is 200M Do not install the camera close to high voltage or other sources of electrical interference Install the camera in a position where it can not be damaged or vandalised Avoid direct exposure to the weather...

Страница 4: ...rnet to remote view via 365SECU For more details please read the REMOTE SURVEILLANCE GUIDE on page 7 3 Because your camera is weatherproof it requires less protection than weather resistant cameras and it can be placed in more exposed locations if needed Keep in mind that most cameras are designed to operate between 14 F to 122 F 10 C to 60C with a relative humidity of up to 95 and consider wind c...

Страница 5: ...eps Note Make sure the monitor supports same resolution as your DVR output resolution otherwise the monitor is unable to display video STEP 1 Get into Main Menu from desktop shortcut menu STEP 2 Click Setup then choose Basic menu STEP 3 Select the desired resolution from Video Output STEP 4 Click Apply to save settings STEP 5 Click Exit to restart system and then re login afterwards Change passwor...

Страница 6: ...mething or some one walk through grid area within camera view range If DVR detects movement within grid area a yellow hunanoid figure would be presented in the screen The grid could not cover flag trees or some other flow objects in the wind to avoid false alerts Click to save setting Click to exit PLAYBACK Get into system Main Menu Search system presents picture as following Select the channel St...

Страница 7: ... Exit Note It needs to connect the WIFI device again after unplugging UPGRADE If the DVR requires a software upgrade contact your supplier You will be sent the upgrade files by e mail STEP 1 Put software into U Disk and ensure software is at root directory as below STEP 2 Put U Disk into DVR port USB2 0 Unplug the mouse from the front USB socket STEP 3 Restart DVR Power off and on it will be upgra...

Страница 8: ...ted to internet Step 2 How to test your DVR s network 1 Right click Mouse Main menu Set up Network 2 Tick Obtain IP address automatically 3 Click Test if OK is displayed the network is connected successfully Note Please ensure DHCP in your router is open Step 3 Remote Monitoring Setting A Smartphone Remote Monitoring 1 iPhone iPad User Search 365SECU in app store and install it or scan the followi...

Страница 9: ...ame etc Camera Catalogue Device DVR Pop up items to add Directory DVR camera Search Local Device DVR 8 3 Login Interface instructions Start 365SECU as following 4 User Registration The new user need to get an account from the login interface Click button Register and fill information as following 5 Device Management Instruction Main menu Device Manage These items must be completed User ID User nam...

Страница 10: ...erver can be found in all Router Click Test if OK is displayed the network is connected successfully 9 B PC Client Remote Monitoring Download 365SECU from CD install and start it as below picture Account same as the 365SECU account in smartphone Password same as the 365SECU account in smartphone Enter main interface and show it as following Remark The PC operation has the same create Delete functi...

Отзывы: