


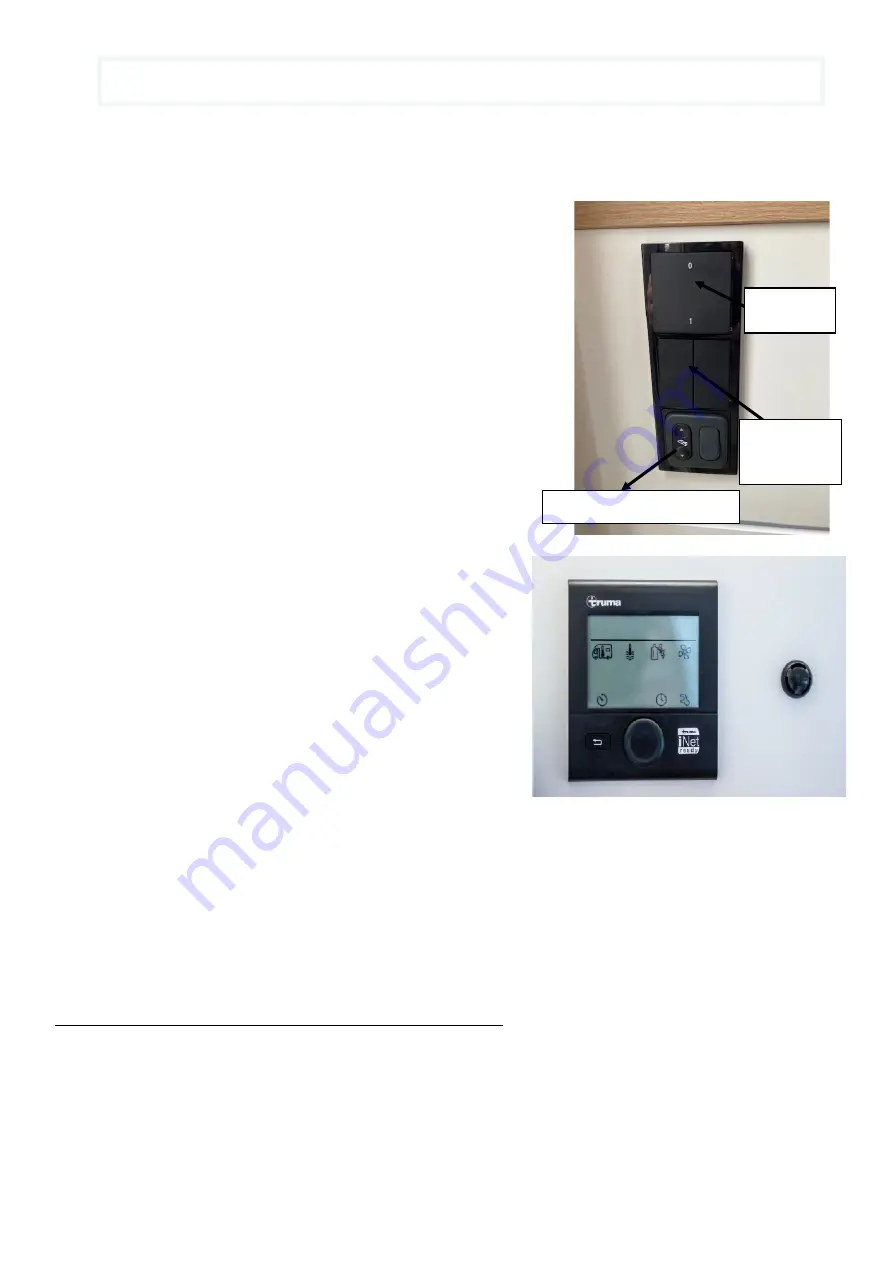
The command panel powers the Motorhome, on entering the Motorhome push the main Black switch at the
door, The panel will activate the screen has a touch screen, and you can Scroll
On entering the motorhome to Turn on the power pushing the BLACK
Switch at the side of the door
This will turn on the Main control panel on the wall.
After turning on the power to the motorhome first select the source
feeding the motorhome, this is done on the trauma panel below by
scrolling to the GAS or ELECTRIC icon and selecting gas or electric. When
the source has been selected it will be shown above the black line as a gas
bottle or an electric Flash
The Trauma controls the power source to the Motorhome, and the heating
and water temperature
Motorhome Heating will work off the 240 v Electric or the Gas (YOU DO
NOT NEED THE WATER PUMP ON FOR THE HEATING)
Decide first if you are running the heating off Gas or Electric (if in a
campsite preferably use the 240v supply)
If Gas Turn on the Gas Bottle, If Electric plug in the 240V supply
With the Gas or Electric now selected,
you can operate the Trauma
panel by pushing the main button
until the panel lights up
The first screen you will see is this
!
Scroll to the third icon (GAS Bottle or Electric) push the
button and scroll to the icon you are running the heating on.
If running on Gas scroll to the gas bottle and push the button
the gas bottle will appear above the line.
If running on Electric 240V select EL2 and push the button
the electric sign will appear above the line.
These are the only two choices you will Require
NOW
Scroll back to the motorhome icon, this controls the heating in the motorhome, push the button and the icon
flashes, turn the dial to the desired temperature, then push the button again.
The heating sign will appear above the line and will flash until the motorhome has reached the desired
temperature.
NEXT
Scroll to the next icon: this is for the water temperature, on the icon push the button the icon flashes, turn the
button you have the option of ECO, HOT and BOOST select one and push the Button the Temp icon will flash
above the line until the water has reached the temperature required.
The 4th Icon is the fan scroll to this push the button and select fan speed push the button again.
These are the only controls you will require on the Trauma Panel
Before you decide to move, turn the heating and Gas on the Trauma panel to OFF by
scrolling to the motorhome and temperature icons push the button and turn until you
see OFF and push the button then leave the system to cool down for 5 minutes before
switching off the Gas or disconnecting the 240v supply
TRAUMA HEATING AND WATER CONTROLS
Electric Step button
Power up
switch
Front and
back light
switches
Содержание P740 Evidence
Страница 1: ...Pilote P740 Evidence...
Страница 3: ...PILOTE P740 COMMAND CONTROL PANEL...
Страница 10: ...All external locks are worked by the same key Rear Garage for storage...
Страница 11: ...INTERNAL SEATING AND DINING AREA The seating Area converts into two traveling seats fitted with Seat belts...
Страница 16: ...Adjustable TV All windows are Fitted with Blinds and Fly Screens Close all other window blinds...