background image

The vehicle provides power and allows a maximum speed of 45 km/h.

02_05

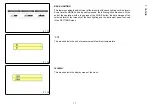
When the traction battery charge is close to 0% the reserve warning light remains
steadily. This means you need to recharge from the electricity mains.

02_06

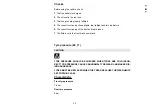
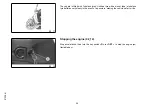
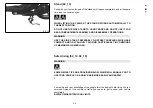
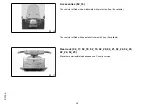
Recharge from the mains (02_06, 02_07, 02_08, 02_09, 02_10)

To recharge by mains supply it must be necessary that the key is switched «

OFF

».

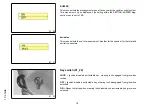
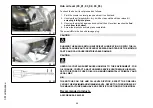
Lift the saddle and remove the cable with charging plug. Run the cable in its place
next to the hinge of the saddle and close it so that the cable activates the switch. When
you do this, the warning light will turn on. The drive is inhibited until the cable is re-
moved from the position described above.

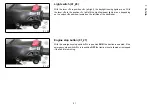
This vehicle is equipped with a «

CEI 69-6 STANDARD PLUG

», which is required for

charging from public charging stations. In order to use the home network it is neces-
sary to use the adaptor supplied with the vehicle, positioned on the right side of the
front top box or in the helmet compartment, depending on the version. The power
cable is fitted with a fused protection device.

CAUTION


DO NOT, UNDER ANY CIRCUMSTANCES, REMOVE THE COVER FROM THE
BATTERY COMPARTMENT. CONTACT AUTHORISED PIAGGIO ASSISTANCE
CENTRES ONLY.

30

2 Use

Содержание Liberty E-Mail

Страница 1: ...ation tips and precautions for using your vehicle It also describes features details and devices to assure you that you have made the right choice We believe that if you follow our suggestions you wil...

Страница 2: ...egular checks that should be carried out on the vehicle at an authorised Dealer or Service Centre The booklet also contains instructions for simple repairs Any operations not specifically described in...

Страница 3: ...ing the environment Vehicle intactness The incomplete or non observance of these regulations leads to the risk of serious damage to the vehicle and sometimes even the invalidity of the guarantee The s...

Страница 4: ...4...

Страница 5: ...entification 24 Rear top box opening 24 Bag clip 25 USE 27 Riding mode 28 Recharge from the mains 30 Checks 33 Tyre pressure 33 Stopping the engine 34 Stand 35 Safe driving 35 Accessories 38 Rear rack...

Страница 6: ...6...

Страница 7: ...Liberty e mail Chap 01 Vehicle 7...

Страница 8: ...Dashboard 01_01 01_01 A Speedometer B Digital display C Front brake lever D Warning lights E High low beam lights passing switch 8 1 Vehicle...

Страница 9: ...F Horn button G MODE button H HYTECH push button I Throttle grip L Rear brake lever M Courtesy horn button N Turn indicator switch if available O RUN STOP button P Light switch 9 1 Vehicle...

Страница 10: ...01_02 Instruments 01_02 Key A Warning lights B Speedometer C Multifunction digital display 10 1 Vehicle...

Страница 11: ...warning light red G Right turn indicator warning light green if available H RUN OFF warning light red I Reserve battery recharge warning light amber 01_04 Digital lcd display 01_04 01_05 01_06 01_07...

Страница 12: ...l or in the electronic control unit the instrument panel signals the failure by displaying the SERVICE icon and the red gen eral warning light comes on 01_07 URGENT SERVICE ALARM A serious failure is...

Страница 13: ...this condition 01_09 TEMPERATURE ALARM When the external temperature is less than or equal to 3 C 37 F the ice warning symbol appears on the LCD display 01_10 TURN INDICATOR MALFUNCTION IF AVAILABLE W...

Страница 14: ...o low Recognition rear wheel slippage or accelerated this can happen if accelerating on the centre stand 01_12 Maintenance icons 01_12 When the maintenance interval threshold is exceeded an icon with...

Страница 15: ...DE button resets all quantities of the Trip Computer active in that environment In status ODO 1 Trip 1 Time 1 Charge Consumption 1 is turned on the icon 1 on the LCD In ODO 2 Trip 2 Time 2 Charge Cons...

Страница 16: ...clock value is set The main display shows Clock adjustment When you enter this mode the minutes of the clock disappear and only the hours remain For each quick press of the MODE button the hour value...

Страница 17: ...ing icons are shown At the end of the operation with a long press of the MODE button the data storage of the selected level of the intensity of the back lighting and the instrument panel is shown in t...

Страница 18: ...miles This menu selects the unit of measurement whether for the speed or for the total and partial trip counters 01_22 Key switch 01_22 LOCK Ignition disabled extractable key steering lock engaged fro...

Страница 19: ...y and turn it to OFF CAUTION DO NOT TURN THE KEY TO LOCK OR KEY OFF WHILE RIDING 01_23 Switch direction indicators 01_23 IF AVAILABLE To set the left turn indicators flashing move lever N to the left...

Страница 20: ...01_24 Horn button 01_24 Horn button F 01_25 Light on of switch 01_25 0 High beam light 1 Low beam light 2 Passing 20 1 Vehicle...

Страница 21: ...the high low beam lights are on depending on the switch E position located on the left side of the handlebar 01_27 Engine stop button 01_27 With the emergency stop switch O in position RUN the tracti...

Страница 22: ...01_28 courtesy horn 01_28 Courtesy horn button M 01_29 Hy tech button 01_29 Press the H HY TECH button to select the riding mode 22 1 Vehicle...

Страница 23: ...vehicle is supplied with two keys one spare which serve to start the engine and unlock the saddle compartment The keys are accompanied by a tag marked with the identification code to be quoted when or...

Страница 24: ...rts We recommend that you check that the prefix and chassis number stamped on the vehicle correspond with those in the vehicle documents CAUTION BE REMINDED THAT ALTERING IDENTIFICATION REGISTRATION N...

Страница 25: ...01_35 Bag clip 01_35 To use the retractable bag hook B located at the front end of the saddle pull it forward lightly 25 1 Vehicle...

Страница 26: ...26 1 Vehicle...

Страница 27: ...Liberty e mail Chap 02 Use 27...

Страница 28: ...olling the menu looking for the desired mode the indi cation on the instrument panel is flashing when the desired mode is displayed keep the HY TECH key pressed for one second the indication stops fla...

Страница 29: ...to confirm our choice The ECO icon will now stay on with a fixed light 02_04 To facilitate small parking manoeuvres the vehicle is equipped with reverse gear To activate the reverse gear press the HY...

Страница 30: ...o that the cable activates the switch When you do this the warning light will turn on The drive is inhibited until the cable is re moved from the position described above This vehicle is equipped with...

Страница 31: ...ING OF THE TRACTION BATTERY TAKING ABOUT 7 HOURS UNTIL IT HAS RECHARGED 80 IN OR DER TO SAFEGUARD BATTERY INTEGRITY THE TEMPERATURE REFERS TO THAT OF THE ELECTRONICS INSIDE THE VEHICLE BATTERY THAT CA...

Страница 32: ...RGE and below there is the time needed to complete the charge The RANGE will indicate the autonomy available to the energy stored on board If the message SLOW CHARGE appears it indicates that the syst...

Страница 33: ...The correct functioning of the front and rear brakes 7 The fluid level in the front brake pump tank Tyre pressure 02_11 CAUTION TYRE PRESSURE SHOULD BE CHECKED WHEN TYRES ARE COLD INCOR RECT TYRE PRE...

Страница 34: ...e a tyre with an inner tube a tubeless tyre deflates very slowly in the event of a puncture making the vehicle safer to ride 02_12 Stopping the engine 02_12 Stop acceleration then turn the key switch...

Страница 35: ...ONS WARNING USE THE SIDE STAND PREFERABLY ON STREET SURFACES WHICH ARE COMPACT AND ONLY SLIGHTLY SLOPING PARTICULARLY IN CONDITIONS OF MAXIMUM ALLOWED LOAD Safe driving 02_14 02_15 WARNING SOME SIMPLE...

Страница 36: ...nd in order to avoid abrupt departures 7 If the vehicle is used on roads covered with sand mud snow mixed with salt etc clean the brake disc frequently with mild detergent in order to prevent abrasive...

Страница 37: ...HE VEHICLE AT LOADS NEAR THE MAXIMUM PERMISSIBLE VALUE KEEP YOUR HANDS ON THE HANDLE BARS AT ALL TIMES AND AVOID SUDDEN OR RISKY MANOEUVRES USE PARTICULAR CAUTION ALSO WHEN SETTING OFF FROM A STANDSTI...

Страница 38: ...th a windshield with protective flap if available The vehicle is fitted with an antitheft chain with key if available 02_17 Rear rack 02_17 02_18 02_19 02_20 02_21 02_22 02_23 02_24 02_25 Maximum perm...

Страница 39: ...02_18 02_19 02_20 Type of luggage rack and maximum permissible load depend on Country versions 39 2 Use...

Страница 40: ...02_21 02_22 02_23 Trailer stop lights and running lights connector if available 40 2 Use...

Страница 41: ...undo the 5 screws locking the bag support TOTAL LOAD CAPACITY only Italy The maximum load technically allowed is front luggage carrier 20 kg intermediate bag 5 kg rear luggage carrier 40 kg including...

Страница 42: ...42 2 Use...

Страница 43: ...Liberty e mail Chap 03 Maintenance 43...

Страница 44: ...rainage plug CAUTION RUNNING THE ENGINE WITH INSUFFICIENT LUBRICATION OR WITH THE IN ADEQUATE LUBRICANTS ACCELERATES WEAR AND TEAR OF THE MOVING PARTS AND CAN CAUSE IRRETRIEVABLE DAMAGE CAUTION USED O...

Страница 45: ...ad Also check that tyres do not show signs of splitting at the sides or irregular tread wear should this occur go to an authorised workshop or to a workshop properly equipped for refitting CAUTION TYR...

Страница 46: ...top up the level follow the steps listed below Unscrew the 2 screws B remove the reservoir cap C and pour in the required quantity of fluid the brake fluid level must be above minimum Place the handle...

Страница 47: ...entre To have access to the battery it is necessary to open the front case and remove the fixing screw of the battery tank access door as shown in the figure If the vehicle is not going to be used for...

Страница 48: ...problem that caused it to blow Do not replace the fuse with any alternative form of conductor 03_09 Front light group 03_09 03_10 03_11 03_12 To access the headlight bulbs 1 twin filament high low be...

Страница 49: ...and the rear 2 C Once this is done the handlebar cover can be removed 3 Remove the handlebar cover to access the headlight and the bulbs N B IF MISTING IS NOTICED ON THE INSIDE OF THE HEADLAMP GLASS T...

Страница 50: ...carefully in order to prevent the screwdriver from damaging the plastic parts Remove the glass and the flashing bulb To refit press it 03_15 In order to replace the front turn indicator bulbs remove t...

Страница 51: ...d replace the bulb N B IF MISTING IS NOTICED ON THE INSIDE OF THE HEADLAMP GLASS THIS DOES NOT INDICATE A FAULT AND IS ATTRIBUTABLE TO HUMIDITY AND OR TO LOW TEMPERATURES THE PHENOMENON SHOULD QUICKLY...

Страница 52: ...he bulb N B IF MISTING IS NOTICED ON THE INSIDE OF THE HEADLAMP GLASS THIS DOES NOT INDICATE A FAULT AND IS ATTRIBUTABLE TO HUMIDITY AND OR TO LOW TEMPERATURES THE PHENOMENON SHOULD QUICKLY DISAPPEAR...

Страница 53: ...aking circuit or an irregular brake operation In this case particularly considering the importance of the brakes in terms of safety it is strongly recommended that you take the vehicle to an Authorise...

Страница 54: ...E HAND BRAKE 03_25 To use this device just keep pulled the left brake lever then push it downward to engage it in the stud bolt on the rear brake lever To unlock the brake pull the lever again the rel...

Страница 55: ...placed at an Authorised Service Centre 03_27 Periods of inactivity 03_27 We recommend carrying out the following operations 1 Clean the scooter thoroughly and then cover it with a canvas 2 Be careful...

Страница 56: ...ter Then rinse with abundant water and dry with a shammy cloth For the engine exterior use petrol a brush and clean cloths Petrol can damage paintwork Remember that any polishing with silicone wax mus...

Страница 57: ...EHICLE SHOULD BE WASHED IN AN AREA EQUIPPED FOR THE COLLECTION AND PURIFICATION OF THE LIQUIDS USED WARNING NEVER WASH THE VEHICLE UNDER DIRECT SUNLIGHT ESPECIALLY IN SUM MER WHEN THE BODYWORK IS STIL...

Страница 58: ...NT BRAKING Oil on drum or disc Worn Pads Shoes Contact an Authorised Service Centre incorrect rear brake adjustment Adjust INEFFICIENT SUSPENSION Oil leak worn limit switch bumpers worn shock absorber...

Страница 59: ...STAND DOES NOT RETURN TO POSITION Presence of dirt Clean and grease 59 3 Maintenance...

Страница 60: ...60 3 Maintenance...

Страница 61: ...Liberty e mail Chap 04 Technical data 61...

Страница 62: ...04_01 62 4 Technical data...

Страница 63: ...Wheelbase 1370 mm Height 1120 mm Chassis Tubular steel frame Front suspension Telescopic mechanical fork 76mm travel Rear suspension Dual chamber hydraulic shock absorber 73 5 mm travel Front brake D...

Страница 64: ...pressure 2 bar Weight 143 6 kg CAPACITY Rear hub oil Quantity 250 cc 04_02 Toolkit 04_02 Wrenches one TORX T30 wrench one TORX T25 wrench one twin screwdriver one shock absorber wrench one extractor f...

Страница 65: ...Liberty e mail Chap 05 Spare parts and accessories 65...

Страница 66: ...SPARE PARTS CAUSES YOUR WARRANTY RIGHTS TO EXPIRE WARNING PIAGGIO MARKETS ITS OWN LINE OF ACCESSORIES THAT ARE RECOG NISED AND GUARANTEED FOR USE IT IS THEREFORE ESSENTIAL TO CON TACT AN AUTHORISED D...

Страница 67: ...Liberty e mail Chap 06 Scheduled maintenance 67...

Страница 68: ...I I I Brake control levers greasing L L L L L L Brake fluid level I I I I I I I I I I I Headlight direction adjustment I I I I I I I I I I I Brake pads I I I I I I I I I I I Tyre pressure and wear I I...

Страница 69: ...lent springy calcium spray grease R I D A D R 2 10 b 2 R I Na 2 42 I A T A 2 I M D G class 2 UN 1950 Pag 9022 EM 25 89 eni i Ride PG 5W 40 Synthetic based lubricant for high performance four stroke en...

Страница 70: ...70 6 Scheduled maintenance...

Страница 71: ...Horn 20 22 Hub oil 44 Hy Tech 22 I Identification 24 K Key switch 18 Keys 23 L Light switch 21 M Maintenance 14 43 67 Mirrors 53 P Puncture 55 R Riding 28 S Saddle 23 Scheduled maintenance 67 Stand 35...

Страница 72: ...changes to components parts or accessories which it considers necessary to improve the product or which are required for manufacturing or construction reasons Not all versions models shown in this pub...

Отзывы: