


- 4 -
G3 Units
G3 units have bendable tabs. These tabs are then screwed into the picture frame. You should
remove the screws.
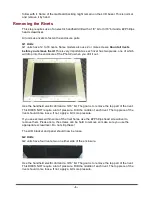
You should now remove the picture frame.
Removing the Matboard
For the best results and reuse of your matboard, we recommend using a plastic putty knife.
The matboard is held in place with a high-tack, double-sided tape that is specific to the picture
framing industry. While you can try to peel back the matboard, there is a good chance you will
damage it.
G1/G2 Units
G1 and G2 units have the matboard mounted to an enclosure part. In all cases, the matboard
must be removed to access the internal unit.
G3 Units
G3 units have the matboard mounted to a removable faceplate. In most cases, the faceplate
can be removed, leaving the matboard intact. Please see the section on
Removing the
Faceplate
.
Position the PhotoVu face up. Start at a corner of the matboard. Insert the putty knife between
the matboard and enclosure. Work your way around the matboard and slowly pry it up. You
are trying to release the matboard from the adhesive tape on the enclosure. It might take
several rounds. You can also use the putty knife in a sliding motion to assist in the process.
Once the matboard has been released, it is common to find some of the matboard backing on
the enclosure. You can remove this by hand.
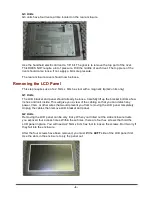
Removing the Faceplate
This step requires use of a #1 Phillips head screwdriver.
G3 Units Only
This step only applies to G3 units
. Turn the PhotoVu face down. You will see 8 screws, 2 on
each side, which hold the faceplate in place. Use the screwdriver and remove all screws.
Remove the rear enclosure from the faceplate.
If the faceplate still appears to be attached to the enclosure, you will need to turn the unit over.
Do this by holding both the faceplate and the rear enclosure at the same time then flip the
entire assembly. This step can be tricky but it is necessary.
The problem is that the matboard is partially glued to the bezel of the LCD panel. With the
LCD facing you, work from one corner and gently pry up the faceplate. The matboard should


