background image

7

8

1. Go to www.photocentric3d.com and download 

Creation Workshop for Liquid Crystal Pro which 
can be found on the “Software” page. The latest 
version is always online. 

2. Make sure the display port, USB and Power 

cables are plugged into the printer and then 
turn on the power using the rocker switch at the 
back. Turn on the screen using the switch at the 
front of the printer.

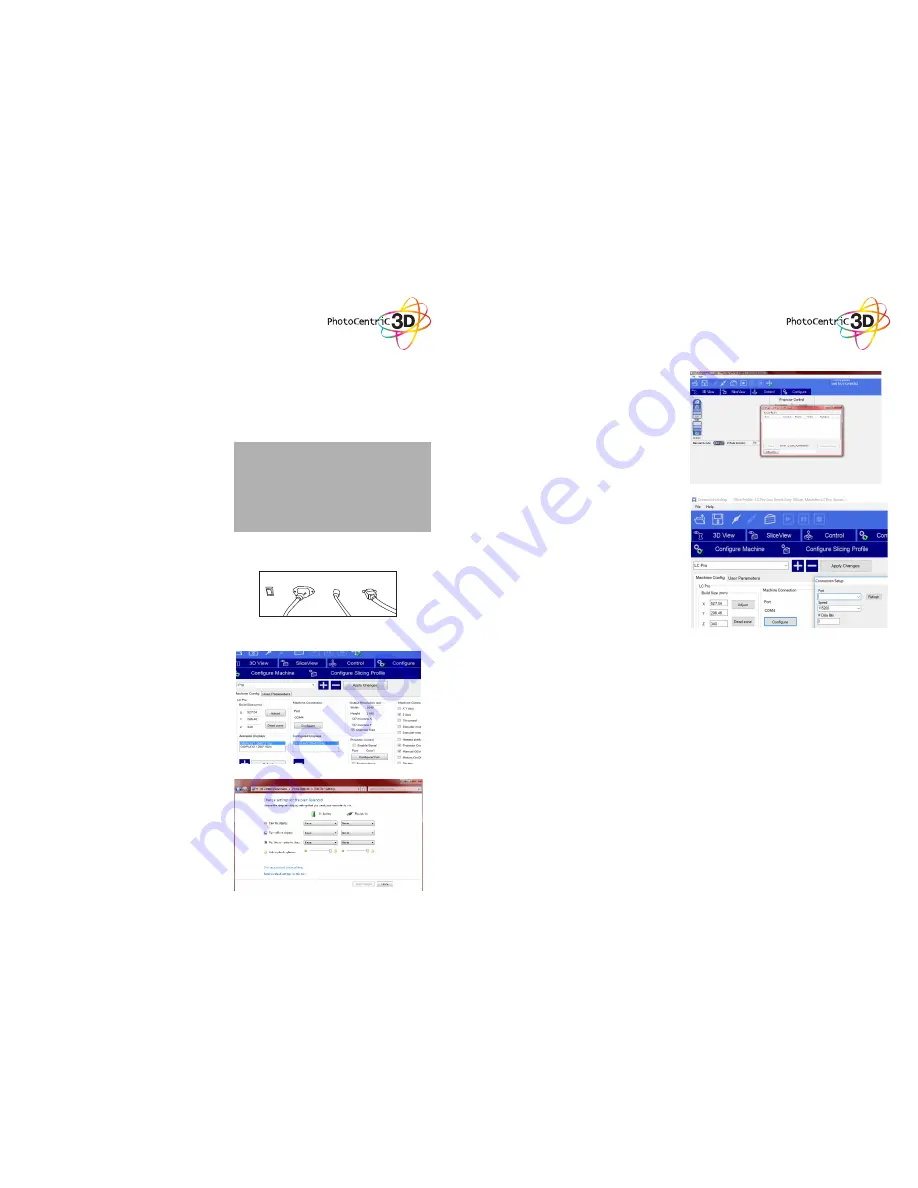
3. Go to your computer desktop, right click and 

open “Screen resolution”. Set your screens to 
“Multiple Displays” and “Extend this display 
mode”, keeping your computer monitor as the 
main screen. Make sure that the printer’s screen 
is set to a resolution of 3840 x 2160. There are 
videos online if you need further help. 

4. Configure your computer so that the screen-

saver does not come on and ensure that it does 
not have the power-saving mode enabled. If you 
forget to do this your computer may shut down 
mid process and the printer will switch off.

1.1. SOFTWARE
INSTALATION

MINIMUM COMPUTER 

REQUIREMENTS

•  Dual Core processor or above 
•  Windows
•  Software NOT compatible with MAC and 

Linux

•  2 GB RAM memory or above

6. Execute the Creation Workshop software by 

double clicking on “CreationWorkshop.exe”. If 
the software requires a license number insert 
the license number supplied on the back of the 
printer.

7. In Creation Workshop, click on “Configure”, and 

then open the subfolder “Configure Machine”. In 
the configuration folder connect the printer to the 
computer by clicking on the button “Configure” 
in the Machine Connection section. Select the 
port you have connected the USB to and set the 
speed to 115200 and data bits to 8. Press “OK” 
and finally press “Apply Changes”. Now click 
[CONNECT ICON] to connect your computer 
and the Liquid Crystal.

8. If you are experiencing difficulties to start or 

connect your printer, go to our website www.
photocentric3d.com, and visit “Support”. You 
will find videos that will run you through the 
issues you may find due to specific computer 
settings. Should you still find difficulties, please 
contact your national supplier or contact us at 
[email protected].

Содержание LC Pro

Страница 1: ...K info photocentric3d com www photocentric3d com UK USA DISPOSAL INSTRUCTIONS Do not throw this electronic device into the waste when dis carding To minimize pollution and ensure utmost protection of...

Страница 2: ...ons 1 1 Software Installation 1 2 Connecting the printer 2 Slicing your print 3 Setting up a print 4 Removing the finished print cleaning post exposing 5 Emptying and cleaning the vat 6 Detailed Creat...

Страница 3: ...DPP techno logy i Low cost We use high resolution low cost LCD screens that are widely available in monitors tablets mobile phones and televisions These provide phenomenal value for money which we pa...

Страница 4: ...torage or when not used for a long period of time This 3D printer is connected to the elec trical network with an input of 110 or 240 V AC 50 60 Hz Do not allow anything to rest on the power cord Do n...

Страница 5: ...is heavy approx 65kg so two people are needed to lift it from the pallet and into position 2 Open the door and loosen the two bolts that secure the print plate assembly to the drive carriage 3 Remove...

Страница 6: ...ARE INSTALATION MINIMUM COMPUTER REQUIREMENTS Dual Core processor or above Windows Software NOT compatible with MAC and Linux 2 GB RAM memory or above 6 Execute the Creation Workshop software by doubl...

Страница 7: ...ssfully contact Photocentric for further support 2 SLICING YOUR PRINT 1 Set up the machine profile in Creation Workshop as shown below Remember to press Apply Changes 2 Set up the slicing profile in C...

Страница 8: ...position If the print plate started in a very high position it may stop before reaching home If so press the Home button again Press down evenly on the print plate with one hand and tighten the hex h...

Страница 9: ...r Repeat as necessary Make sure the water and soap reach all sides of the part Use a sponge or soft brush to clean detailed parts of the print 5 To make the print easier to remove from the platform it...

Страница 10: ...ially if there is a large volume of resin remaining Pour the resin gently into the funnel from one corner of the vat Pour at a steady rate and be careful not to over fill the funnel Resin will flow ov...

Страница 11: ...the button is greyed out this means that the printer is connected 18 1 Loading a Model The Scene View allows you to manipulate various aspects of the scene Selecting You can select a model by double c...

Страница 12: ...mend checking no supports pass through your object If they do you can delete them and manually add others if needed Adding a single Support A single support can be generated by clicking the manual sup...

Страница 13: ...odel for later use Simply click on the File Save Scene STL menu item to save the scene model This will flatten all models in a scene into a single STL file Scenes can also be saved to CWS files These...

Отзывы: