


9
MU1002X
the EFX send output, which can be used in conjunction
with external effect processors, or simply as an auxiliary
output for any means required.
20. Pan / Balance Controls
This alternates the degree or level of audio that the left
and right side of the main mix should receive. On mono
channels, this control will adjust the level that the left
and right should receive (pan), where as on a stereo
channel, adjusting the BAL control will attenuate the left
or right audio signals accordingly (balance).
21. Peak Indicator
This LED indicator will illuminate when the device hits
high peaks, slightly before overload occurs. It is best to
adjust the gain of the channel so that the peak indicator
does not light up. The peak indicator can be found on
both channels 1 and 2.
22. Level Control
This control will alter the signal level that is sent from the
corresponding channel to the main mixing bus. There
are 6 channel level controls in total; one on each channel
strip.
23. +4 / -10 Switch
This switch is used adjust the input sensitivity of the
corresponding channels, which will adapt the MU 1002X
to external devices which may use different operating
levels. If the input source is -10dBV (like most consumer-
level devices), it is best to engage the switch, allowing
the signal to be heard. However, if you are unsure of the
source’s operating level, we suggest leaving the switch
disengaged until you test the source’s signal. You can
then engage if necessary (if the level of input is obviously
too low).
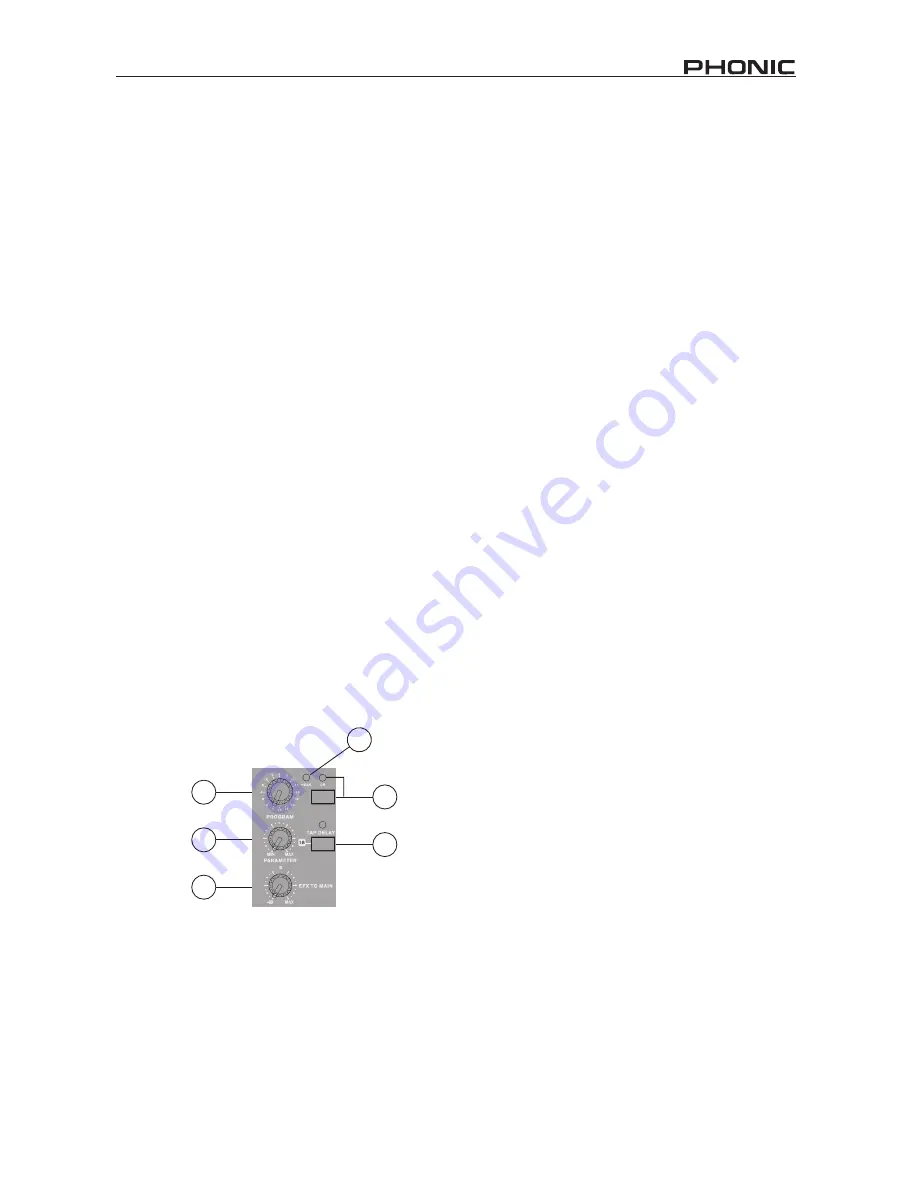
Effect Processor
24. Effects On Button and Indicator
Pushing this button will turn the built-in effect processor
on and off. When the effect processor is activated, the
corresponding LED will light up to indicate so.
25. Peak Indicator
This LED indicator will illuminate when the EFX signal
hits high peaks, just before overload occurs. It is best to
adjust the EFX to Main control so as to ensure the Peak
indicator does not light up.
26. Program Control
This control will allow users to select one of the 16 built-
in digital effects of the MU1002X. The effect names that
correspond with the numbers can be found on the top of
the MU1002X mixer’s face, or in the digital effect table.
27. Parameter Control
Turning this control will adjust the main parameter of
the selected effect; whether it is delay time, reverb time,
etc. Each effect’s parameter can be found on the digital
effect table.
28. Tap Delay Button and Indicator
When the tap delay effect – effect number 16 – is chosen,
pushing this button will allow you to select the tap delay
time. Push the button twice to set the tap delay time -
the time between the two pushes will be used. Pushing
26
27
29
28
24
25


