6
Installation instructions
Dynamic SoundField
V4.00/20
11-09/visu’l/© Phonak AG/All rights reserved/page 6/7
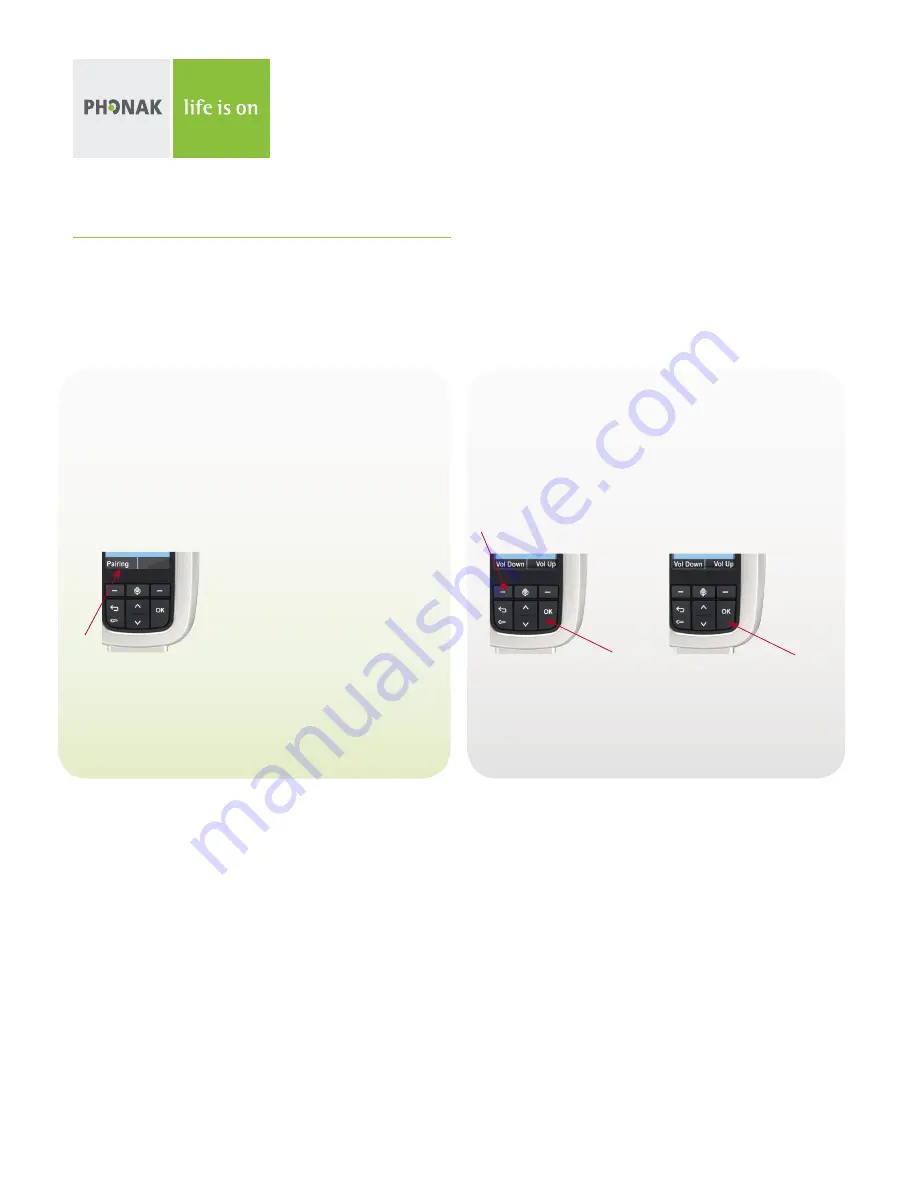
inspiro version 2.2 and 2.3 pairing with DigiMaster
When the battery symbol appears, press OK button and LEFT
SOFTKEY (C) simultaneously as shown below, then press OK (D).
a)
select “Soundfield” to access the pairing menu.
b)
Select “Pairing”.
inspiro
will now guide you through the
pairing process. Follow the instructions provided.
C
D
Note:
The key combination (C and D) should be pressed within 15 seconds
of the battery symbol appearing. After this time interval, the
inspiro
device needs to be switched off/on before repeating the key
combination (C and D) or.
1) Take inspiro and make sure it is charged (see the Dynamic SoundField User Guide). Switch on inspiro.
2)
Use pairing procedure according to inspiro software version:
inspiro version 3.0 and later pairing with DigiMaster
When the battery symbol appears, press ‘pairing’ soft key button.
inspiro
will guide you through the pairing process. Please follow
the instructions provided.
How to find the inspiro software version?
Select “Help” and “About inspiro”
3)
When you see three dots on the
inspiro
LCD, hold
inspiro
close to the loudspeaker (nearer than 1 meter/3 feet)
and switch on the DigiMaster.
4) DigiMaster 5000 loudspeaker
After a short time,
inspiro
will inform you that the loudspeaker has been paired. The LED color of the DigiMaster will display
a constant blue light. This blue light shows that the Dynamic SoundField system is ready for operation. Dynamic SoundField’s
installation is complete.
5) DigiMaster 7000 loudspeaker
After a short time
inspiro
will inform you that the loudspeaker has been paired and asked
“Do you want to pair a second Dynamic SoundField?”
1) If NO, the LED color of the DigiMaster will now display a constant blue light. This blue light shows that the
Dynamic SoundField system is ready for operation. Dynamic SoundField’s installation is complete.
2) If YES, repeat the previous step for the second loudspeaker (DigiMaster 7000).
3) After succesfully pairing, the LED color of the second DigiMaster loudspeaker will display a constant blue light.
The Dynamic SoundField system is ready for operation. Dynamic SoundField’s installation is complete.
3. Pairing DigiMaster with inspiro


