


CONNECTING YOUR Q3
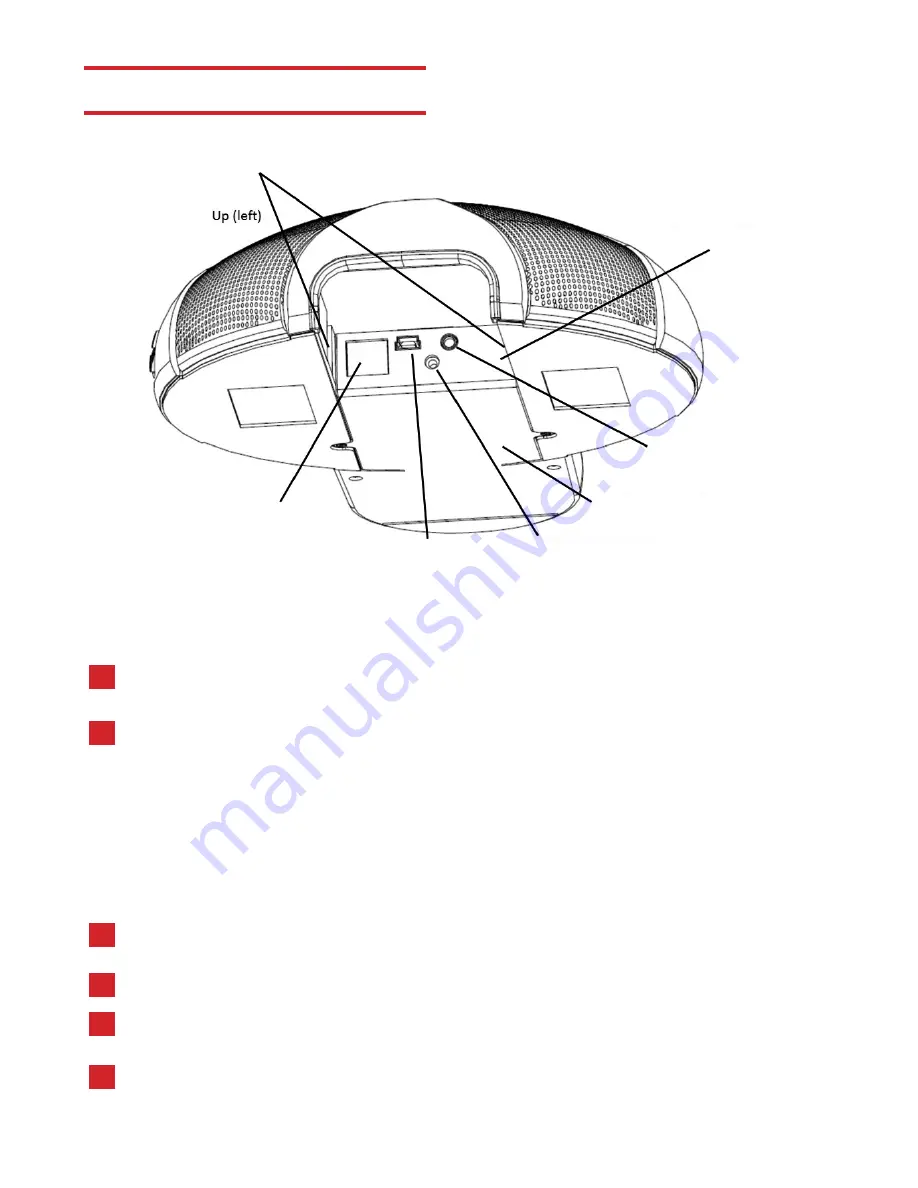
Daisy Chain Connectors
Down (right)
Ethernet Connector
Connector Panel
Interface Module/Dialer
DC Power Connector
Mini USB
3.5mm External
Speaker/Microphone
CONNECT TO AN IP/SIP LINE:
For any session using an IP telephone provider (IP/SIP).
Using the Ethernet cable provided, plug one end of the cable into the Q3 Ethernet
connector (located on the connector panel below the unit)
Plug the other end of the cable directly into your Ethernet wall socket
Make sure that the Q3 is either plugged into a power source or that your home or
offices are equipped with Power Over Ethernet (POE)
It is important that your Quattro3 is registered with an IP service provider (See
Administrative User Manual)
1
2
3
4
1
2
CONNECT TO A COMPUTER:
This connection is for any session using your computer, such as Voice Over IP
applications (Skype, Vidyo, etc.).
Using the USB cable provided, plug the mini USB side of the cable into
the Q3 (located on the connector panel below the unit)
Plug the USB end of the cable into any USB port on your computer,
your Quattro3 is ready to use
No additional drivers or steps are needed. However we do recommend downloading and
using our “Phoenix Audio Setup Utility” for optimal audio control and performance. This
utility can be found on our website:
www.phnxaudio.com


