10/ 2008
TESTFOX CC–1
14
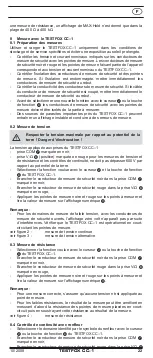
- Contact the black safety measuring wire with the COM-socket
(black).
- Contact the red safety measuring wire with the V-
socket
(red).
- Bring the black and red measuring tips into contact with the measurement
points. Read the measurement value on the digital display
.
Note:
- In small voltage measuring ranges, the zero-volt indication does not appear
(due to interference) when the safety measuring wires are open. Make sure
that the TESTFOX CC–1 is fully functional by short-circuiting the measuring
tips.
See fig. 2:
DC-voltage measurement
See fig. 3:
AC-voltage measurement
8.3 Resistance measurement
- Select the desired function with the sliding switch
and the function button
of the TESTFOX CC–1.
- Contact the black safety measuring wire with the COM-socket
(black).
- Contact the red safety measuring wire with the V-
socket
(red).
- Bring the black and red measuring tips into contact with the measurement
points. Read the measurement value on the digital display
.
Note:
- To obtain a correct measurement, ensure that no voltage is applied to the
measuring point.
- With small resistances, the measuring result can be improved by measuring
the resistance of the safety measuring wires beforehand by short-circuiting
the measuring tips and subtracting the reading obtained from the resistance
measured.
See fig. 4:
Resistance measurement
8.4 Continuity testing with buzzer
- Select the area marked with the buzzer symbol with the sliding switch
and the function button
of the TESTFOX CC–1.
- Contact the black safety measuring wire with the COM-socket
(black).
- Contact the red safety measuring wire with the V-
socket
(red).
- Bring the black and red measuring tips into contact with the measurement
points. If the resistance between the measurement points is less than 50
,
the buzzer incorporated in the TESTFOX CC–1 sounds.
See fig. 5:
Continuity testing with buzzer
8.5 Current measurement
8.5.1 Preparation for measurement
Store and use the TESTFOX CC–1 only under the correct temperature
conditions stated. Always avoid long exposure to sunlight.
- Strong sources of interference close to the TESTFOX CC–1 may produce
unstable readings and measurement errors.
Do not apply voltage to the output contacts of the TESTFOX CC–1.
If necessary, remove the safety measuring wires connected.
When measuring DC current, observe correct polarity.
8.5.2 Current measurement
- Select the desired measuring function with the sliding switch
and the
function button
.
- Press the “ZERO” button to set the TESTFOX CC–1 to the starting point.
- Operate the opening lever
. Grip the single wire containing the current to
be measured with the prongs of the TESTFOX CC–1.
- Read the value in the digital display
.
See fig. 6:
AC/ DC current measurement
9. Maintenance
Before opening the TESTFOX CC–1, ensure that it is not
connected to a source of voltage! Electrical hazard!
Any work required on the TESTFOX CC–1 when it is under voltage must be
done only by a qualified electrician. Special steps must be taken to prevent
accidents.
Before opening the TESTFOX CC–1, remove it from all sources of voltage as
follows:
- Remove first the black and the red measuring tip from the measurement object.
- Then remove the black and red safety measuring wires from the


