


AXC 1050 (XC)
54
PHOENIX CONTACT
8482_en_03
Establishing a connection
•
Connect the controller with your PC via an Ethernet cable.
Activating BootP
•
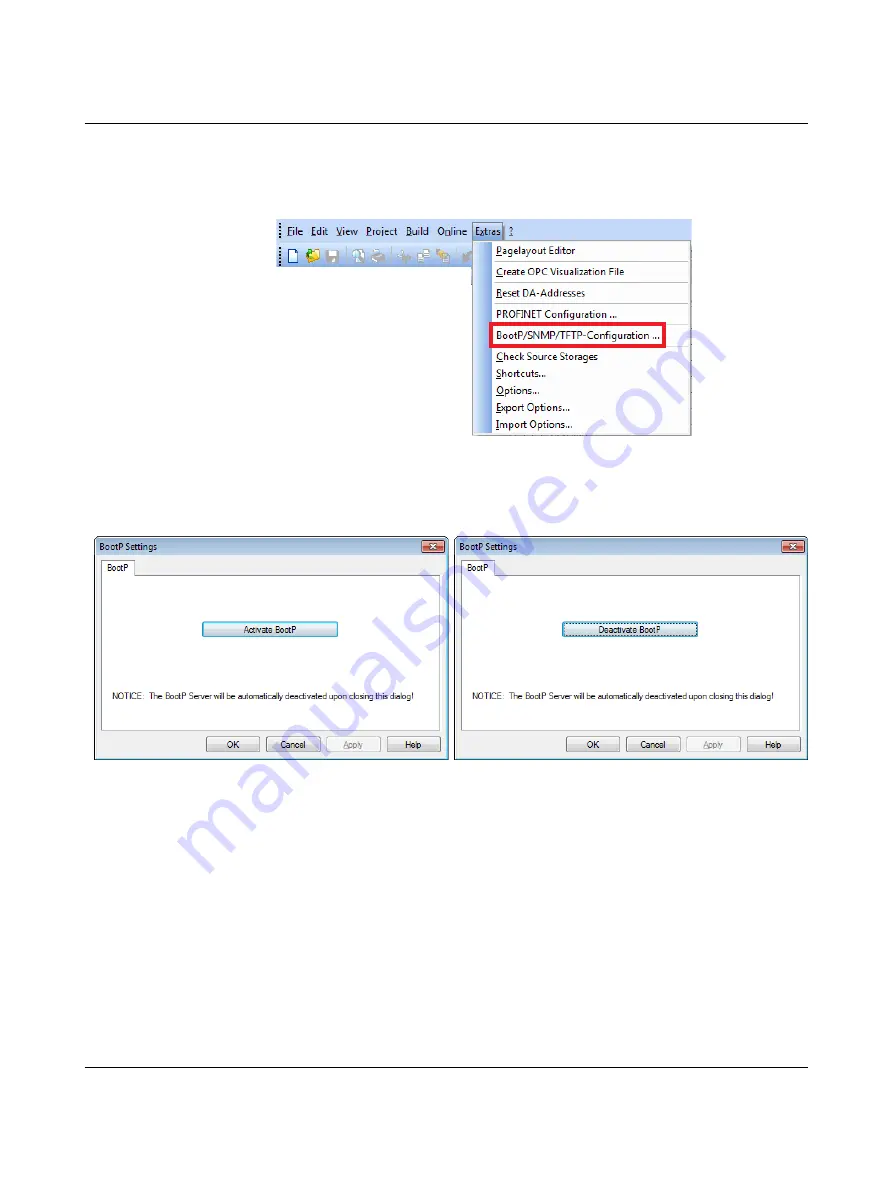
In the PC Worx (Express) menu bar, select the
"Extras, BootP/SNMP/TFTP-Configuration..." menu.
Figure 6-7
"Extras, BootP/SNMP/TFTP-Configuration..." menu
•
Click on the "Activate BootP" button (A in Figure 6-8).
Figure 6-8
"Activate BootP" (A) and "Deactivate BootP" (B) buttons
Applying IP settings after
a cold restart
•
Perform a cold restart for the controller. To do this, switch the supply voltage off and
then on again after about two seconds.
Applying IP settings with-
out a cold restart
If you have activated the function that immediately applies the IP address (see Section 7.2),
then it is not necessary to perform a cold restart (voltage reset) of the controller. This func-
tion is deactivated by default.
The controller is assigned the IP address that you entered in the "Device Details" window of
the "IP Settings" tab (see Figure 6-6). The following message appears in the message win-
dow in the "Bus Configurator" tab:
A
B