


Startup
8482_en_03
PHOENIX CONTACT
53
PC/network adapter
To determine whether your network permits the IP settings used, you must proceed as fol-
lows:
–
In the Windows
®
Control Panel, check the settings for your PC network adapter.
–
If necessary, adjust these settings so that the AXC 1050 can be accessed in your net-
work via the IP address used.
•
If your network does not permit the use of the IP address used, adjust the settings in the
project information accordingly (see Figure 6-2 on page 48).
Activating BootP
BootP is active by default on the controller.
If you have already assigned the IP address via DCP or manually and want to change the IP
address again via BootP, you first have to activate BootP. To do this, proceed as follows:
•
Open the Bus Configuration Workspace.
•
Select the controller in the “Bus Structure” window (in the example: "AXC 1050").
•
In the "Device Details" window, switch to the "Extended Settings" tab.
•
Select "Usage of a BootP Server" in the network settings.
•
Click on the "Send" button to send the setting to the controller.
•
In the "Settings Communication Path" dialog box, confirm the suggested IP address or
the one you have set according to your application with "OK".
•
Successful execution of the service is displayed in the status window.
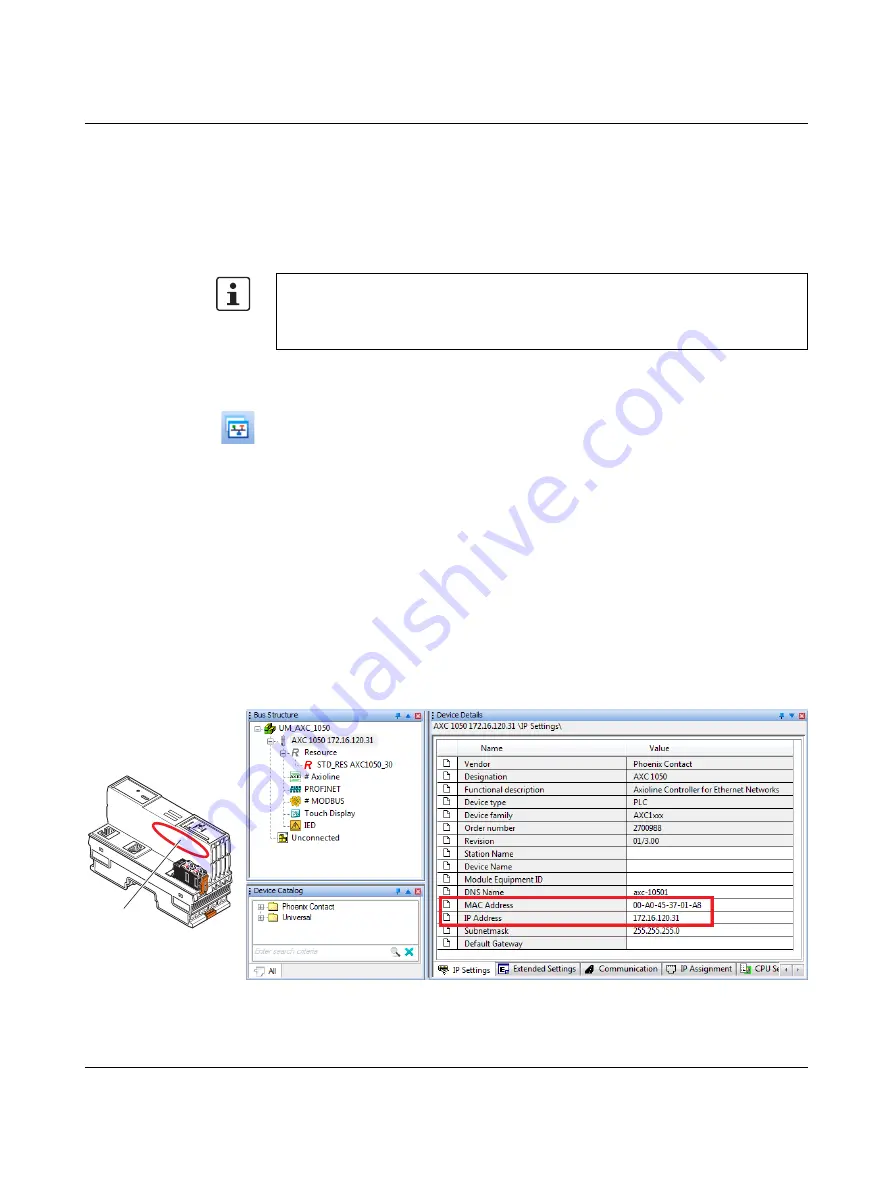
Entering the MAC and IP
addresses
Proceed as follows to enter the MAC and IP addresses:
•
In the "Device Details" window, select the "IP Settings" tab.
•
Enter the MAC address of the controller (see Figure 6-6). It is imprinted on the device
(see item 1 in Figure 6-6). It starts with "00.A0.45.".
•
Enter the IP address to be assigned to the controller.
•
Enter the subnet mask.
Figure 6-6
Entering IP address settings
If any modifications are made to the project information that affect the IP settings for the
controller, these are indicated in a warning (see Figure 6-2 on page 48). However, the
modification is not applied automatically. When a new project is created, the default set-
tings are specified in the "IP Settings" tab (see Figure 6-6).
8482B013
1